Custom weapons
Contents
Contents:This tutorial will show you how to import/port custom weapon models to MGSV:TPP.
Tools Needed:
3ds Max
Fmdl Studio
Photoshop (or any other image editing software)
File Proliferator
Fcnp Tool
Fv2 Tool
Skills Needed:
Basic 3ds Max knowledge
Basic MGSV modding knowledge
Getting Your Model Ready in 3ds Max
Import the gun you want to port into 3ds max. and use fmdl studio to
export the gun model you want to replace as an .fbx.
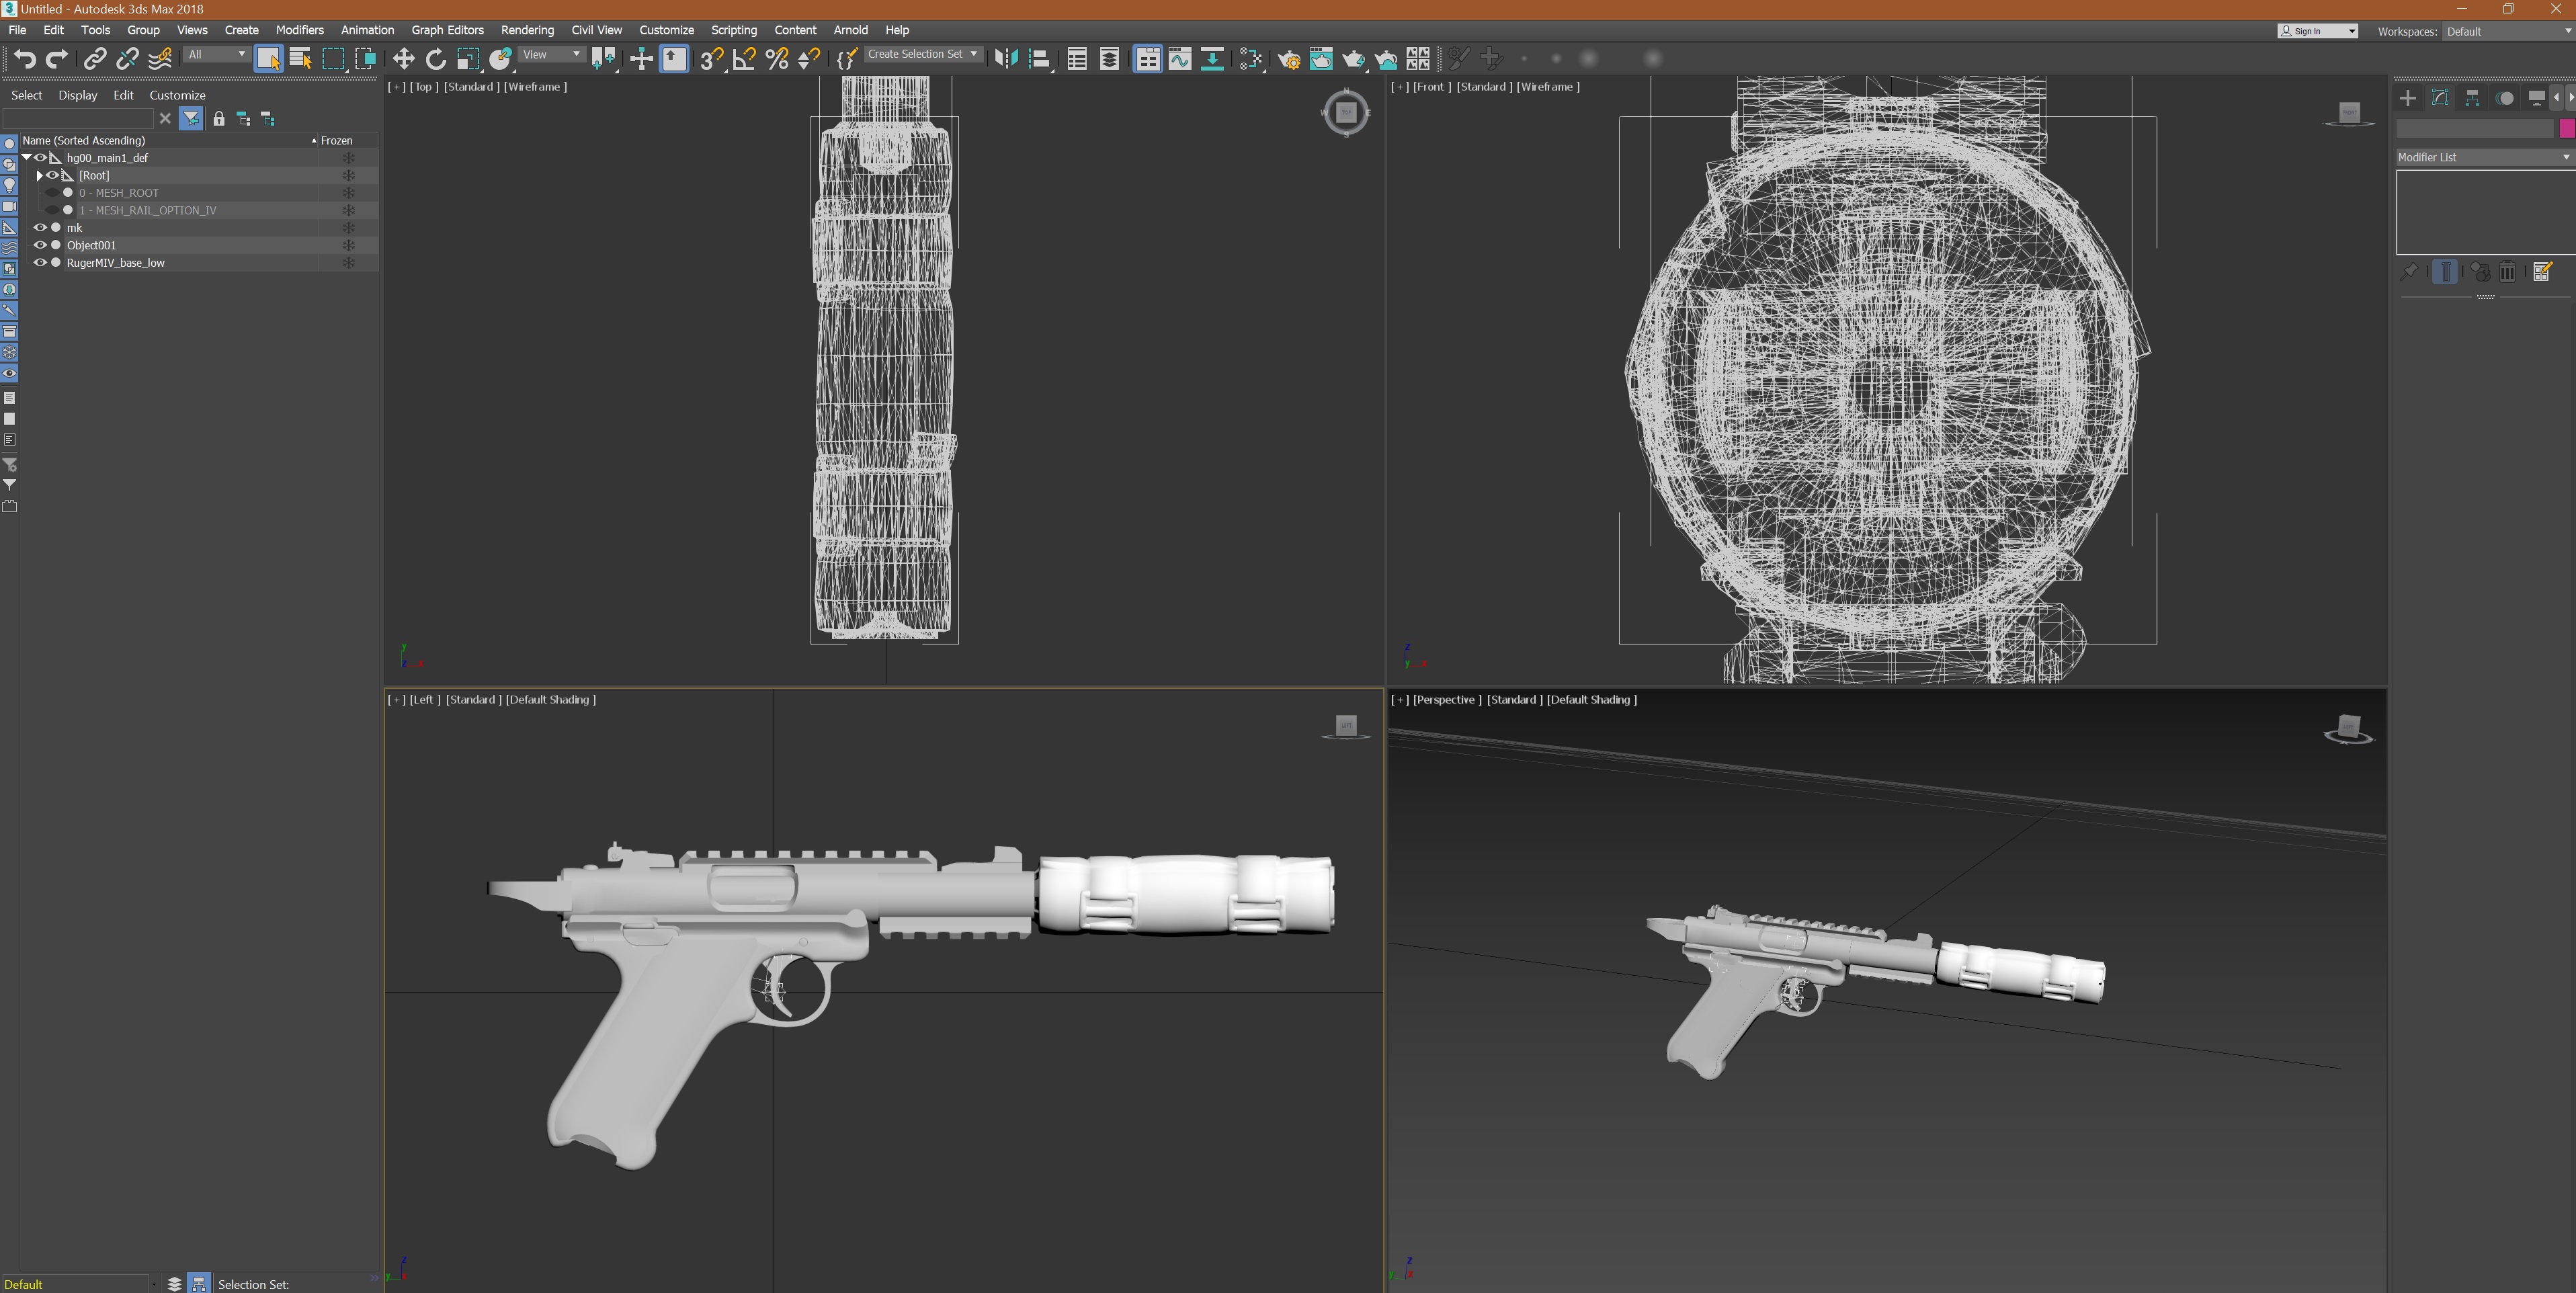 If you have your gun
model ready, import the fbx file of the original weapon and start
scaling your custom weapon so it fits the original one.
If you have your gun
model ready, import the fbx file of the original weapon and start
scaling your custom weapon so it fits the original one.
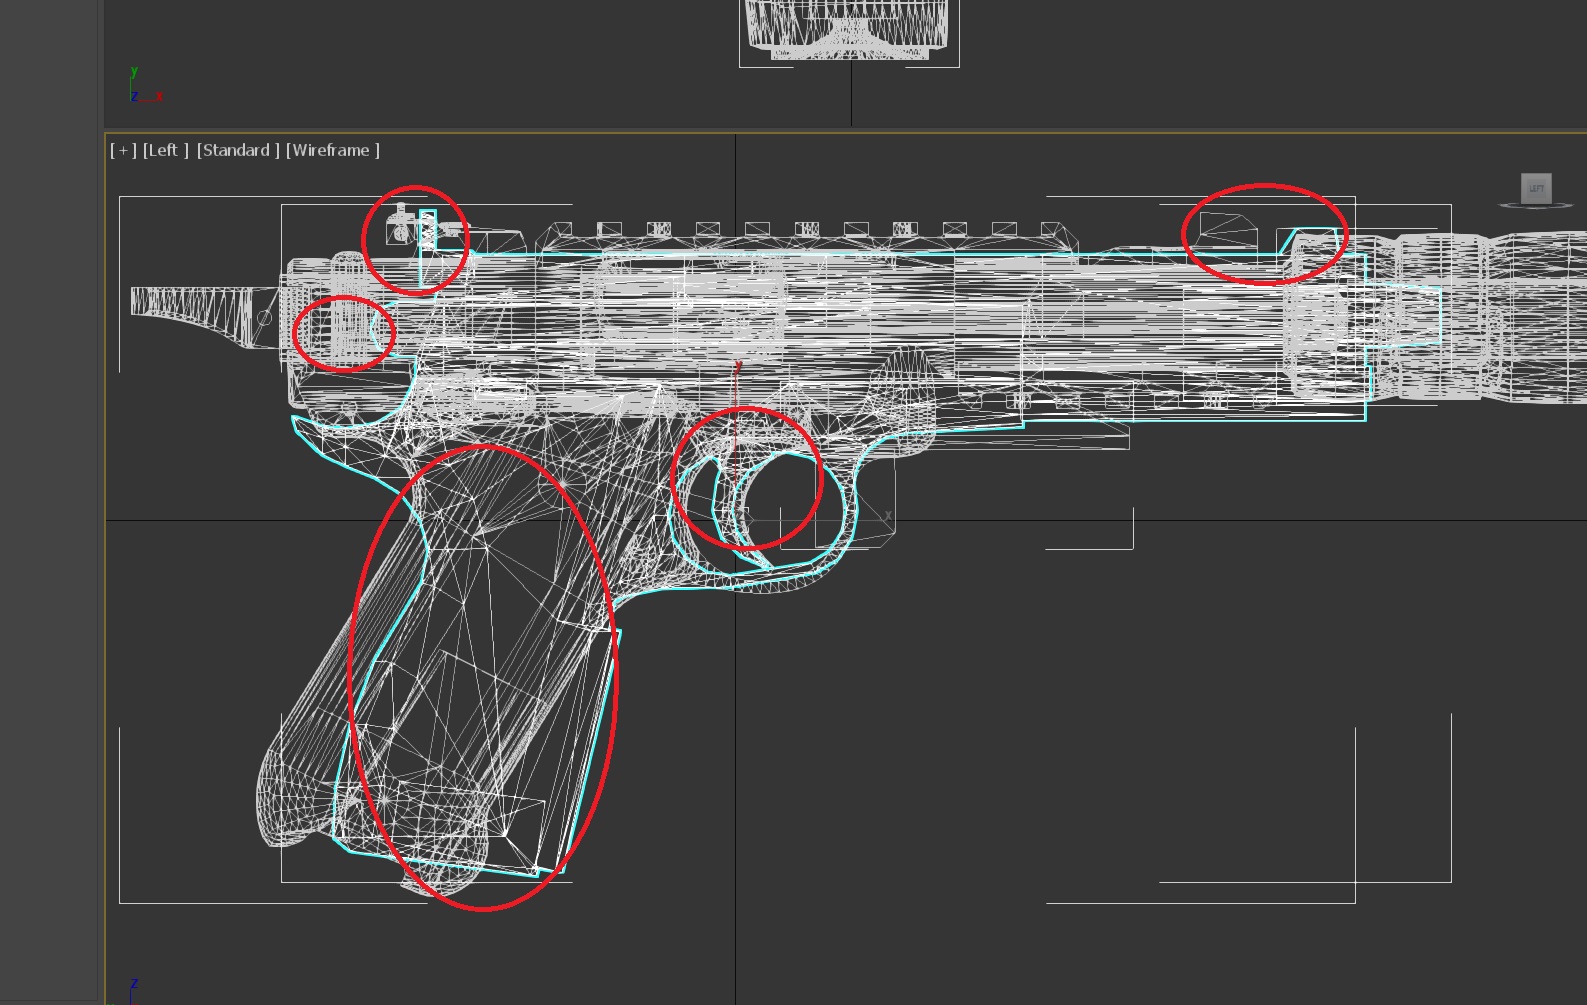 Try to keep the area’s
circled in red to somewhat match the vanilla gun, if it’s not possible
no worries as this can be edited.
Try to keep the area’s
circled in red to somewhat match the vanilla gun, if it’s not possible
no worries as this can be edited.
Now we are gonna rig the gun so moving parts actually move in-game.
Make sure no vertices on your custom model are selected and next select
all vertices on the vanilla weapon.
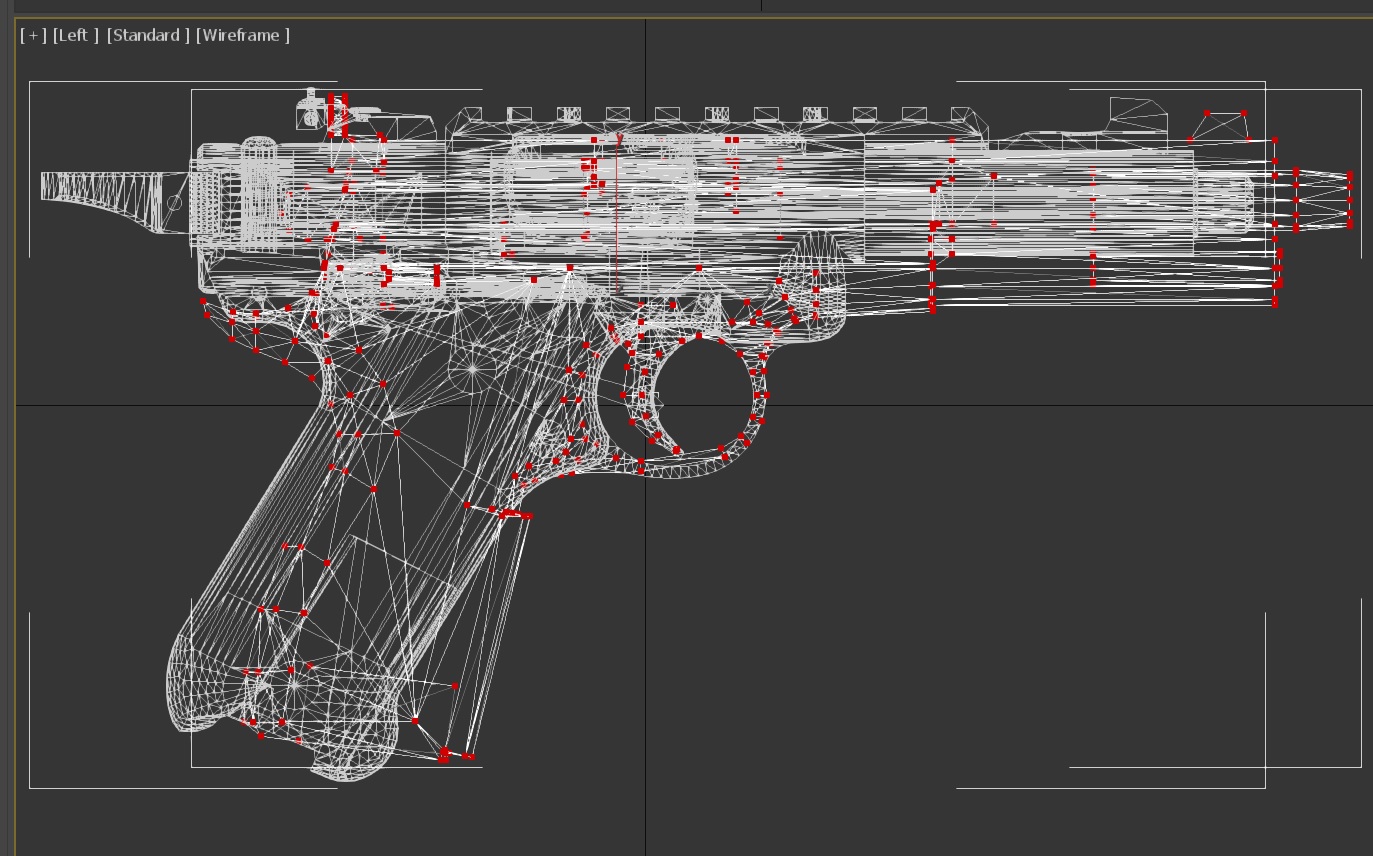 Now attach the vanilla
weapon to the custom one and delete the selected vertices.
Now attach the vanilla
weapon to the custom one and delete the selected vertices.
The old weapon will be deleted now and the new one is rigged, however we still need to edit the skin weights.
Select your model and click on the skin modifier, click on edit
envelopes and also the checkbox ‘‘vertices’’.
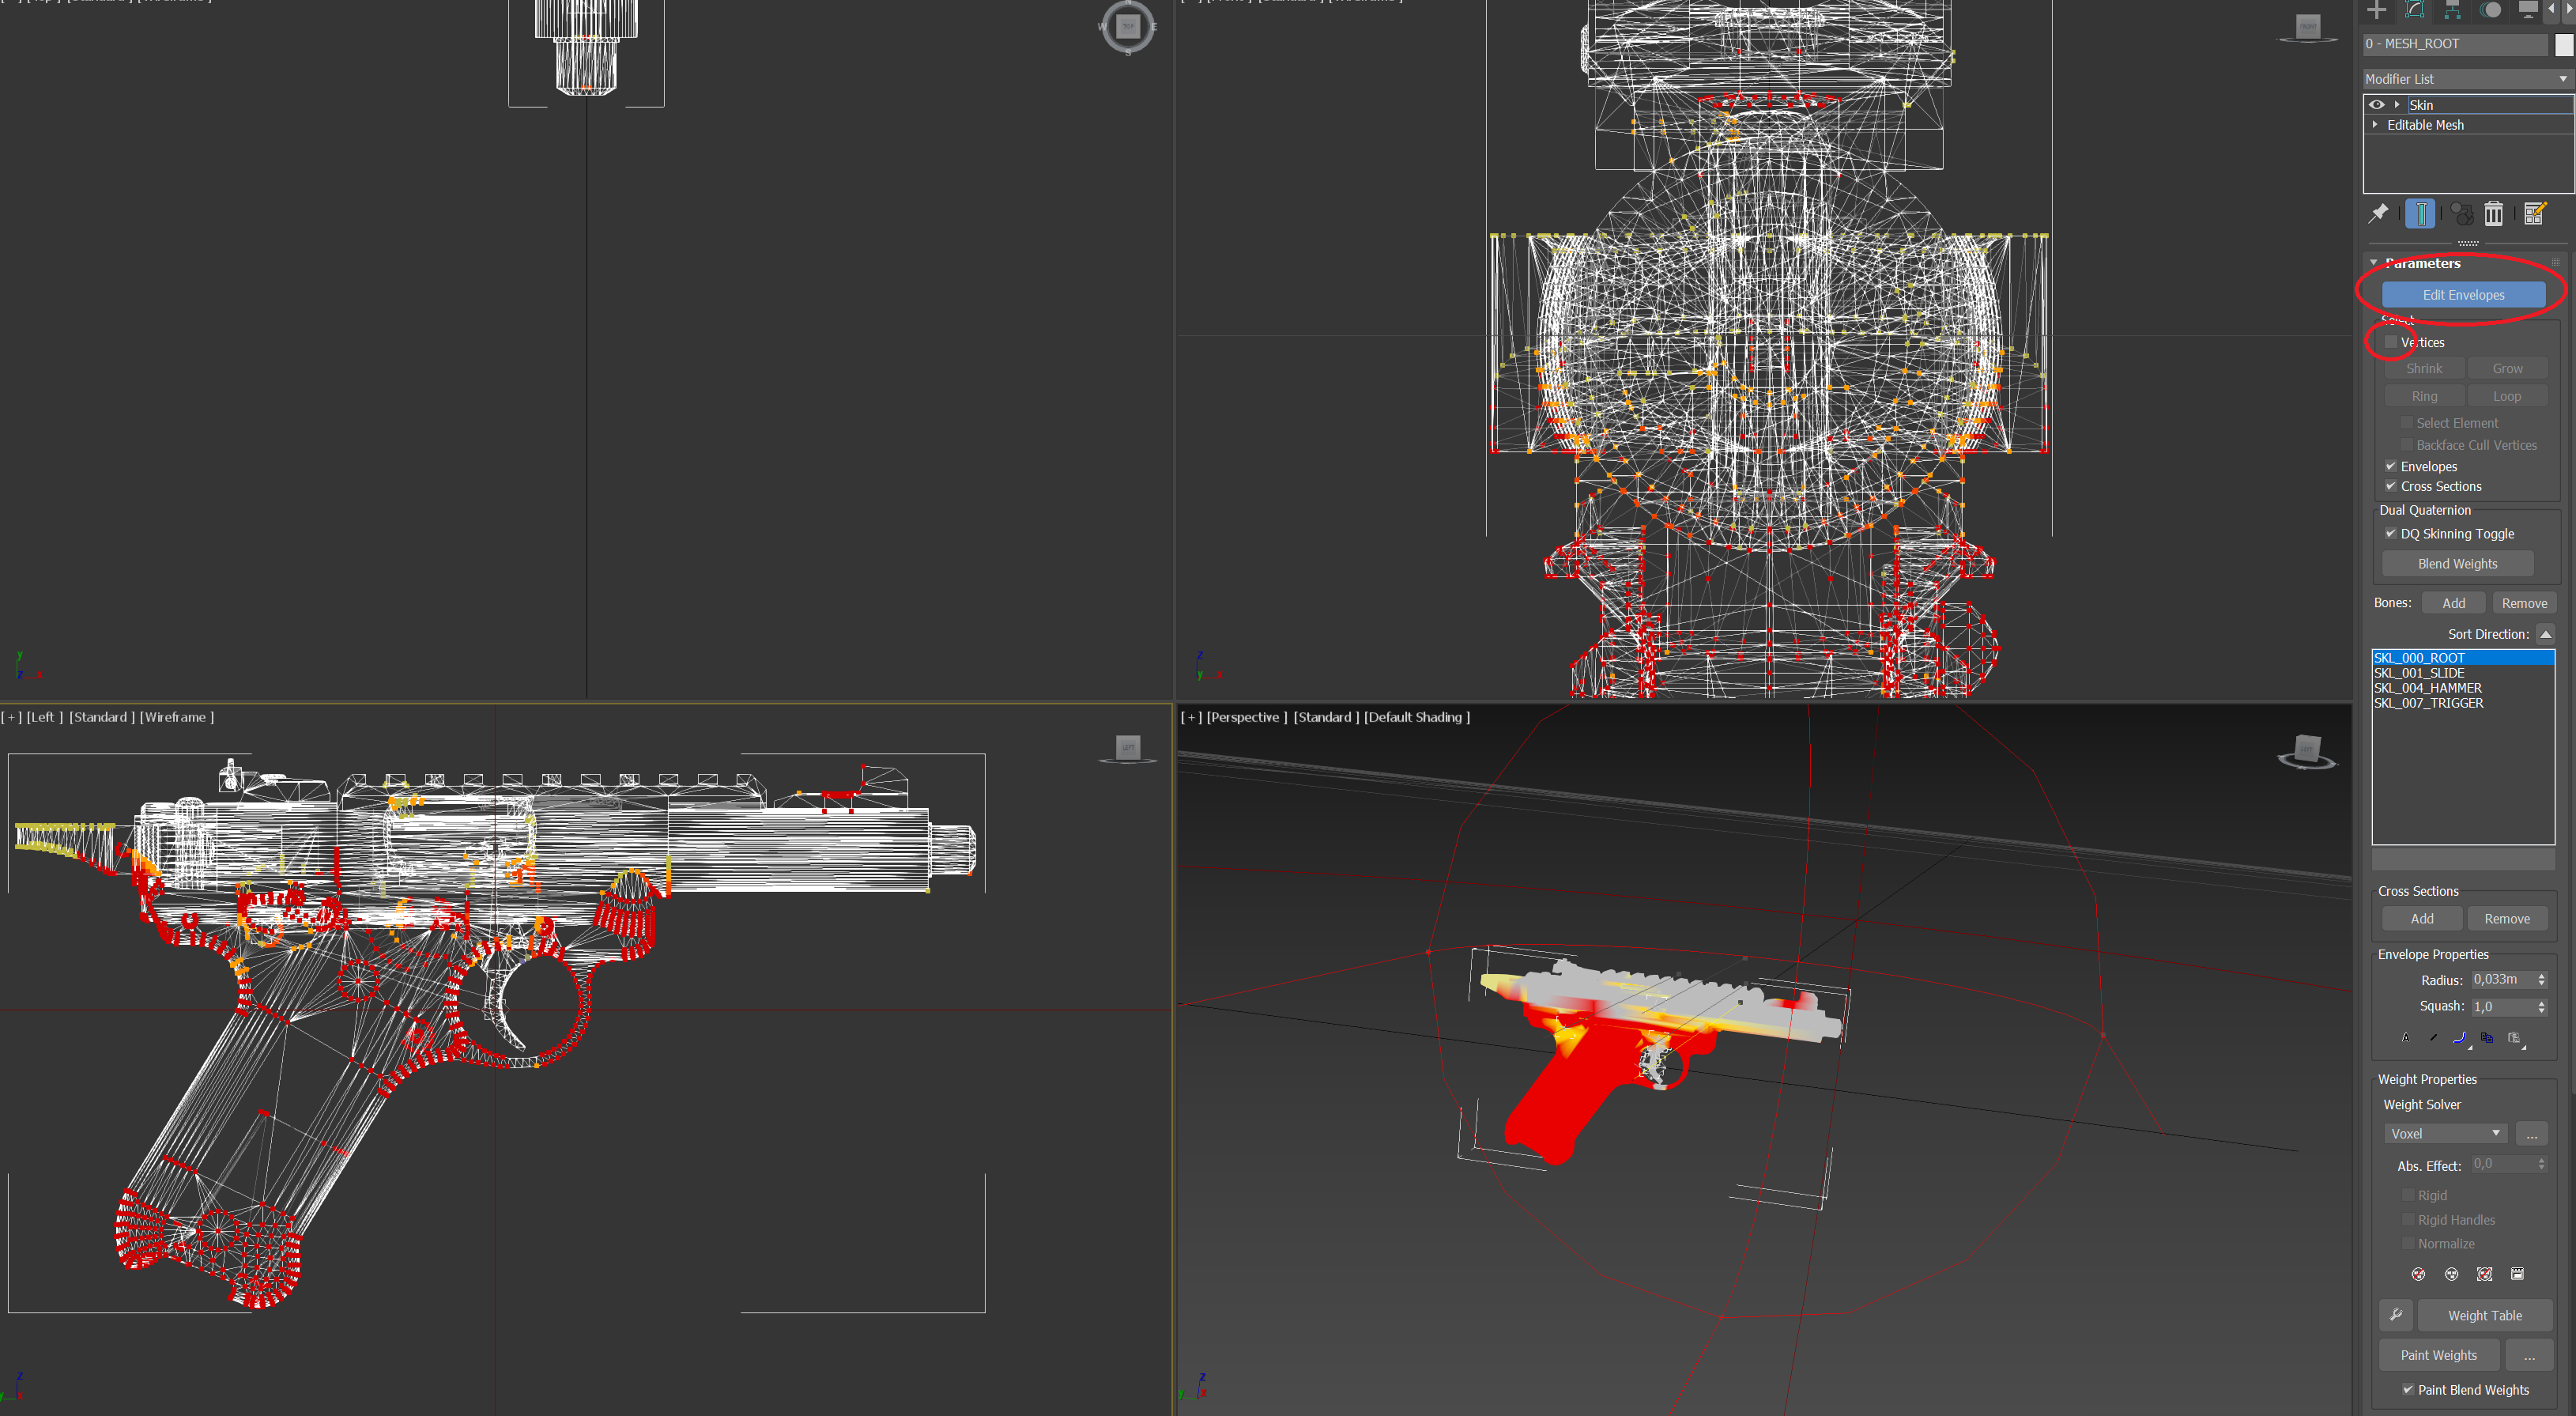 Select all the vertices
on your weapon and make sure you have select the root bone
(SKL_000_ROOT) in the skin modifier.
Select all the vertices
on your weapon and make sure you have select the root bone
(SKL_000_ROOT) in the skin modifier.
Then drag up the abs .effect untill the max (1.0) and the vertices all
turn red. 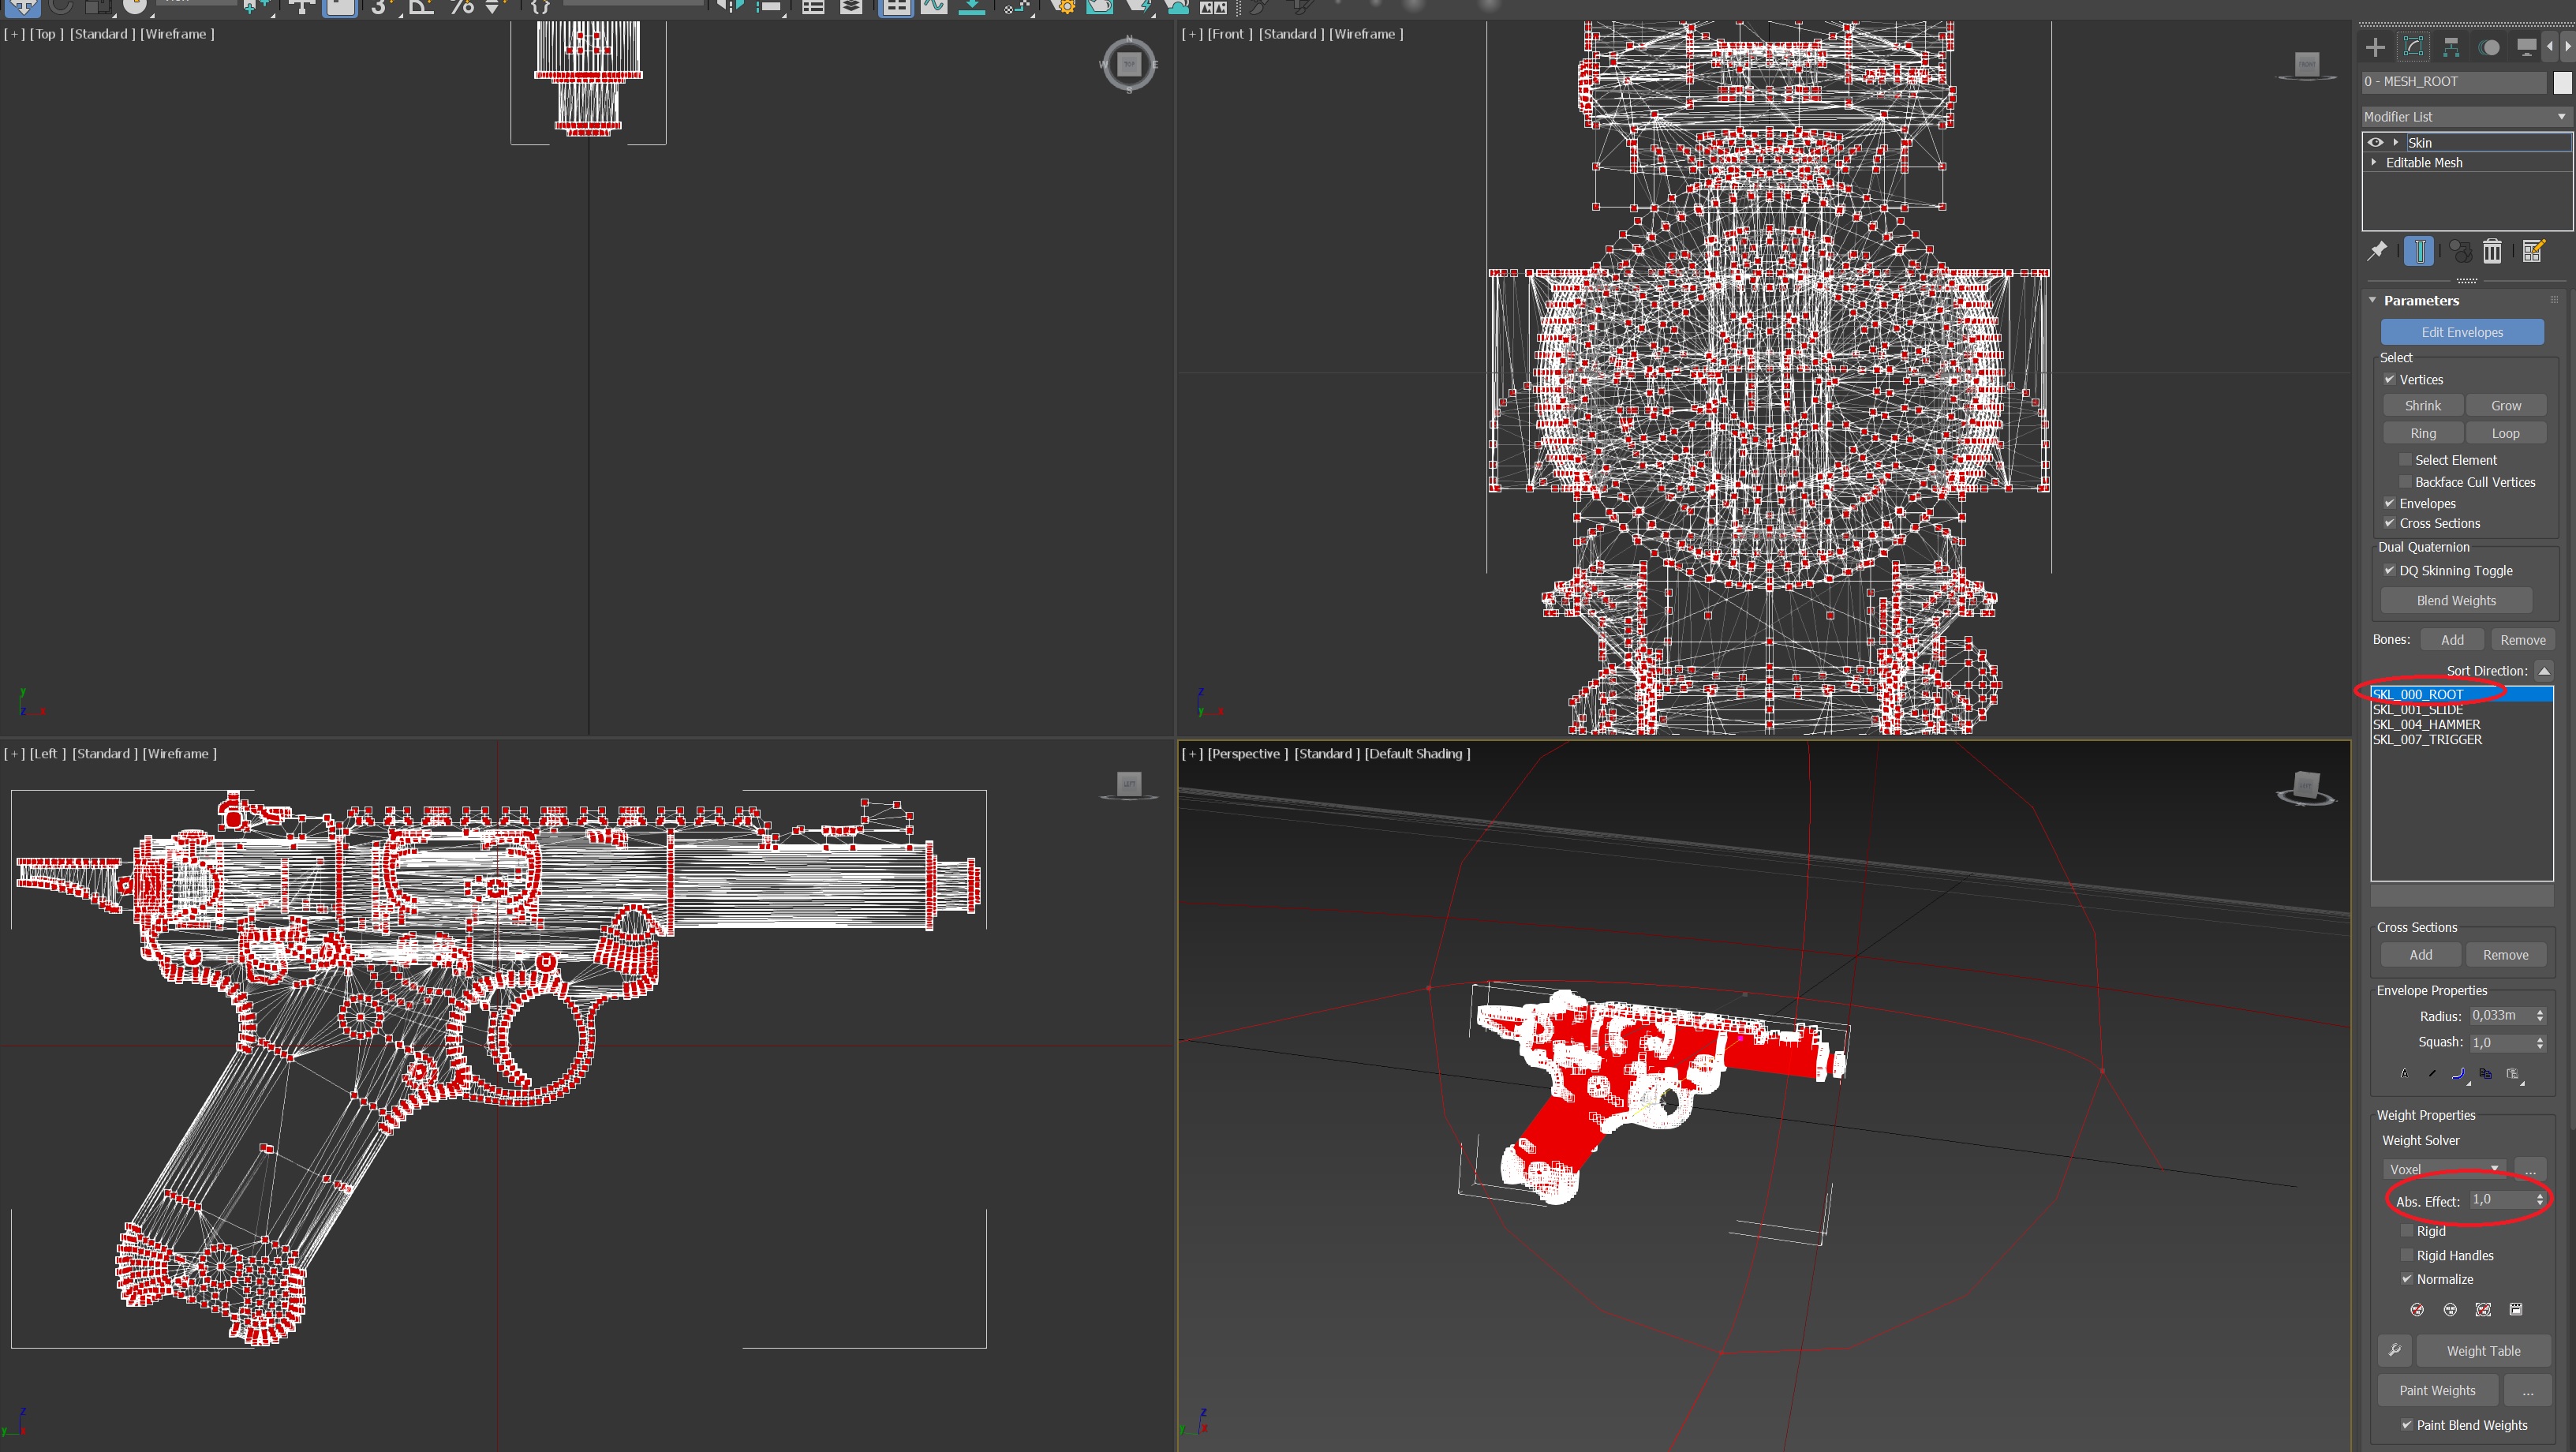 Your whole
gun is rigged to the root bone now, next we will rig the moving parts.
Your whole
gun is rigged to the root bone now, next we will rig the moving parts.
In this case we will rig the slide first, so in the skin modifier select the slide bone (SKL_001_SLIDE).
To make this easier also click the select element checkbox.
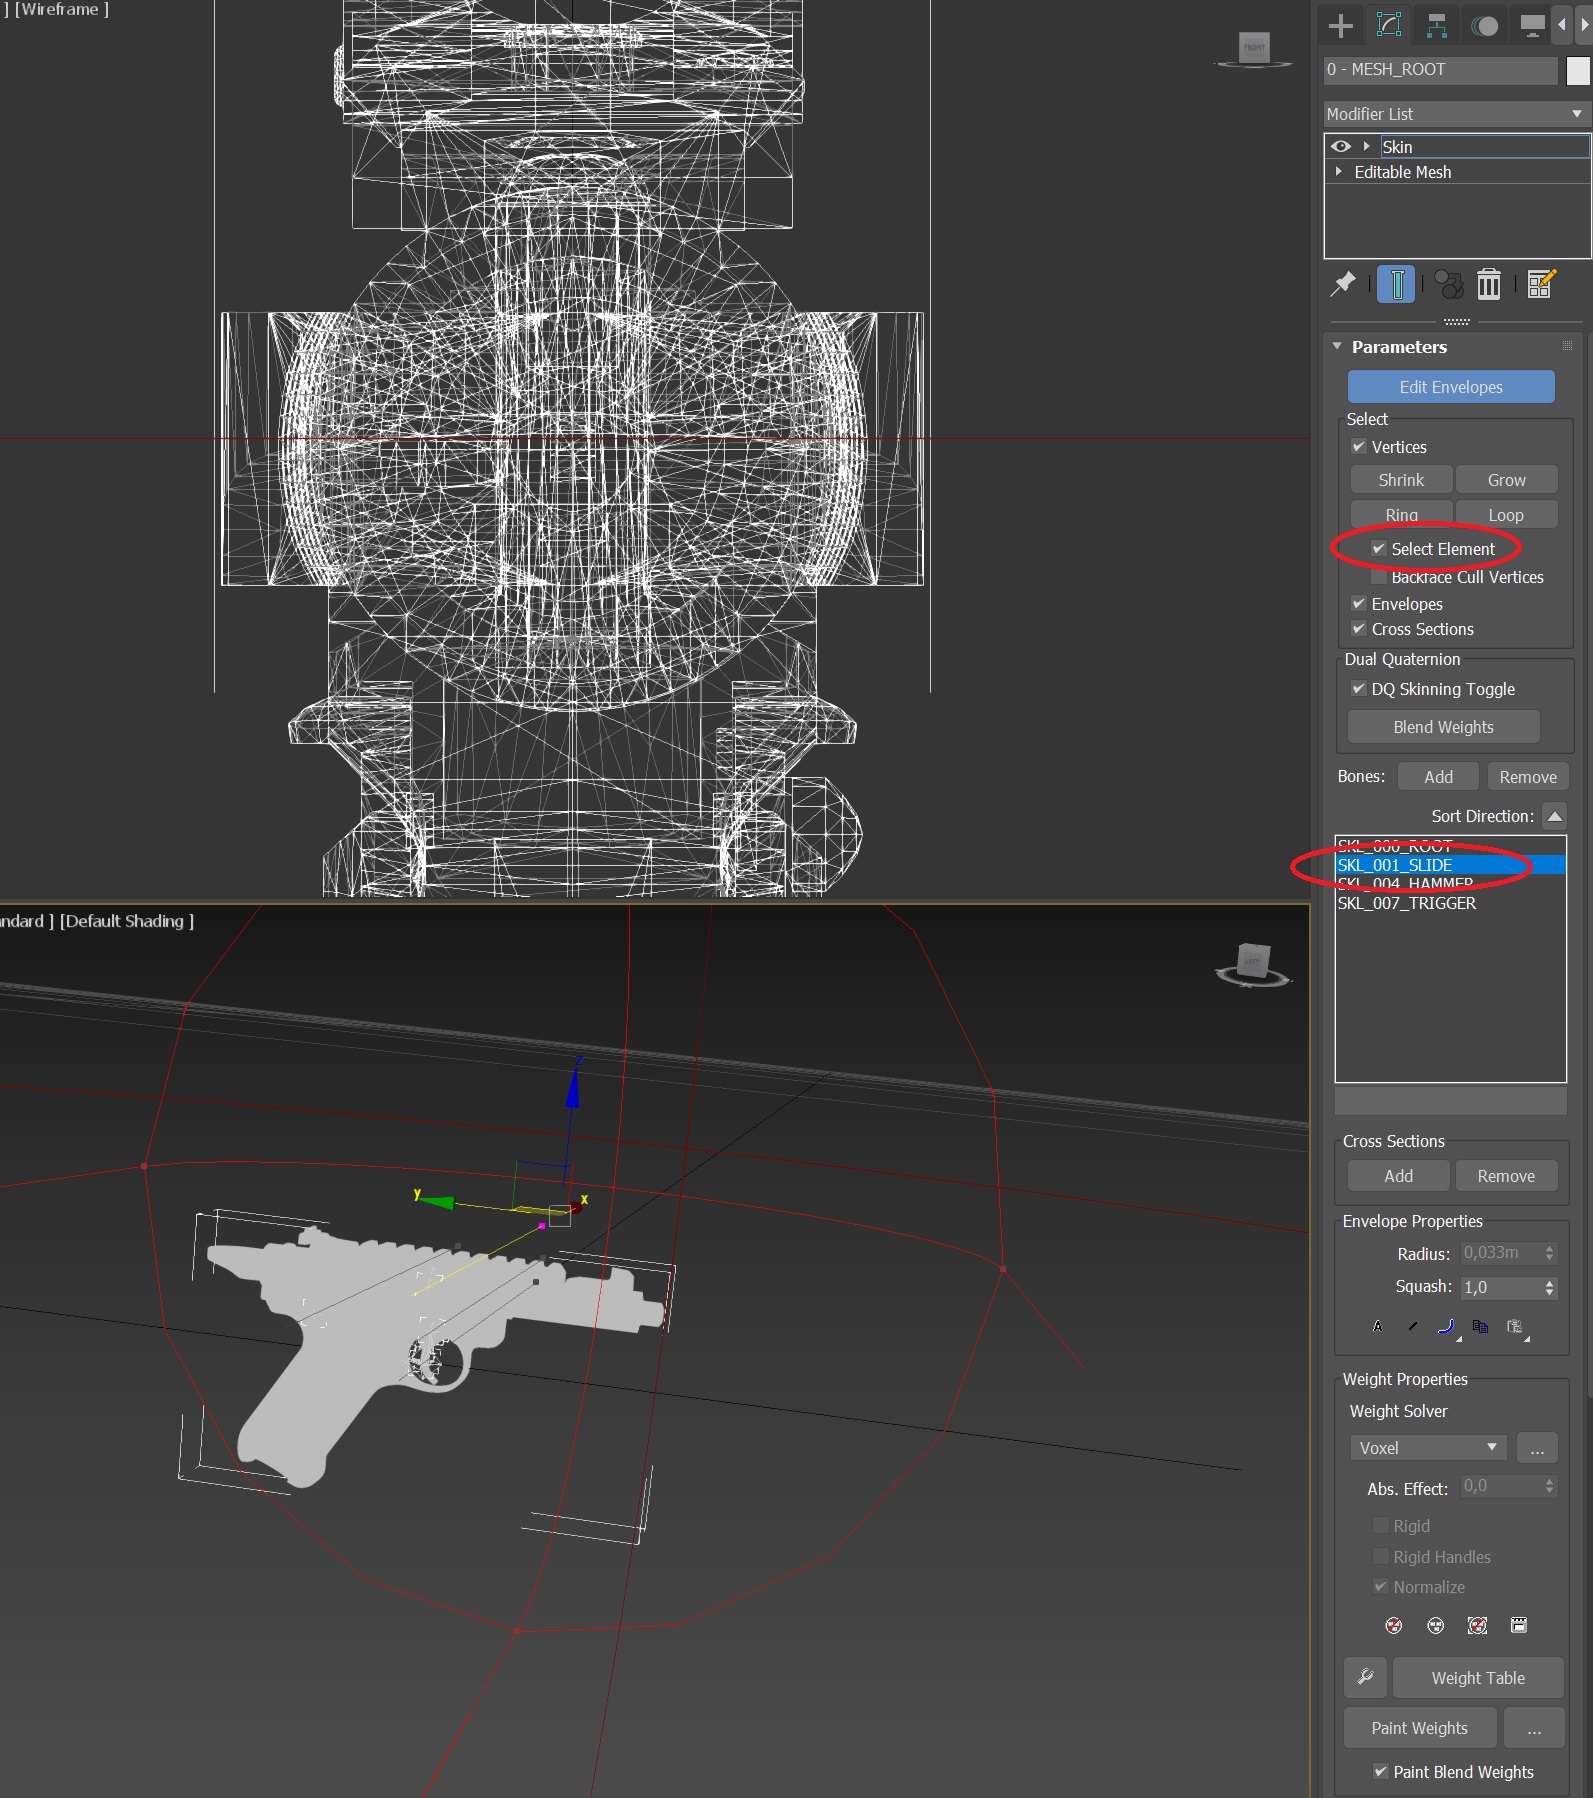 Now select all the
parts of the gun that should move when the slide bone moves.
Now select all the
parts of the gun that should move when the slide bone moves.
The whole element will be selected now, drag up the abs. effect again to
the max. 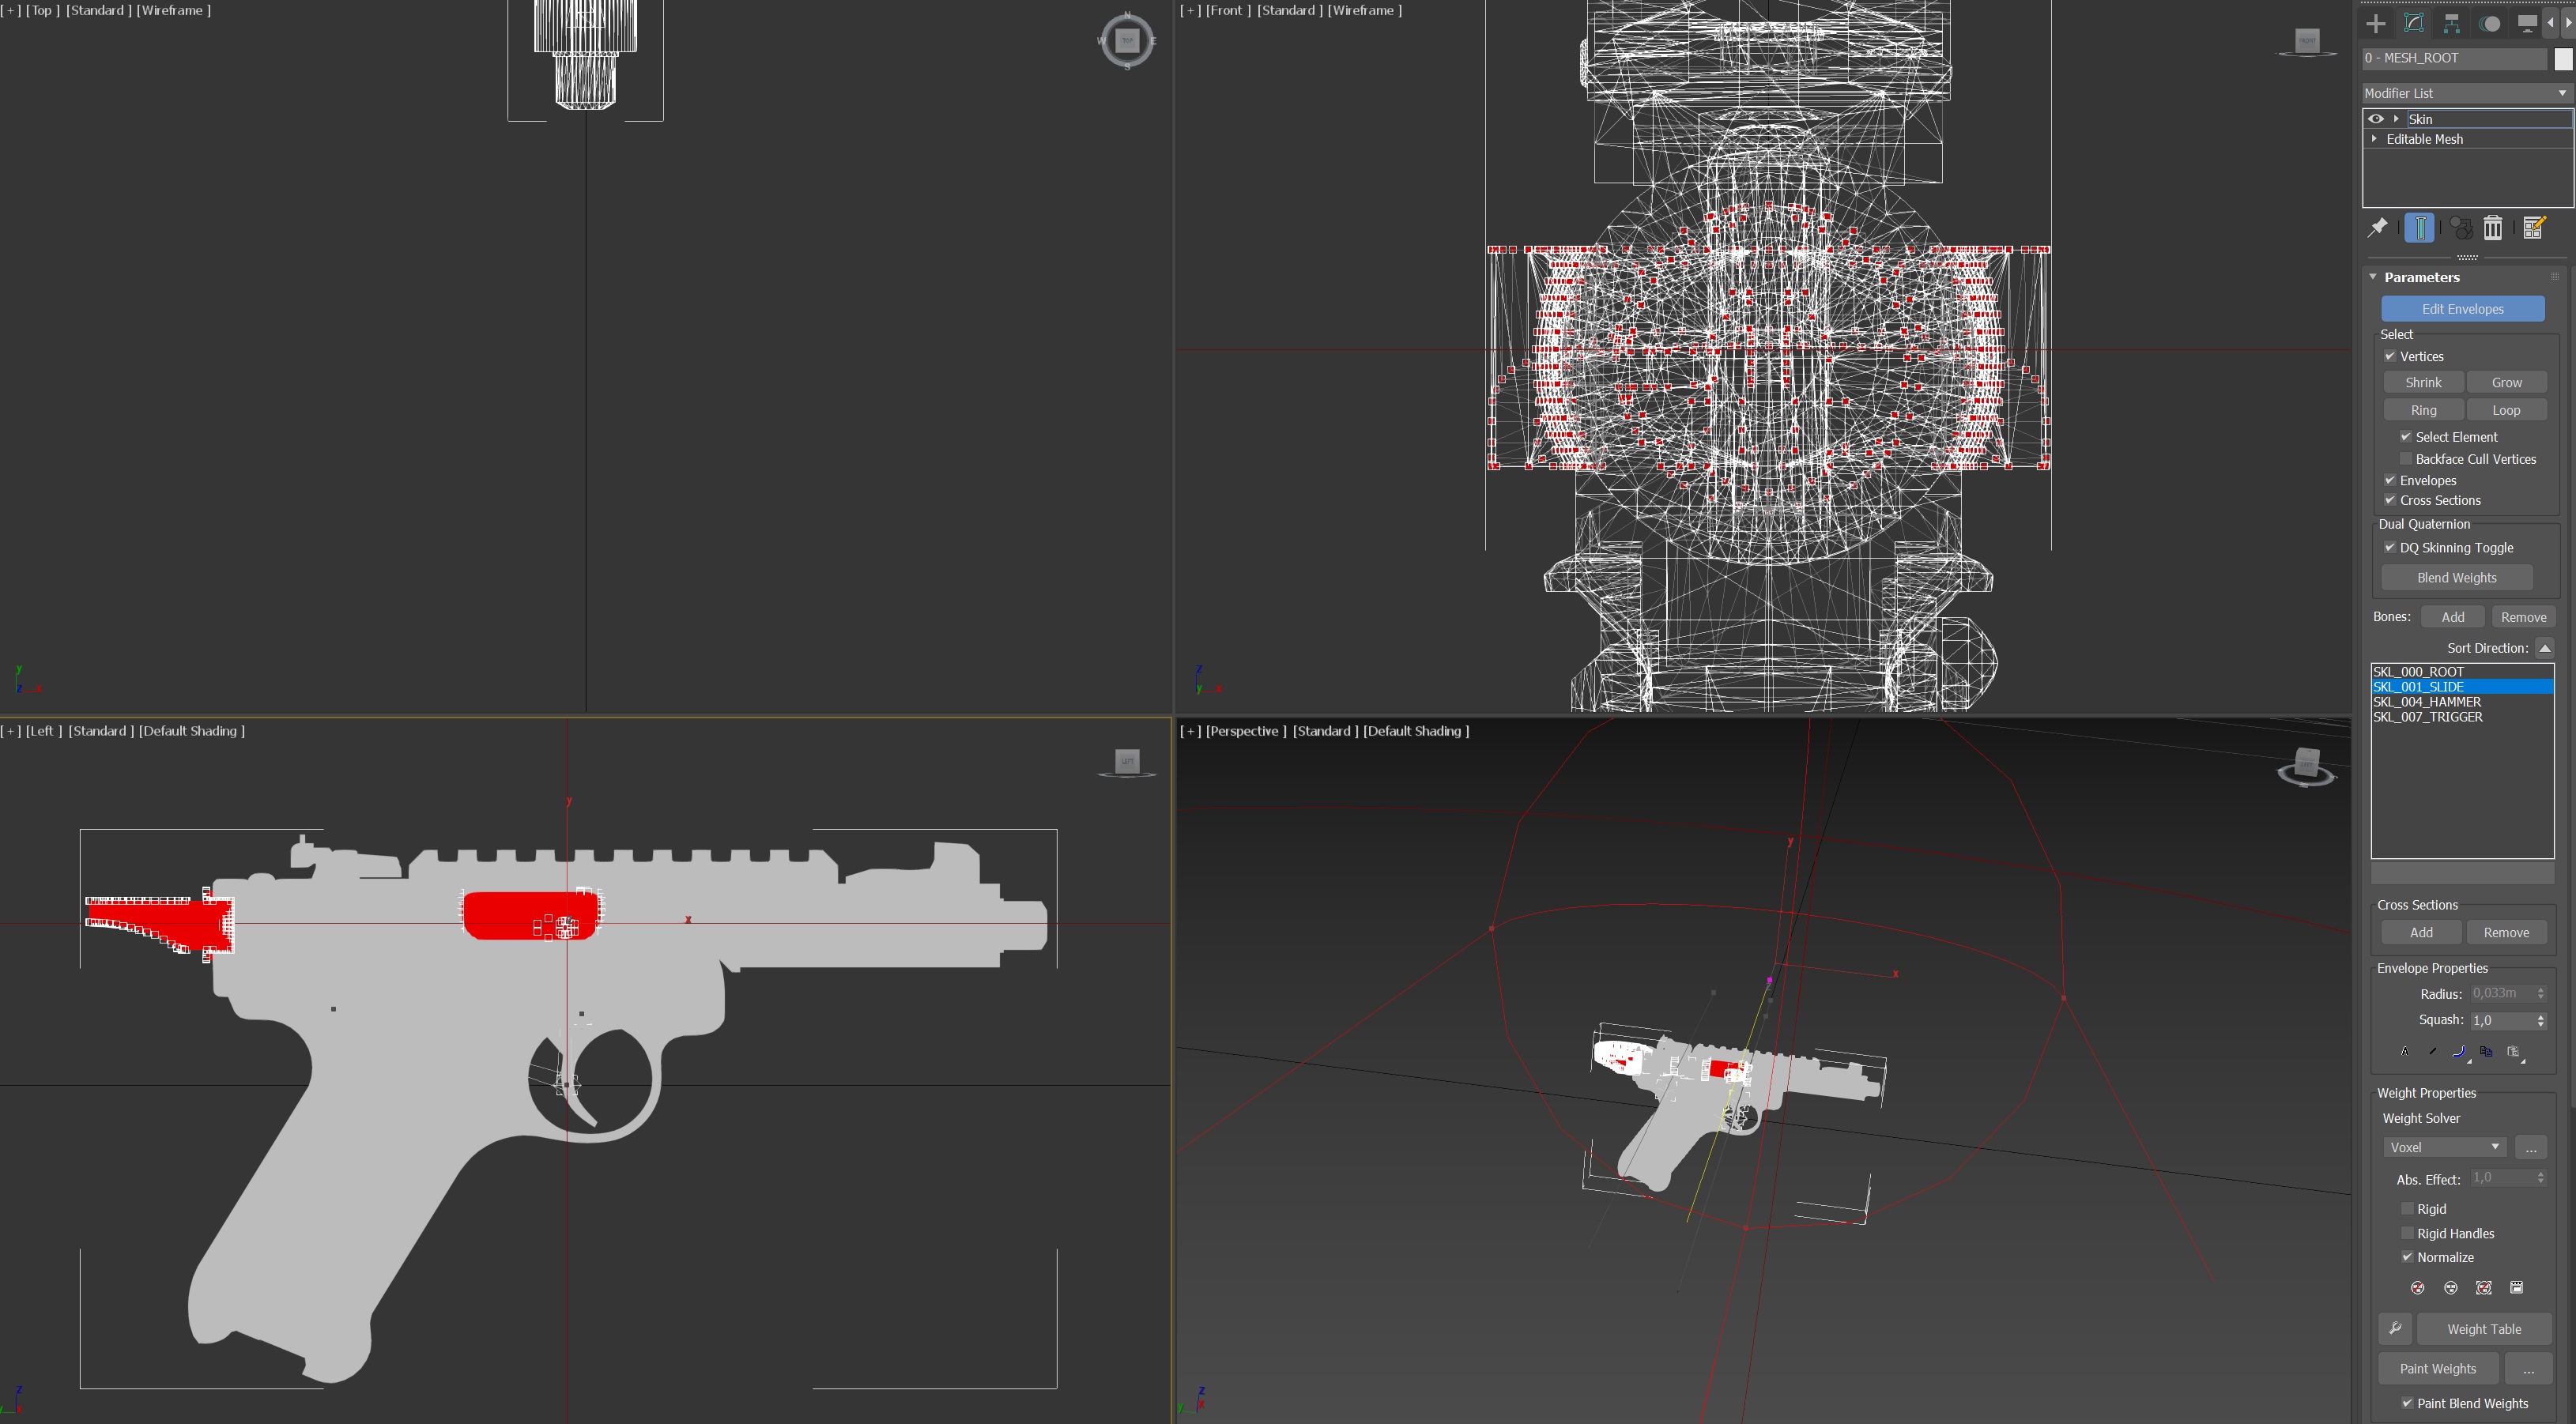 The silde
should be red now as the picture above.
The silde
should be red now as the picture above.
No continue to do this for all parts (hammer/trigger…)
If you want your weapon to have a rail system that apears/dissapears when you select attachments do the same as with the gun itself.
Deselect all vertices on your custom model and select them all on the vanilla one, attach them and delete the selected vertices.
The rail should be automatically rigged to the root bone.
Continue to do this if you have a model that uses multiple meshes.
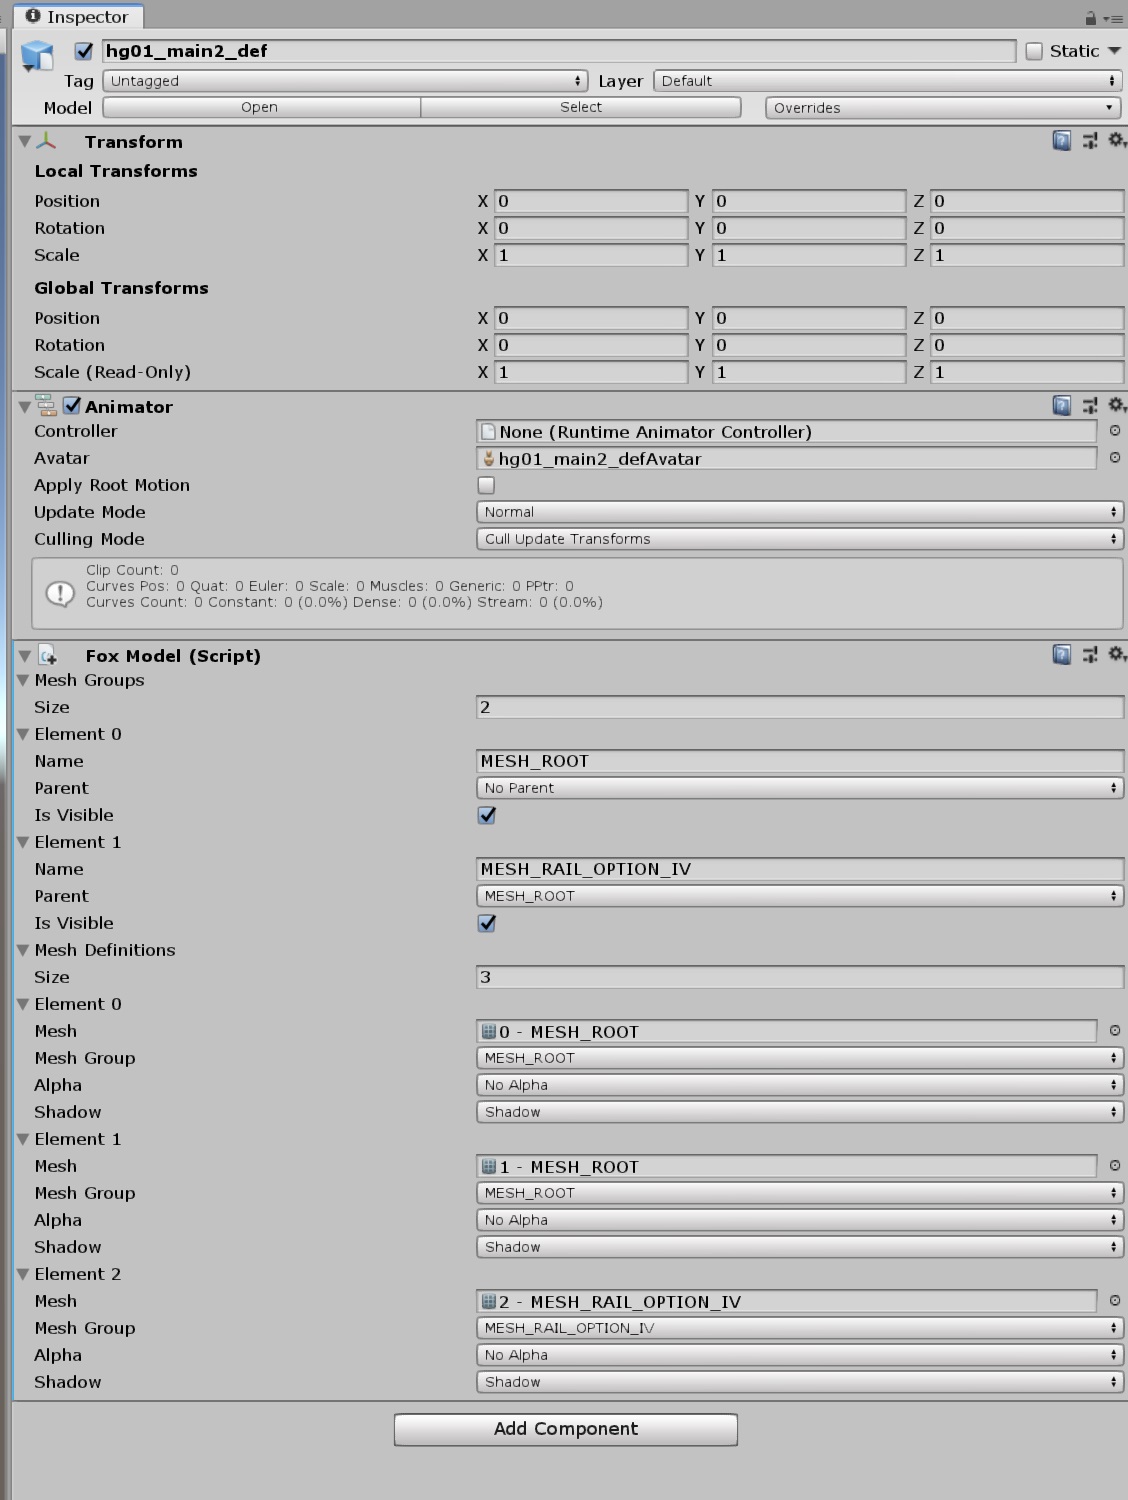
Now if you have rigged the whole gun we are gonna make life easier be already naming our meshes.
All main gun parts should be named MESH_ROOT, the rail parts MESH_RAIL_OPTION_IV.
This is important or else the rail won’t go away if you don’t use
attachments. 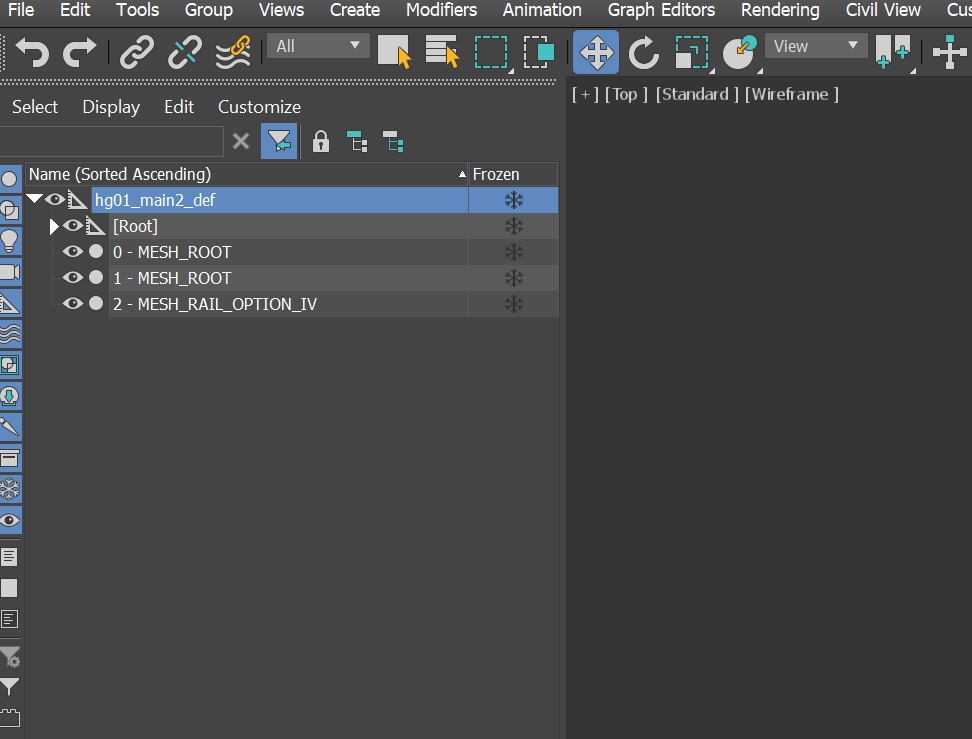 Now select
all objects in the scene and export them as an .fbx file, don’t close
3ds Max yet.
Now select
all objects in the scene and export them as an .fbx file, don’t close
3ds Max yet.
Now you can make your textures ready for the fox engine, just as you would normally.
Weapons use bsm/ nrm/ srm/ mtm but also special camo bsm and lbm textures for the camo patterns you can apply ingame.
An easy way to make these camo textures is by using 3ds max viewport canvas.
Apply the base texture to your model in 3ds max, then select all elements that you want to have painted with camo and detach them.
Go to tools/viewport canvas and click it.

A panel should apear with option, set the paint color to white and click on the brush icon.
Now you can paint your gun parts white in the viewport.
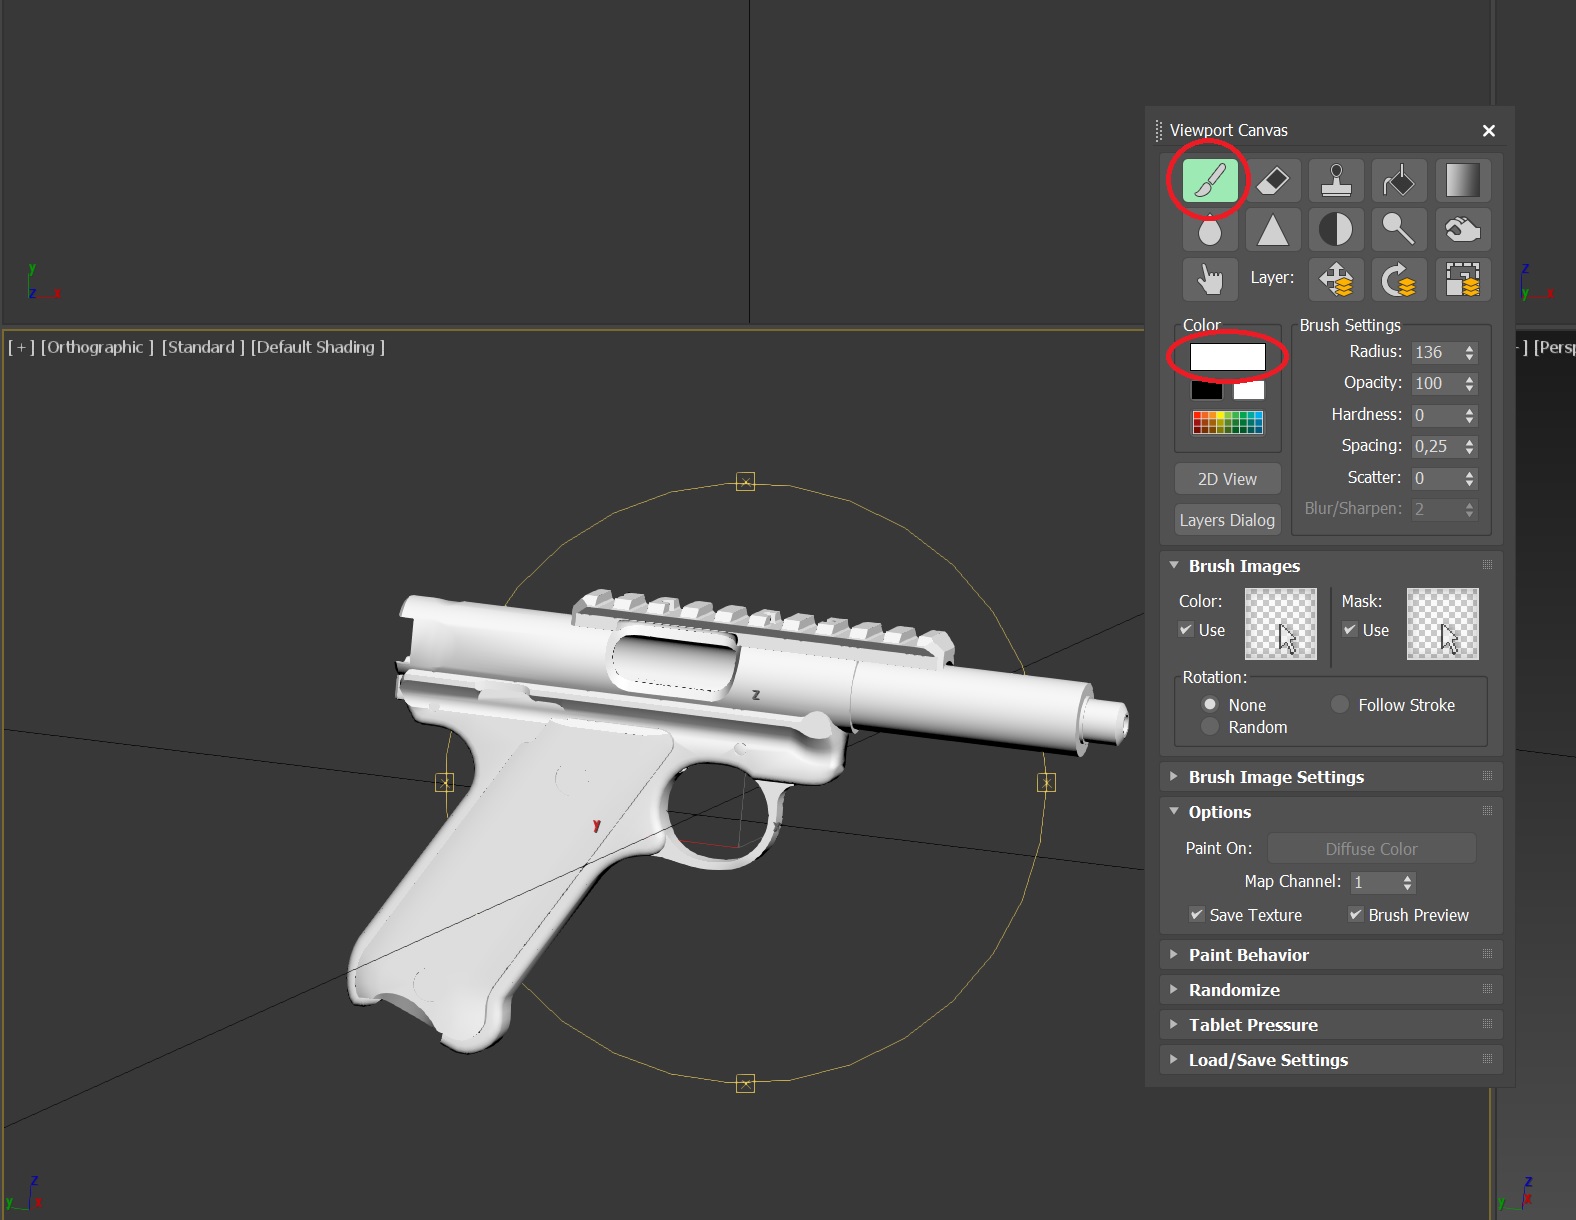
When you have painted all parts, click the brush icon again and save the file as an .psd.
Now open that .psd file with photoshop and you should have an channel with the white painted parts.
Paste the white parts over your base texture (a copy of it).
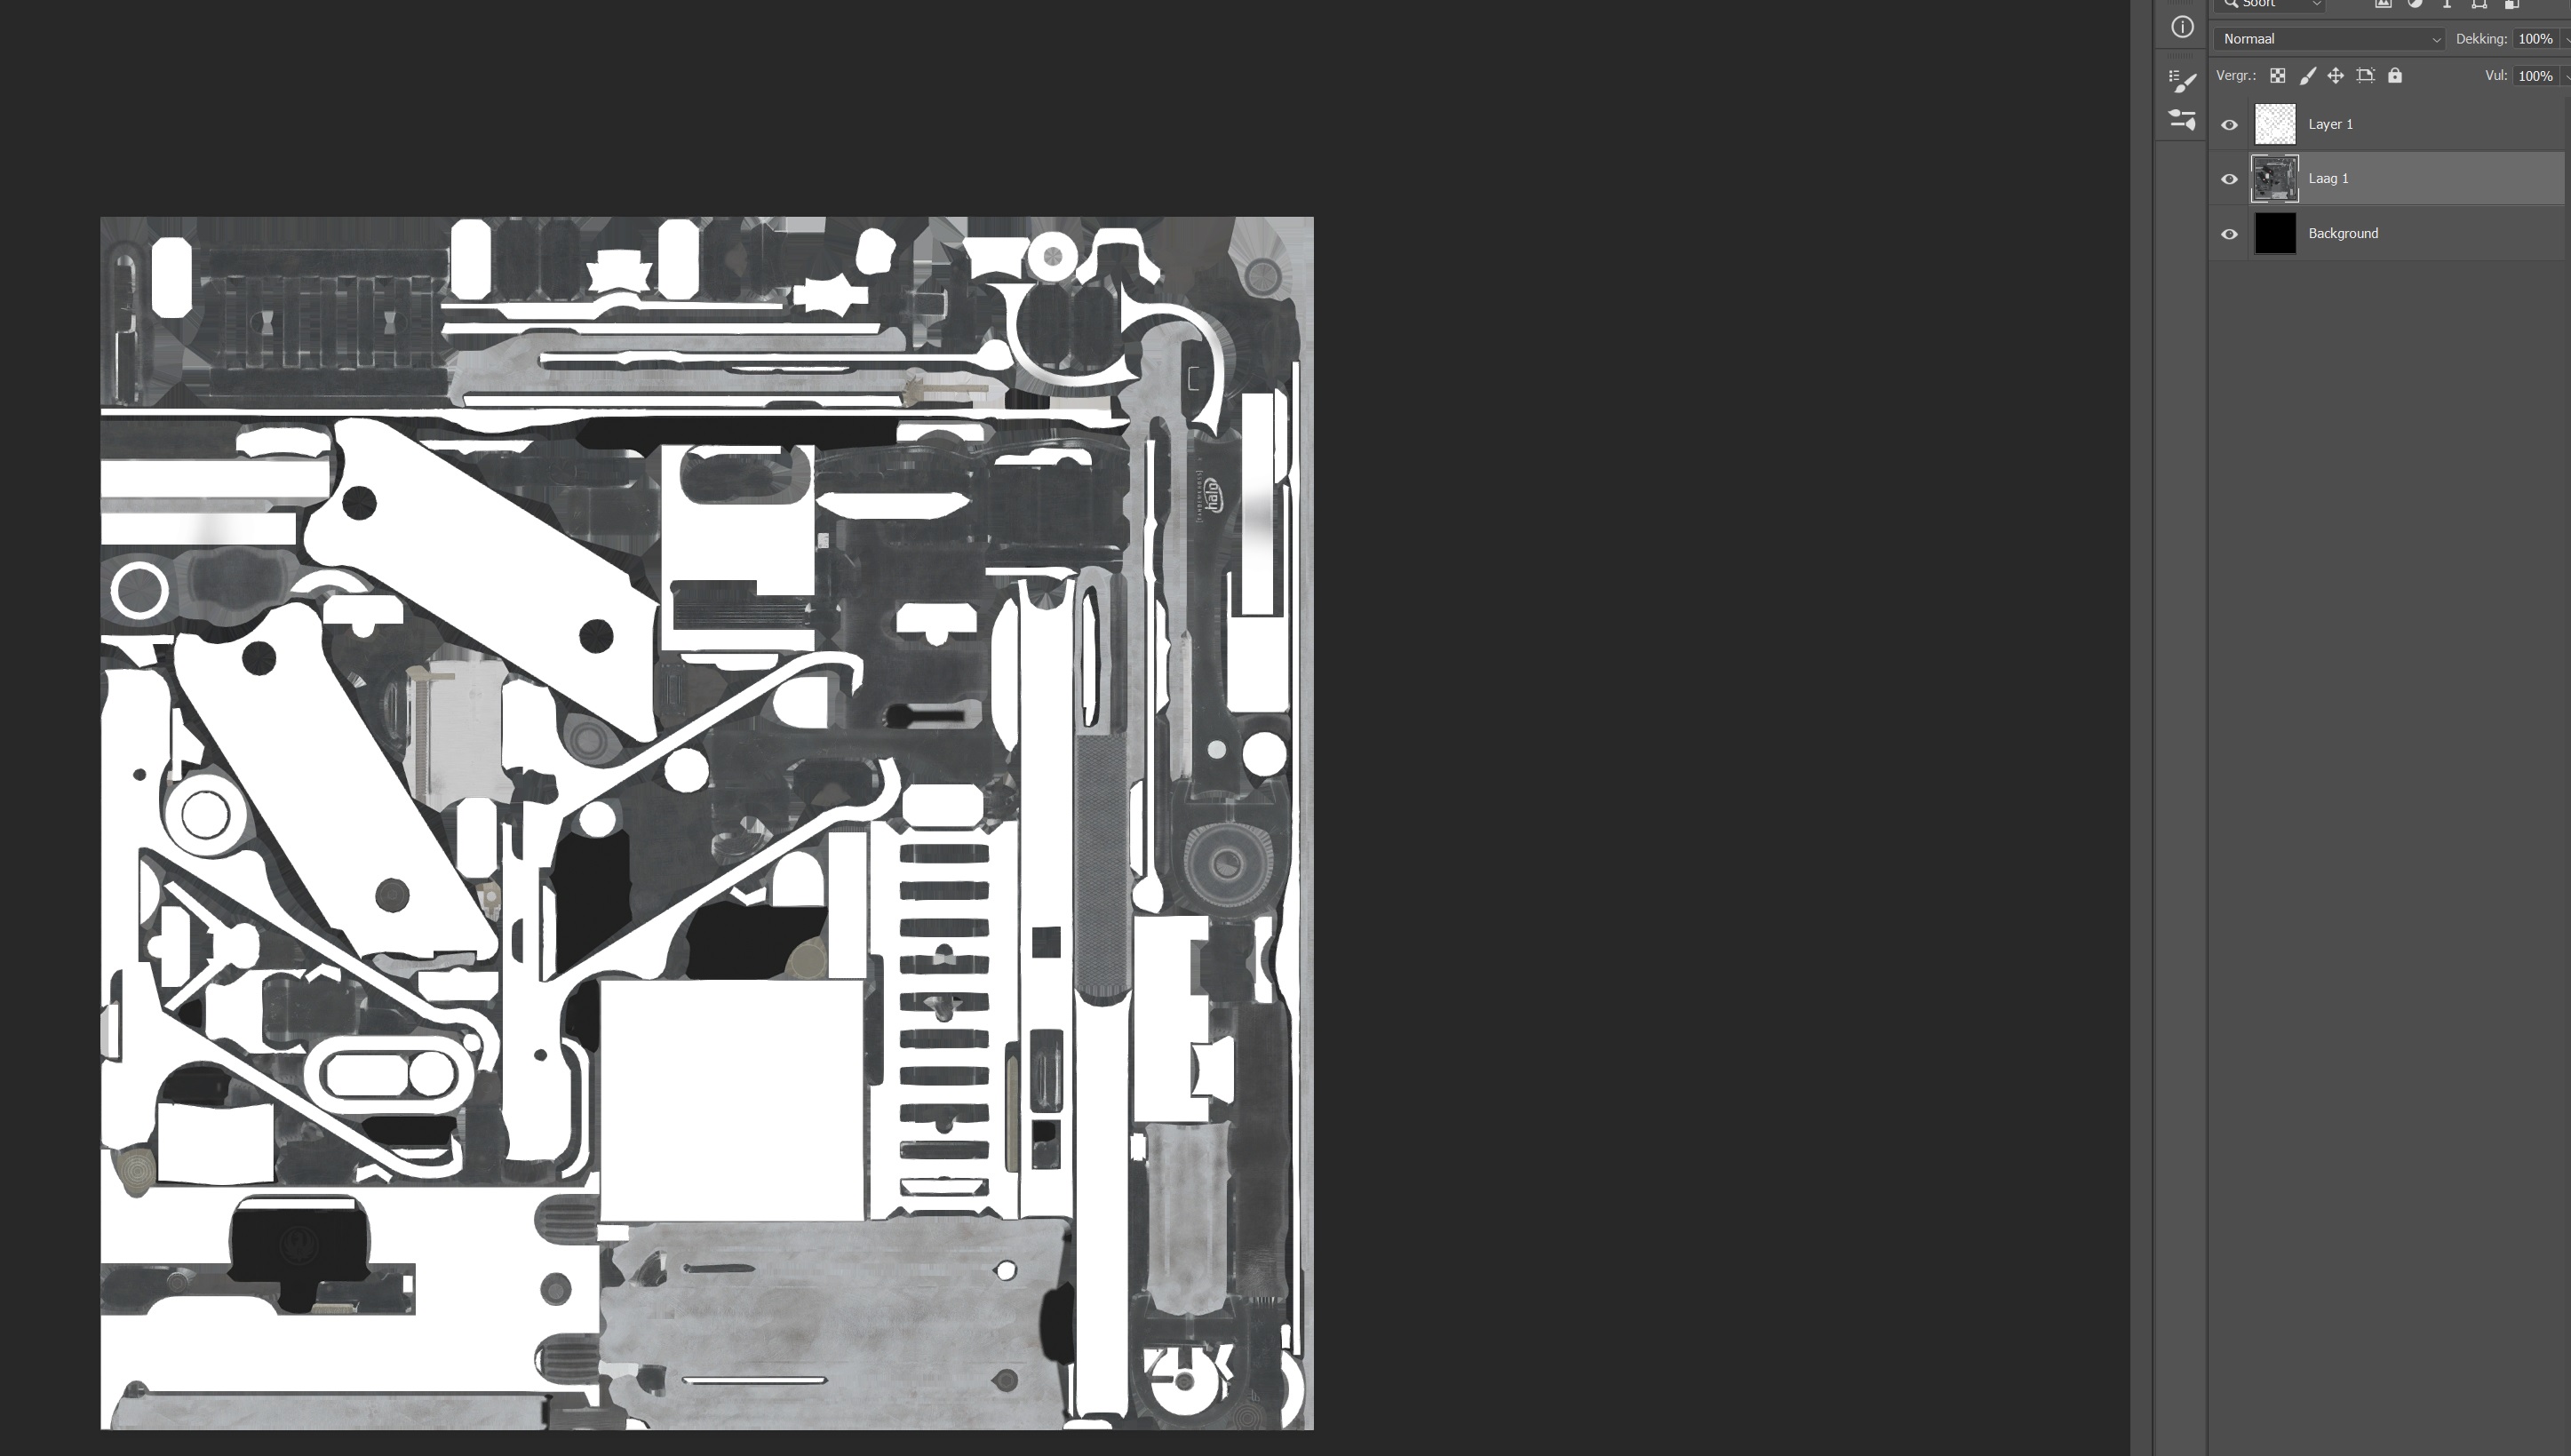
Now save this as your camo bsm texture.
You can edit the white parts to have more details, wear,scratches anything.
Now paint the base texture completly black and save the result as your
camo lbm texture. 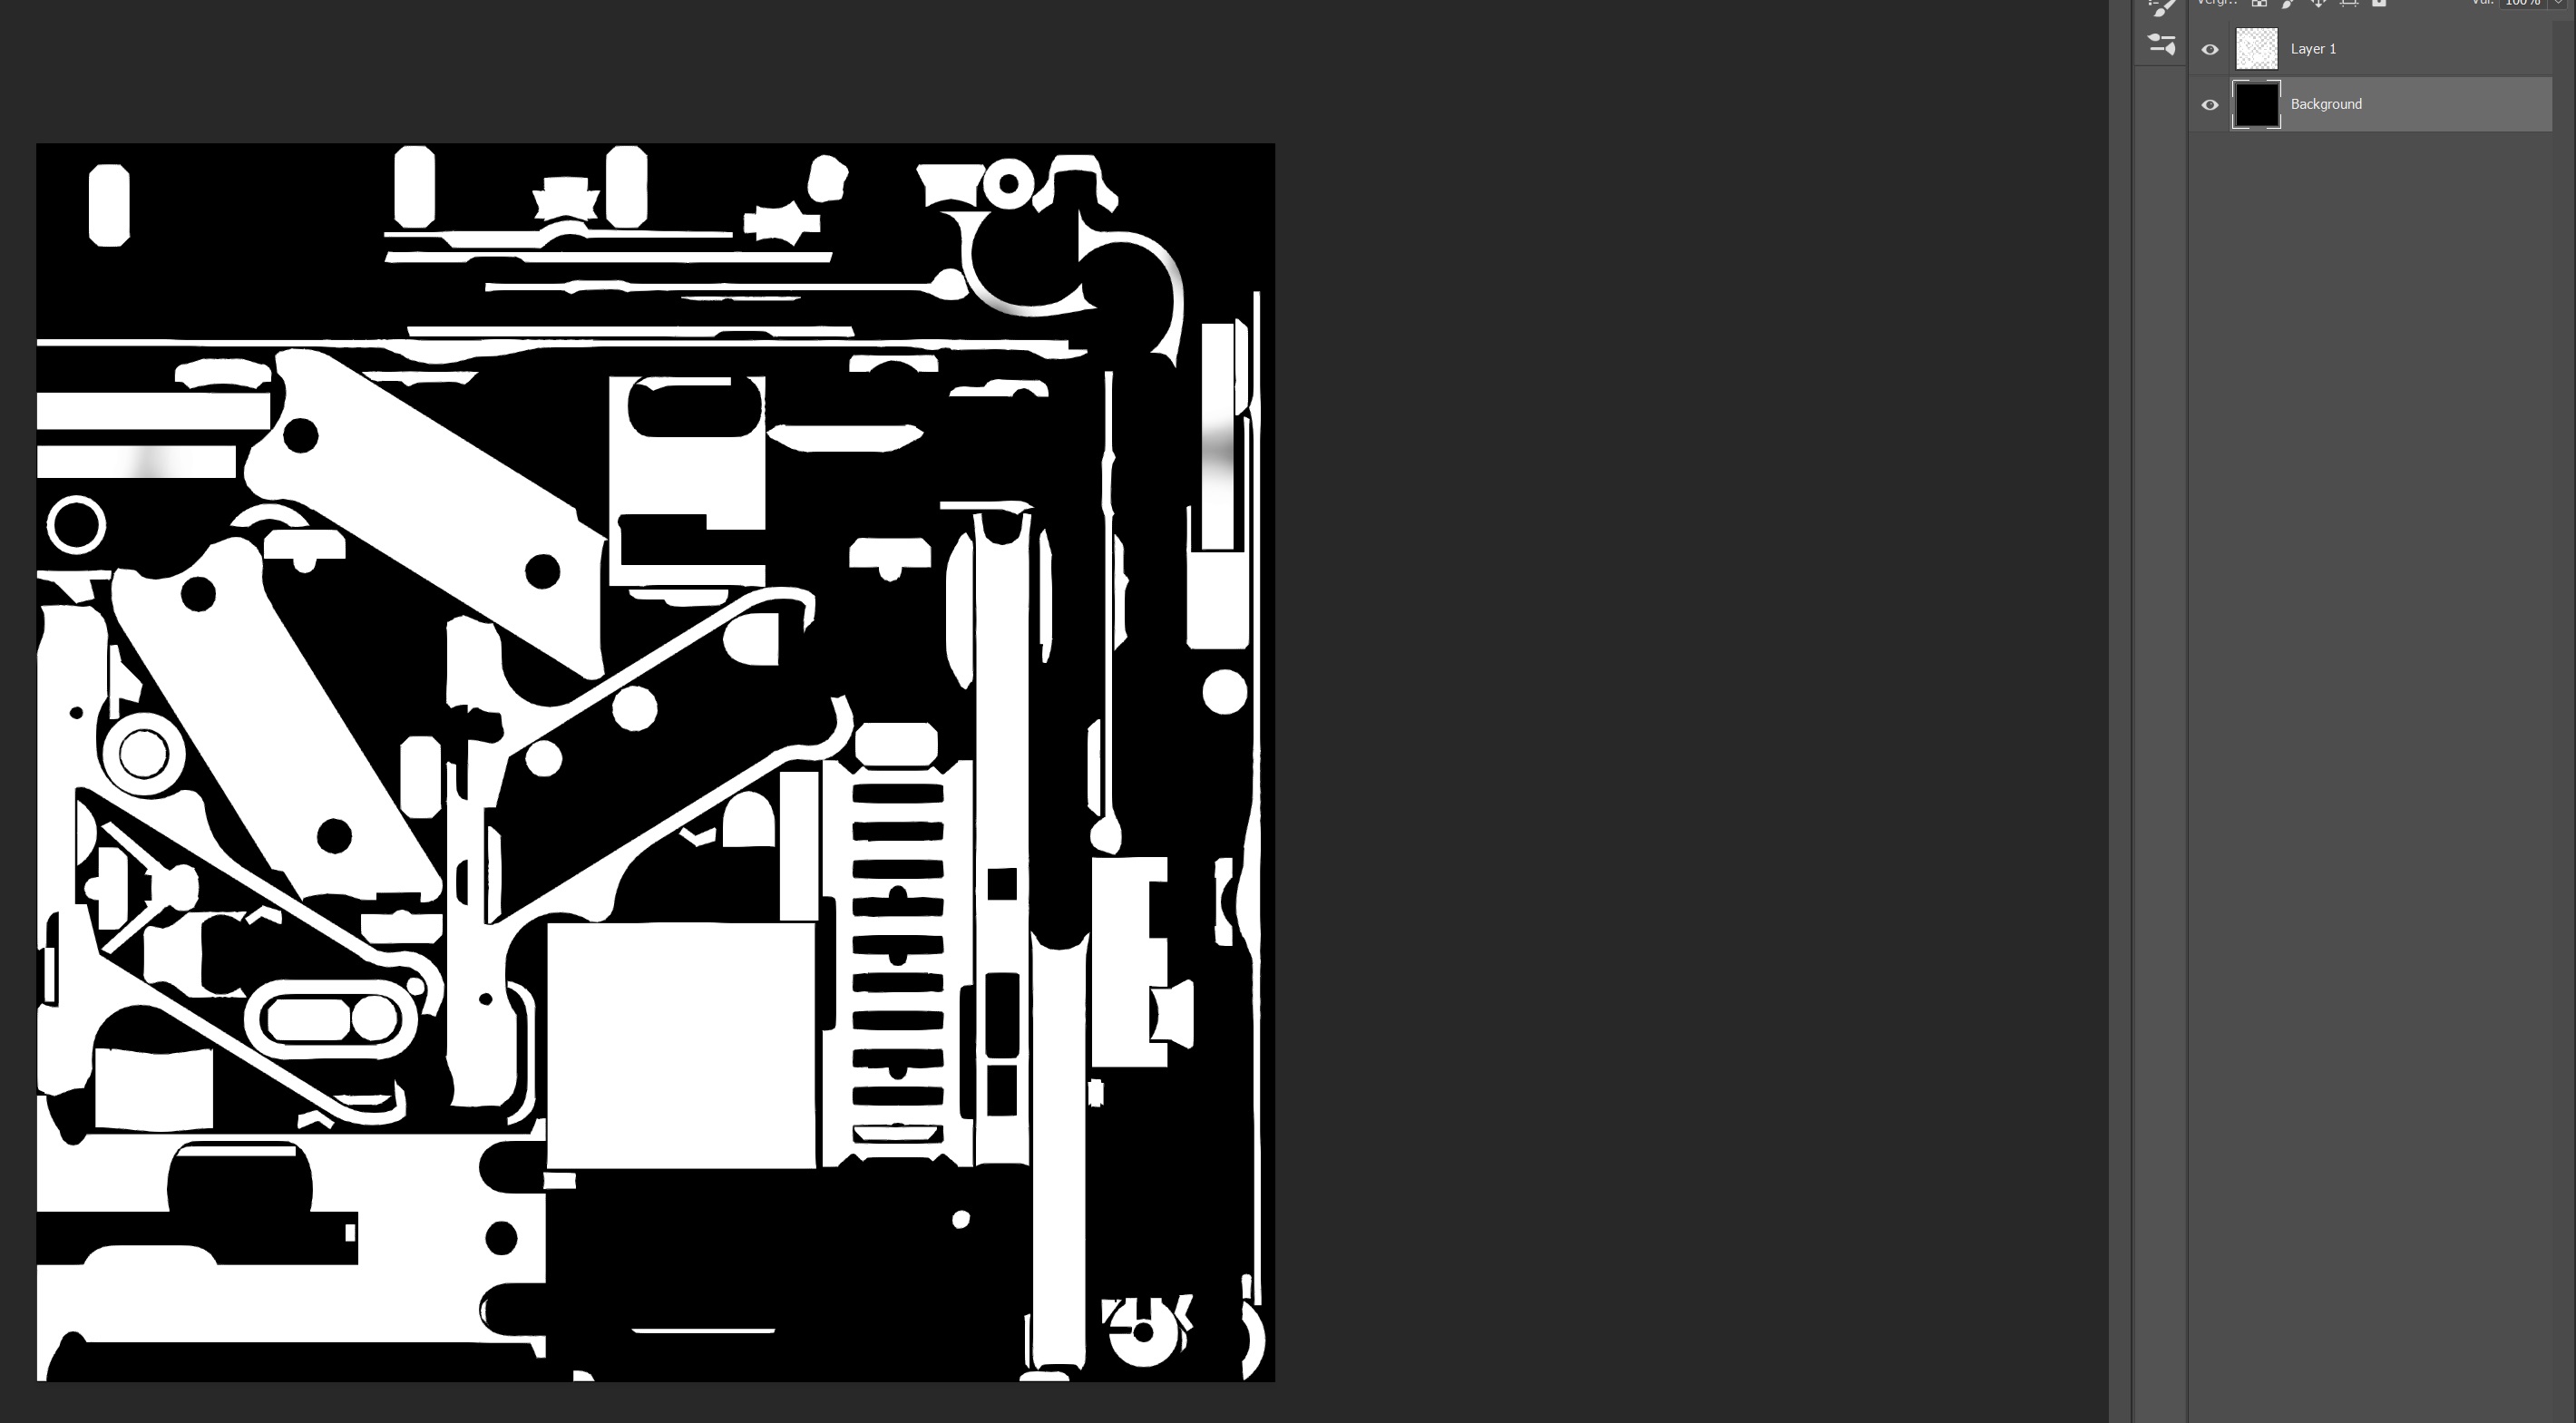
Now that we have all textures ready we can import the new .fbx into fmdl studio and also import the gun you want to replace.
Drag all materials over from the vanilla to the custom one and delete the vanilla gun.
Now this part will be a bit different then usual, in the texture part
only asign the normal map and leave the others be.
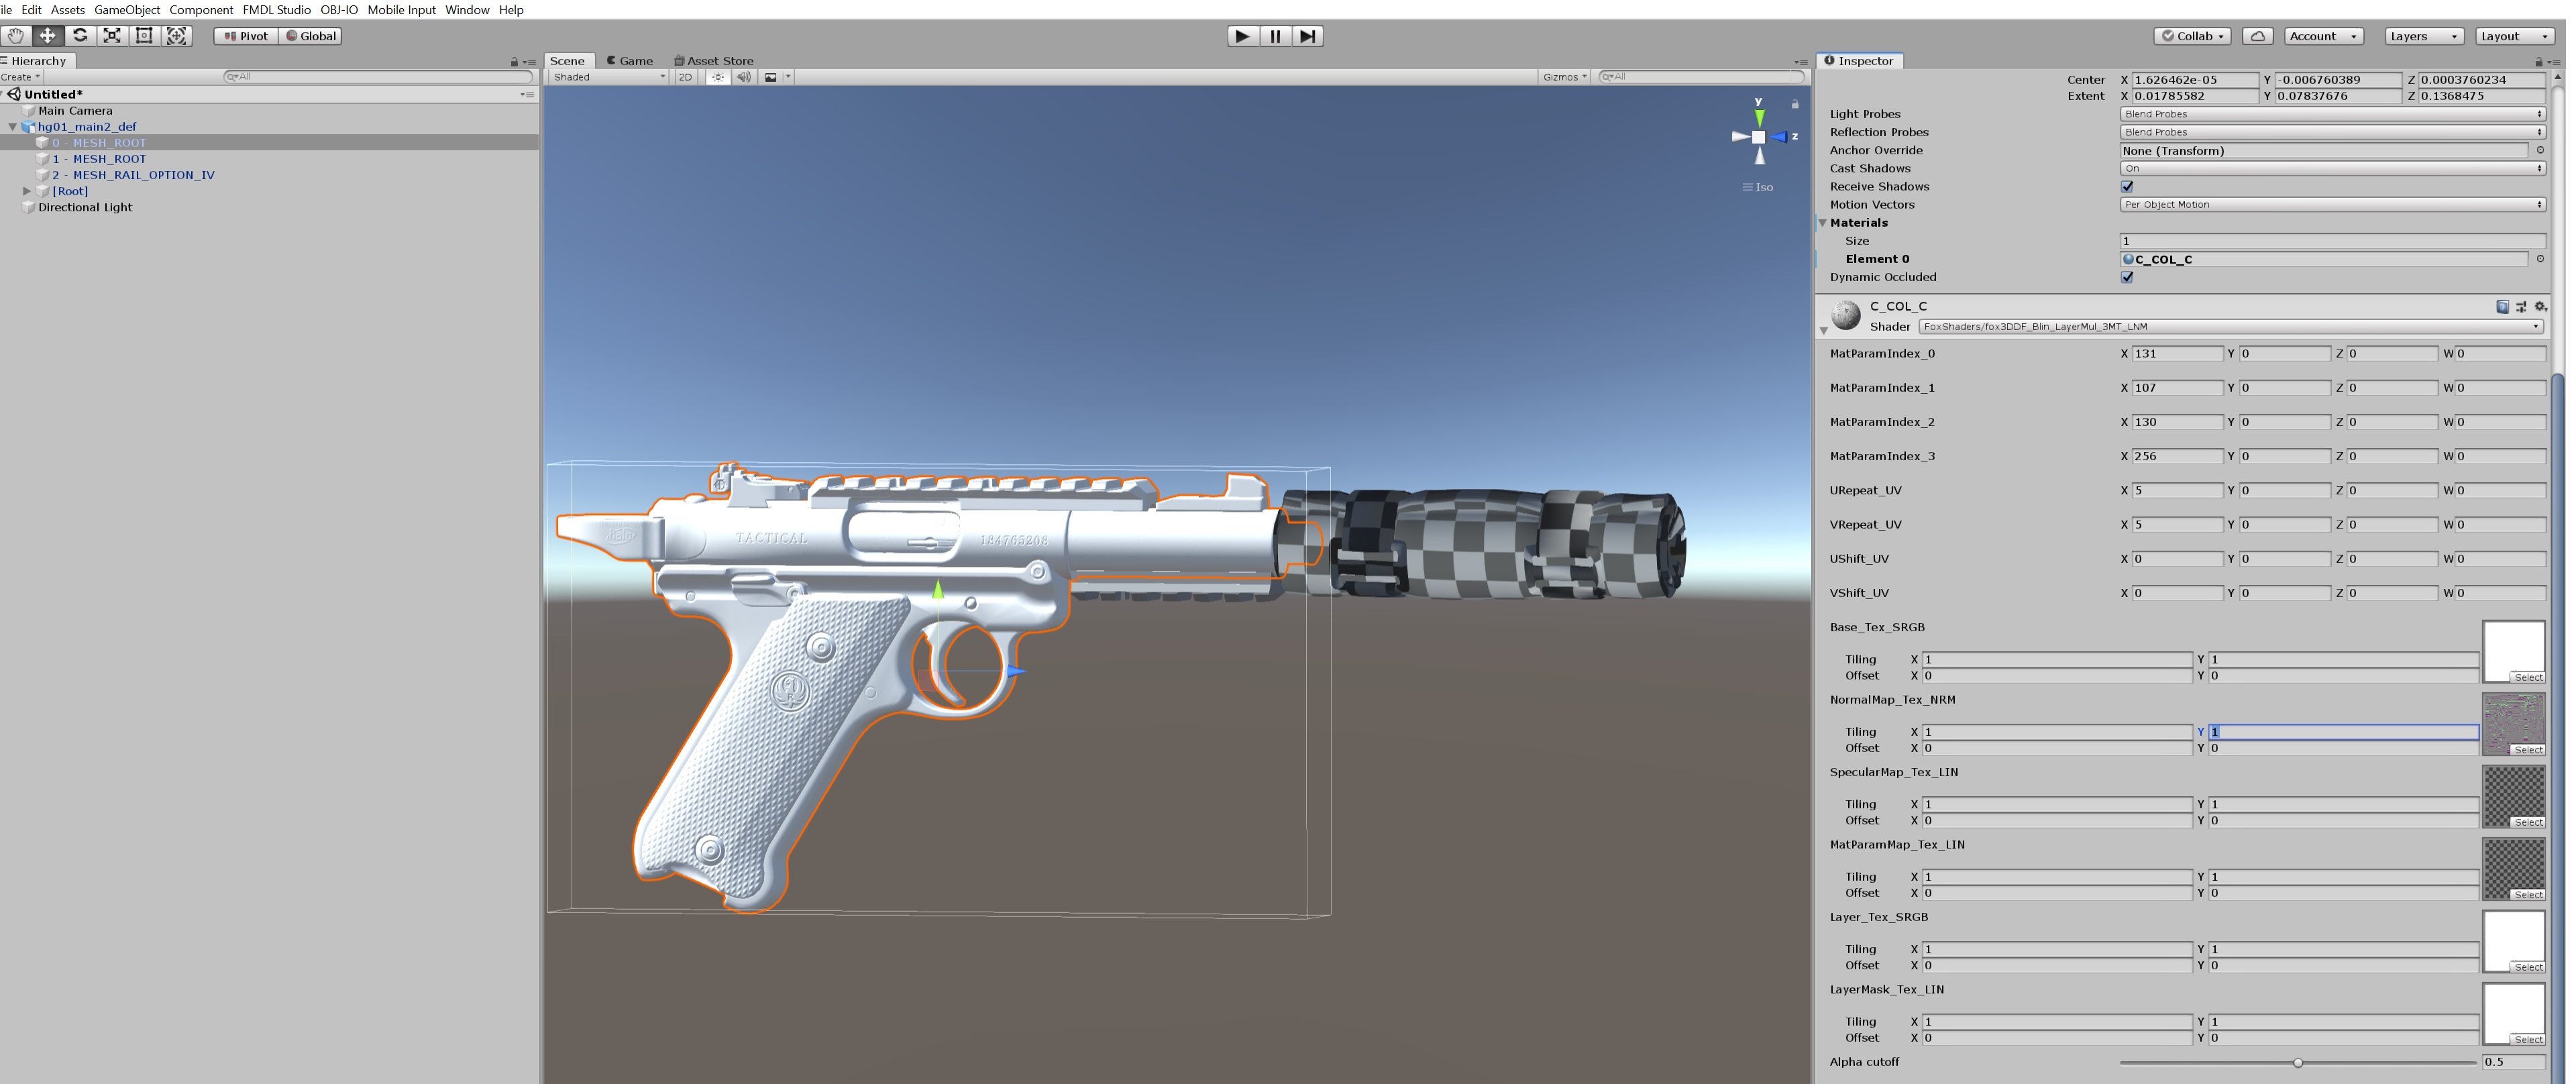
Make sure you have set up your fmdl parameters and export the model as
you would with any fmdl.
Now you need to find the specific weapons .fcnp and .fv2 files
The fcnp file should be in the same location as the .fmdl.
The .fv2 files should be assets/tpp/fova/weapon
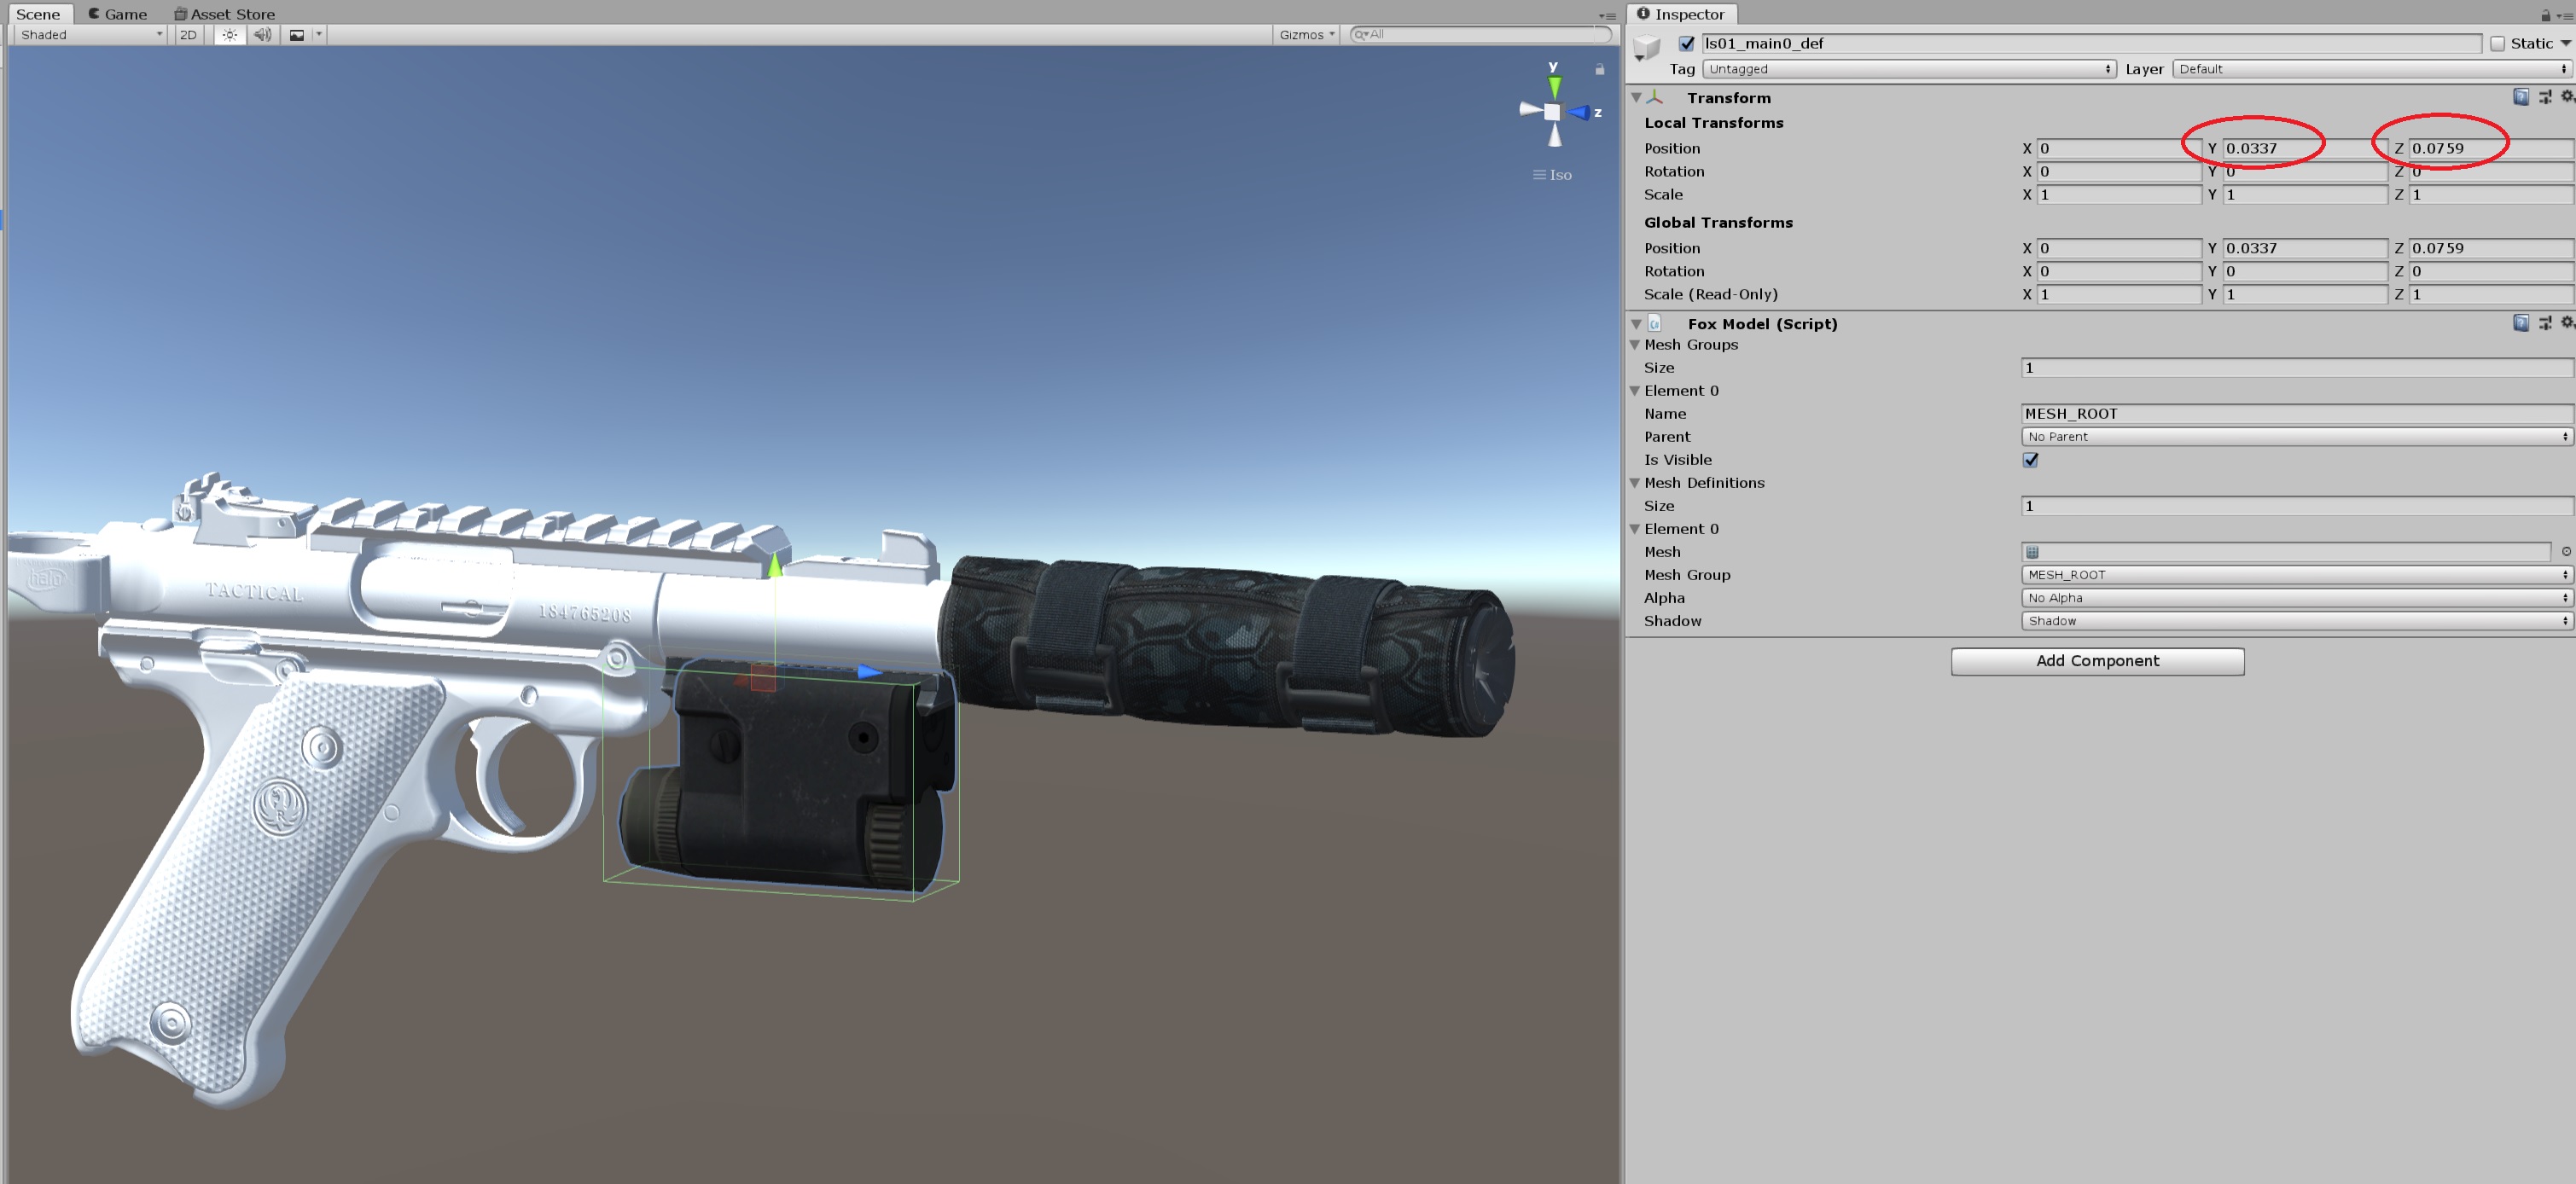
Now drag your fcnp file onto the fcnp tool and open the xml file it generates.
Load a attachment into fmdl studio together with your custom weapon.
Move the attachment to where you want it attached to the gun and copy
the coordinates from it into the xml file.
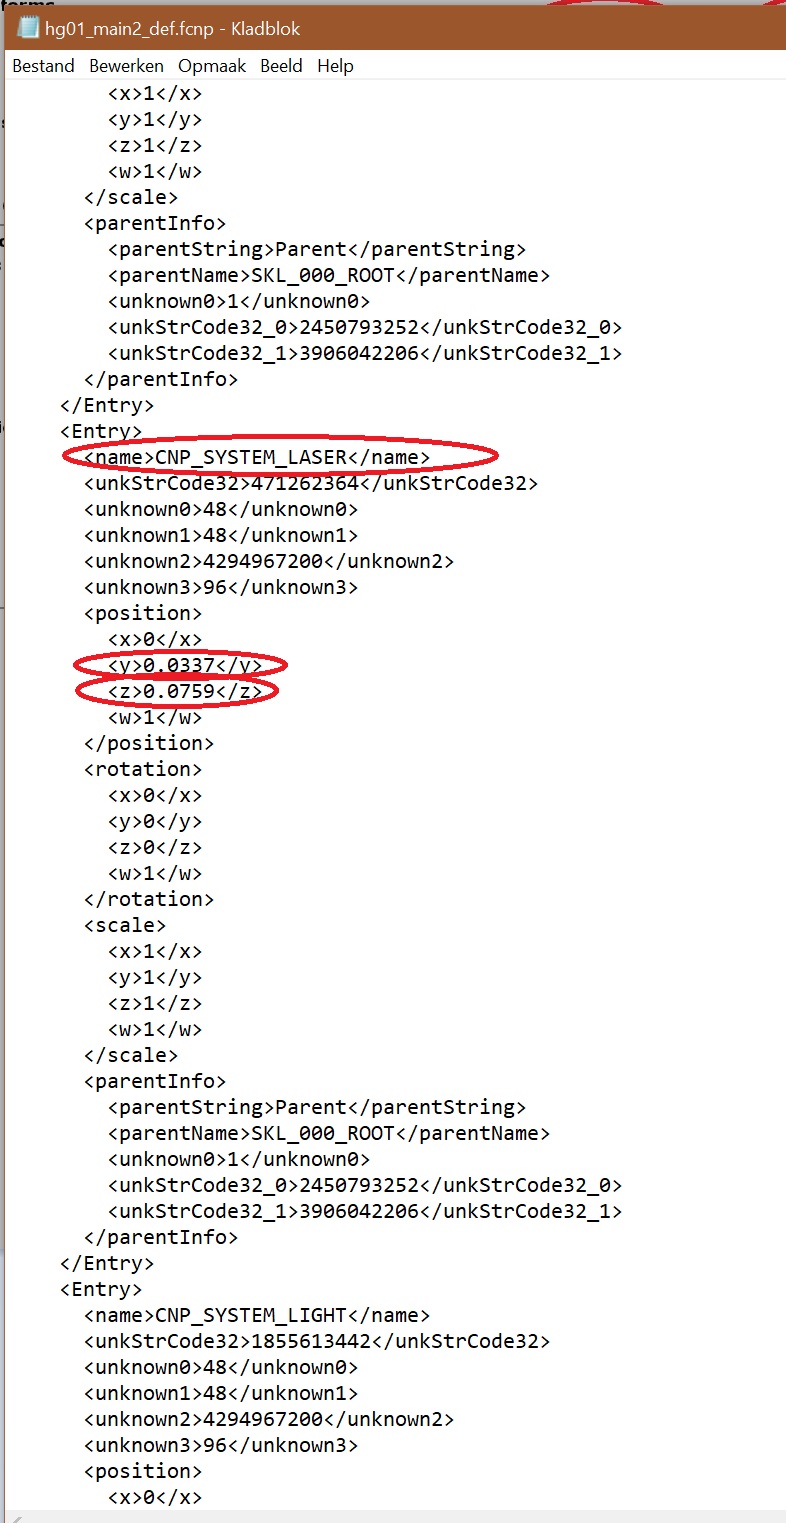
Now when you have all attachments done save the xml file and drag it over the fcnp tool again.
This method will also be used to align the iron sights but this has to be done by just trying to get the right values as you can set those in fmdl studio.
Now open the fv2 files with the fv2 tool and edit the texture paths to
your custom textures in the external files tab.

Do this for all 3 the fv2 files, main is base colors/cam is for the camo overlay/clv is for the solid color camos.
When the fv2 files are done you can use file proliferator to make your files ready for in the game.
Be sure to also put your .ftex files in the right folder.
Make a .mgsv file with make bite and install with snake bite and test your weapon.
I will also include a video here made by TrikzMe with some help from me on how to do this, although the video doesn’t cover everything.