FILTERLUT Texture Guide
Contents
Contents: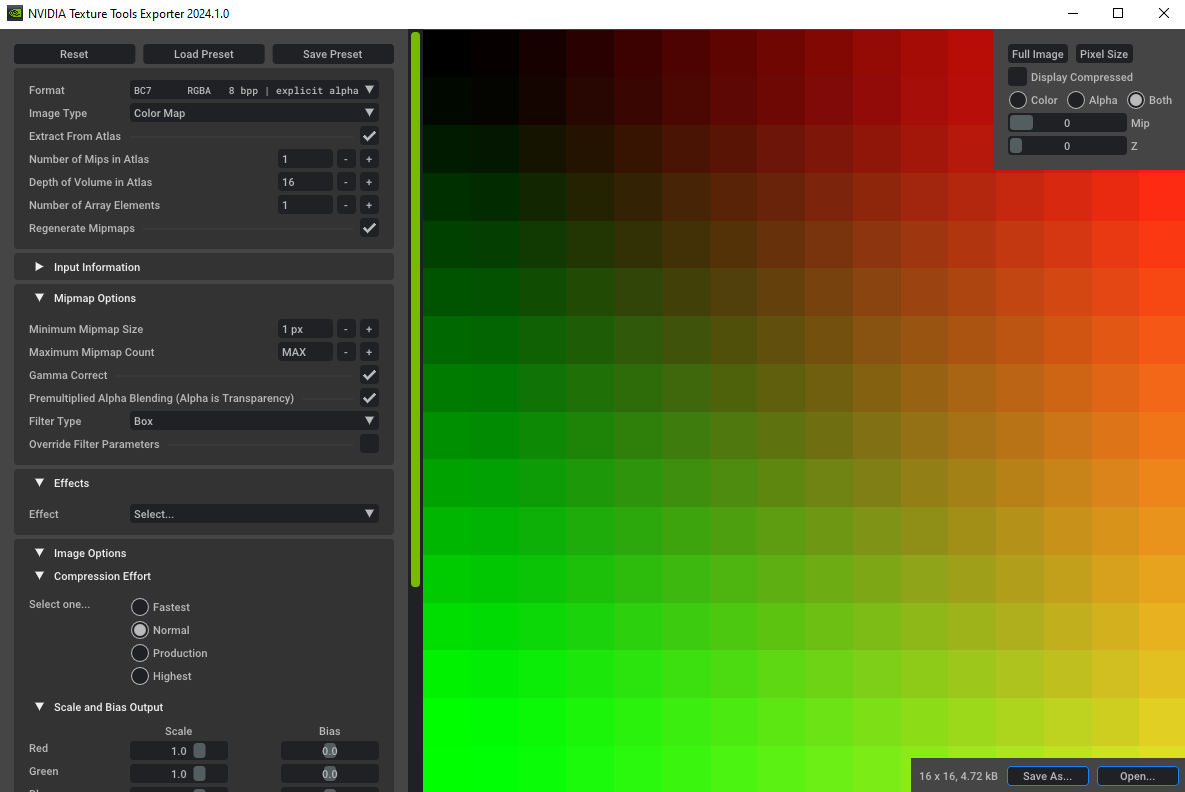
| *This guide was written a long time ago for an inquisitive user who wanted to learn more about the steps for creating I Can’t Believe It’s Not ReShade. It touches on the different lookup tables that are in the base game, their interactions (stacking) with each other, and how to save the changes with Photoshop’s DDS Plugin. FILTERLUT files use a special format: 8.8.8.8 ARGB 32 bpp | unsigned / BC7. This format is unsupported in GIMP (as of 2.10.38), thus the Adobe Photoshop Plugin is recommended for editing lookup tables.* |
What They Do, Where to Find Them
LUTs are the in-game color processing. For example, Night Vision Goggles turn everything green, fixing a critical injury de-saturates red colors, the FOXDIE gimmick in Ground Zeroes makes the colors go crazy — that’s handled using LUTs. These filters can be modified to make mods like ICBINR and the OniVision Goggles, but the process is a bit different from conventional texture modding.
Most of TPP’s filters are found in:
Assets\tpp\pack\resident\resident.pftxs
After unpacking resident00.pftxs, navigate to:
resident00_pftxs\Assets\tpp\effect\gr_pic\lut\
You’ll find 6 filter lookup tables.
FILTERLUTs don’t have mipmaps, so there’s only going to be a .ftex and a .1.ftexs file for each of them. Convert them with ftex tool (note: ftextool versions before v0.3.3 did not support A8R8G8B8. v0.3.3 specifically fixed FILTERLUT modding) and open up the .dds texture with Photoshop. It’ll look like 16 tiles ranging from black/green/red to white/blue/purple.

In-Game Effects
Here’s my current understanding of how the filters are set up:
- Filters behave like layers. Most areas in TPP will have multiple filters stacked on top of one another. In this sense, the final filter is the one that determines the final colors you see in-game for that particular area.
common_base_a_FILTERLUTis the base filter for TPP — typically used as a preliminary layer. Daytime Afghanistan, the sortie prep/customization menus, and Mother Base(?) use this as a first-pass filter.- In particular, the Sortie Prep menu and nighttime Afghanistan only use
common_base. These two places usecommon_baseas their final layer.
- In particular, the Sortie Prep menu and nighttime Afghanistan only use
common_clearSky_a_FILTERLUTis the final filter for daytime Afghanistan — the “piss filter,” as people liked to call it. This filter is also used in the mission Pitch Dark, Episode 13. For that mission, the filter is applied throughout the day and night cycle in Africa.mtbs_2014E3_a_FILTERLUTappears to be the final filter for Mother Base, both daytime and nighttime.common_dmg_a_FILTERLUT,common_dmg_b_FILTERLUT, andcommon_outarea_a_FILTERLUTaffect the low-health, post-severe injury treatment, and out of AO colors respectively.mafr_clearSky_a_FILTERLUTis the final filter for Africa, both daytime and nighttime.mafr_lab_tgs_FILTERLUTis the final filter for the Lufwa Valley Jungle area.
Note: mafr_clearSky_a_FILTERLUT and mafr_lab_tgs_FILTERLUT are not originally packed within resident00.pftxs. To grab the originals, you’ll need to check inside:
Assets\tpp\pack\location\mafr\pack_common\mafr_common.pftxs
In Summary:
- Afghanistan Day: Pre-filtered Render →
common_base_a_FILTERLUT→common_clearSky_a_FILTERLUT→ End Result - Afghanistan Night: Pre-filtered Render →
common_base_a_FILTERLUT→ End Result - Africa Day + Night: Pre-filtered Render →
mafr_clearSky_a_FILTERLUT→ End Result - Pitch Dark (Episode 13) Day + Night: Pre-filtered Render →
common_clearSky_a_FILTERLUT→ End Result - Lufwa Valley: Pre-filtered Render →
mafr_clearSky_a_FILTERLUT→mafr_lab_tgs_FILTERLUT→ End Result - Sortie Prep / Customization Menus: Pre-filtered Render →
common_base_a_FILTERLUT→ End Result - Mother Base: Pre-filtered Render →
common_base_a_FILTERLUT→mtbs_2014E3_a_FILTERLUT→ End Result
Misc. Filters & Speculation:
- Filters like the Night Vision Goggles (
common_nvg_a_FILTERLUT) and the Shining Lights “Wolbachia(?) Vision Goggles” (common_wvg_a_FILTERLUT) are appended to the end of these filter pass-throughs to achieve their visuals. - Cyprus has its own set of filters:
cypr_saturation_m80_FILTERLUTCyFilm_noRed_FILTERLUTCyFilm_FILTERLUTCyFilm_Day_FILTERLUT
CyFilm_Day_FILTERLUTis likely the filter applied to the game’s final cutscene (Cyprus morning), but I have not tested with it.CyFilm_noRedis likely the filter that’s applied when Snake is blown back by The Man On Fire when crawling towards the elevator.- I’ve also found
TFGreenFinal_DD10_FILTERLUT,TFGreenFinal_DD30_FILTERLUT, andTFGreenFinal_FILTERLUTin the textures, though I haven’t confirmed how/where they are used, if at all.
Modding LUTs
If you plan on reworking multiple LUTs, my approach was to edit common_base_a_FILTERLUT first, until I was happy with how the sortie prep and Afghanistan night looked, and then move onto the other filters.
When tweaking a lookup table, I would:
- Take screenshots from in-game that used the LUT I wanted to edit.
- Bring those screenshots into Photoshop.
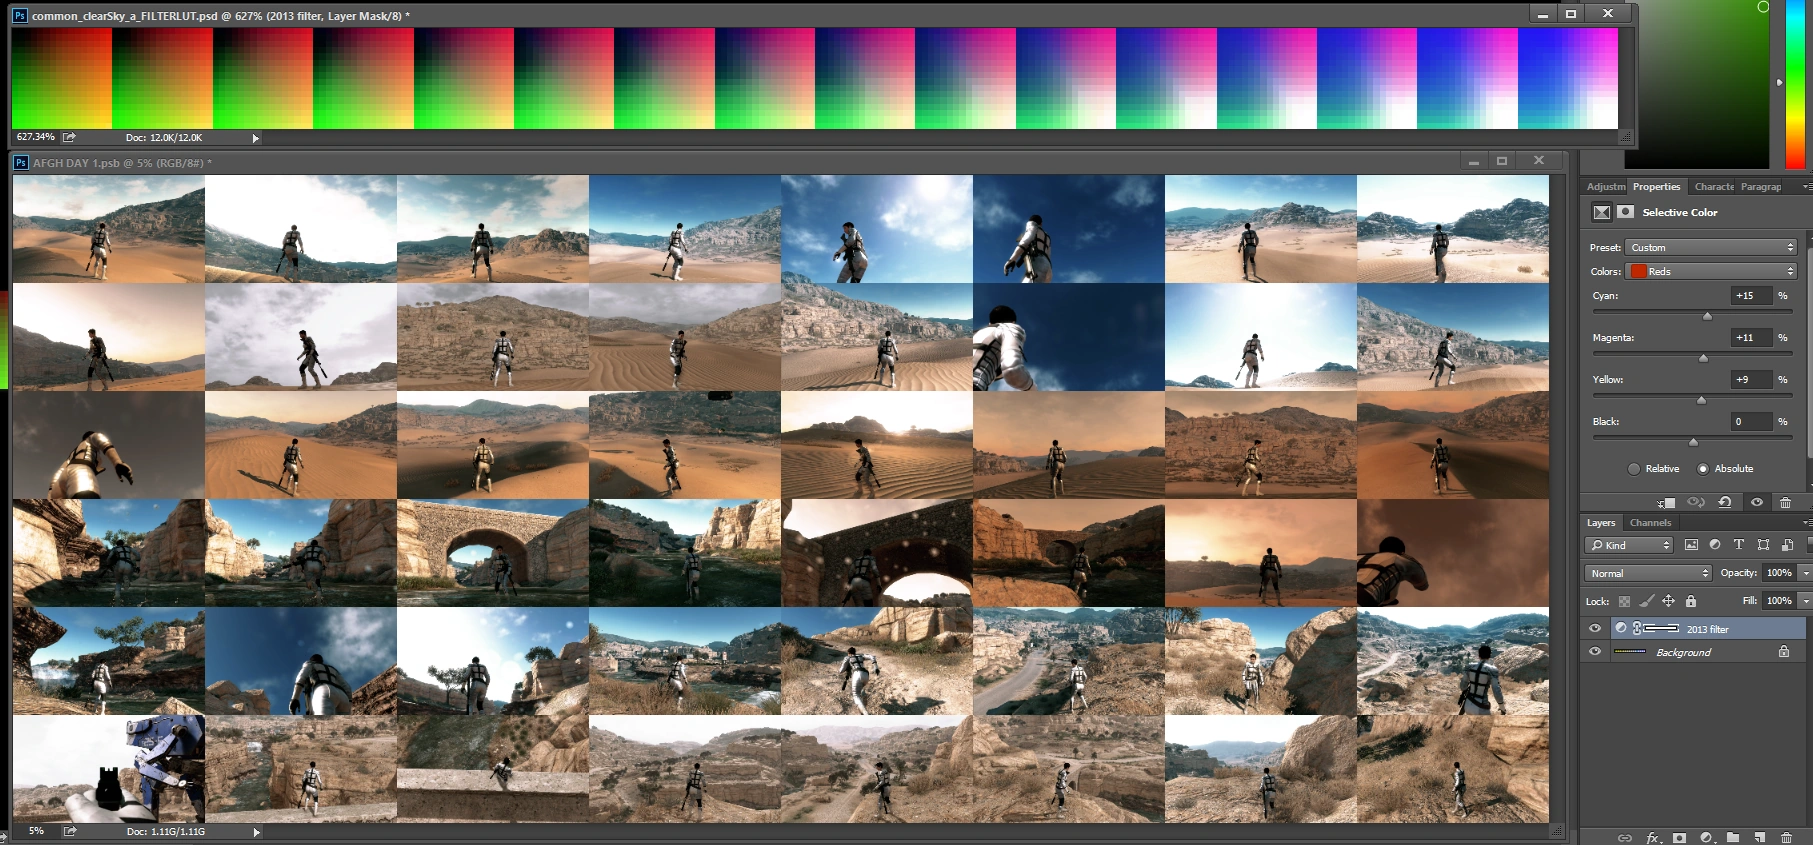
- Use the Selective Color adjustment and Hue/Saturation adjustments to get the colors the way I liked.
Example:
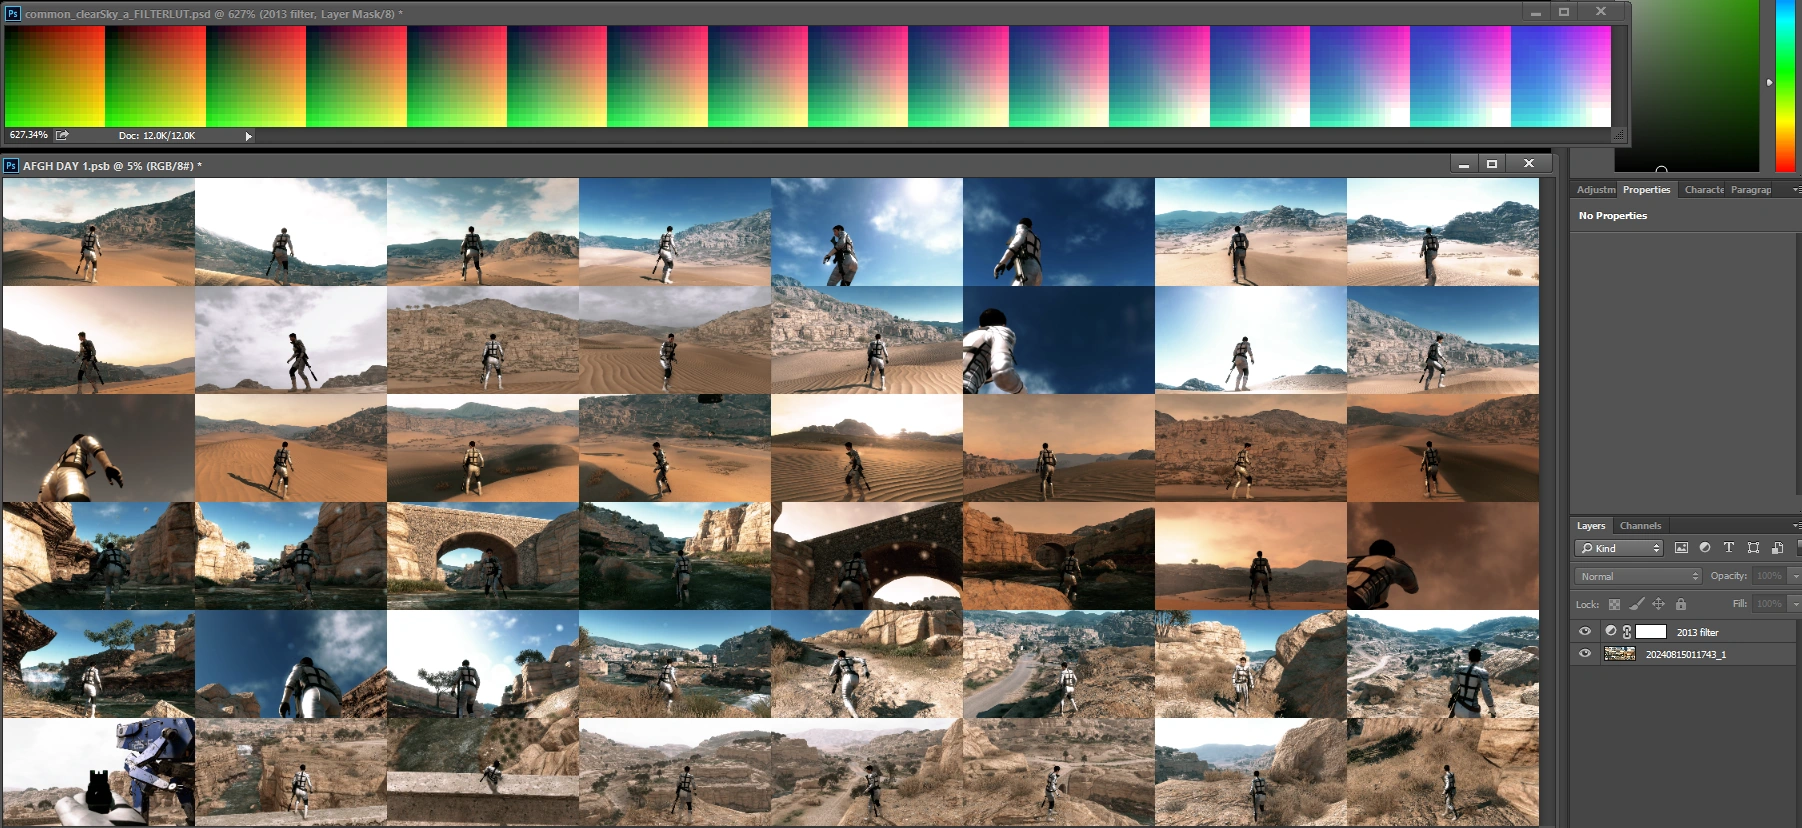
Once I had the changes, I would drag and drop the adjustment layer from the screenshot onto the LUT texture:
When you’re finished with an edit:
-
Save the .ddsas “8.8.8.8 ARGB 32 bppunsigned” - Save it as a Volume Texture and No MIP maps.
Example:
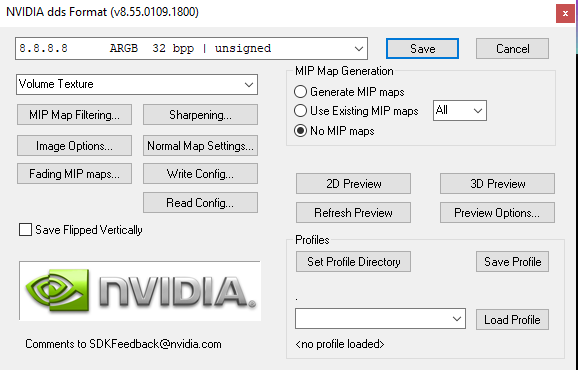
Then:
- Repack the
.pftxs - Build a mod file
- Install it
- Take more screenshots
- Re-tweak the adjustment layer until you’re satisfied with the results.
Remember to work on one filter at a time — if you want to make changes to Afghanistan during the day and the night:
- Take nighttime screenshots first.
- Fine-tune your
common_base_a_FILTERLUT. - Then take your daytime screenshots with your modified
common_base_a_FILTERLUTapplied. - That way, the daytime screenshots will accurately convey how the
common_clearSky_a_FILTERLUTwill look when layered on top.
Keep in mind:
common_clearSky_a_FILTERLUTis also featured in Pitch Dark, even at nighttime, so you’ll want to take some screenshots from that mission as well.