Hair Materials
Contents
Contents:Do you want the hair on your custom model to look awesome?
Well here’s a guide to help you!
This guide is only dedicated to explaining the individual hair texture maps the game uses and how to create them and what shaders to use.
Requirements
Please make sure to check out this YouTube playlist first before going through this guide! We are assuming you already have a more or less idea on how to add textures to models and export them!
Texture maps
There would be no point in just demonstrating without explaining what the textures do and how they work, so let’s get that out of the way first.
The game uses one hair shader most of the time, although there are instances where it will use a normal skin shader instead of a hair shader. This is only used when you might want to add a normal map for the hair, but it’s been noted that the effect won’t look as good as the dedicated hair shader that most vanilla models use. Miller’s hair uses a skin shader to have a normal map give the strands depth, which is another way to make hair look messy. Unfortunately, the game doesn’t have a shader that supports both a normal map (NRM) texture and a shift texture (SHM).
First, let’s understand what texture maps Fox engine uses for hair materials.
| FMDL Studion texture Names | Sufixes | Compression Format |
|---|---|---|
| Base_Tex_SRGB | bsm | DXT5 |
| SpecularMap_Tex_LIN | srm | DXT1 |
| Translucent_Tex_LIN | trm | DXT1 |
| Shift_Tex_LIN | shm | DXT1 |
Let’s explore each texture!
Base_Tex_SRGB (bsm)
The base texture is prefixed with ‘bsm’ (base colour map, or diffuse) and gives your custom hair model its colouring on the hair strands. The texture will be saved in the compression format of DXT5 and that goes for any texture that contains an alpha map, which in this case will be the opacity map.
SpecularMap_Tex_LIN (srm)
The specular map gives your hair its reflection on the material. In this case, we will only be using a roughness map and a specular occlusion map for the SRM texture.
Translucent_Tex_LIN (trm)
The trm map is a fairly important texture to make your hair look snazzy. This map is responsible for the Subsurface Scattering effect that softer materials will have when light hits the material. Instead of deflecting it, it will absorb the light, which will cause the material to glow. What this does is highlights strands giving more depth. Since Fox Engine’s dedicated hair material doesn’t support normal maps, it would end up looking flat. If your trm texture is done correctly it might just give you the edge to make hair look nice and 3D.


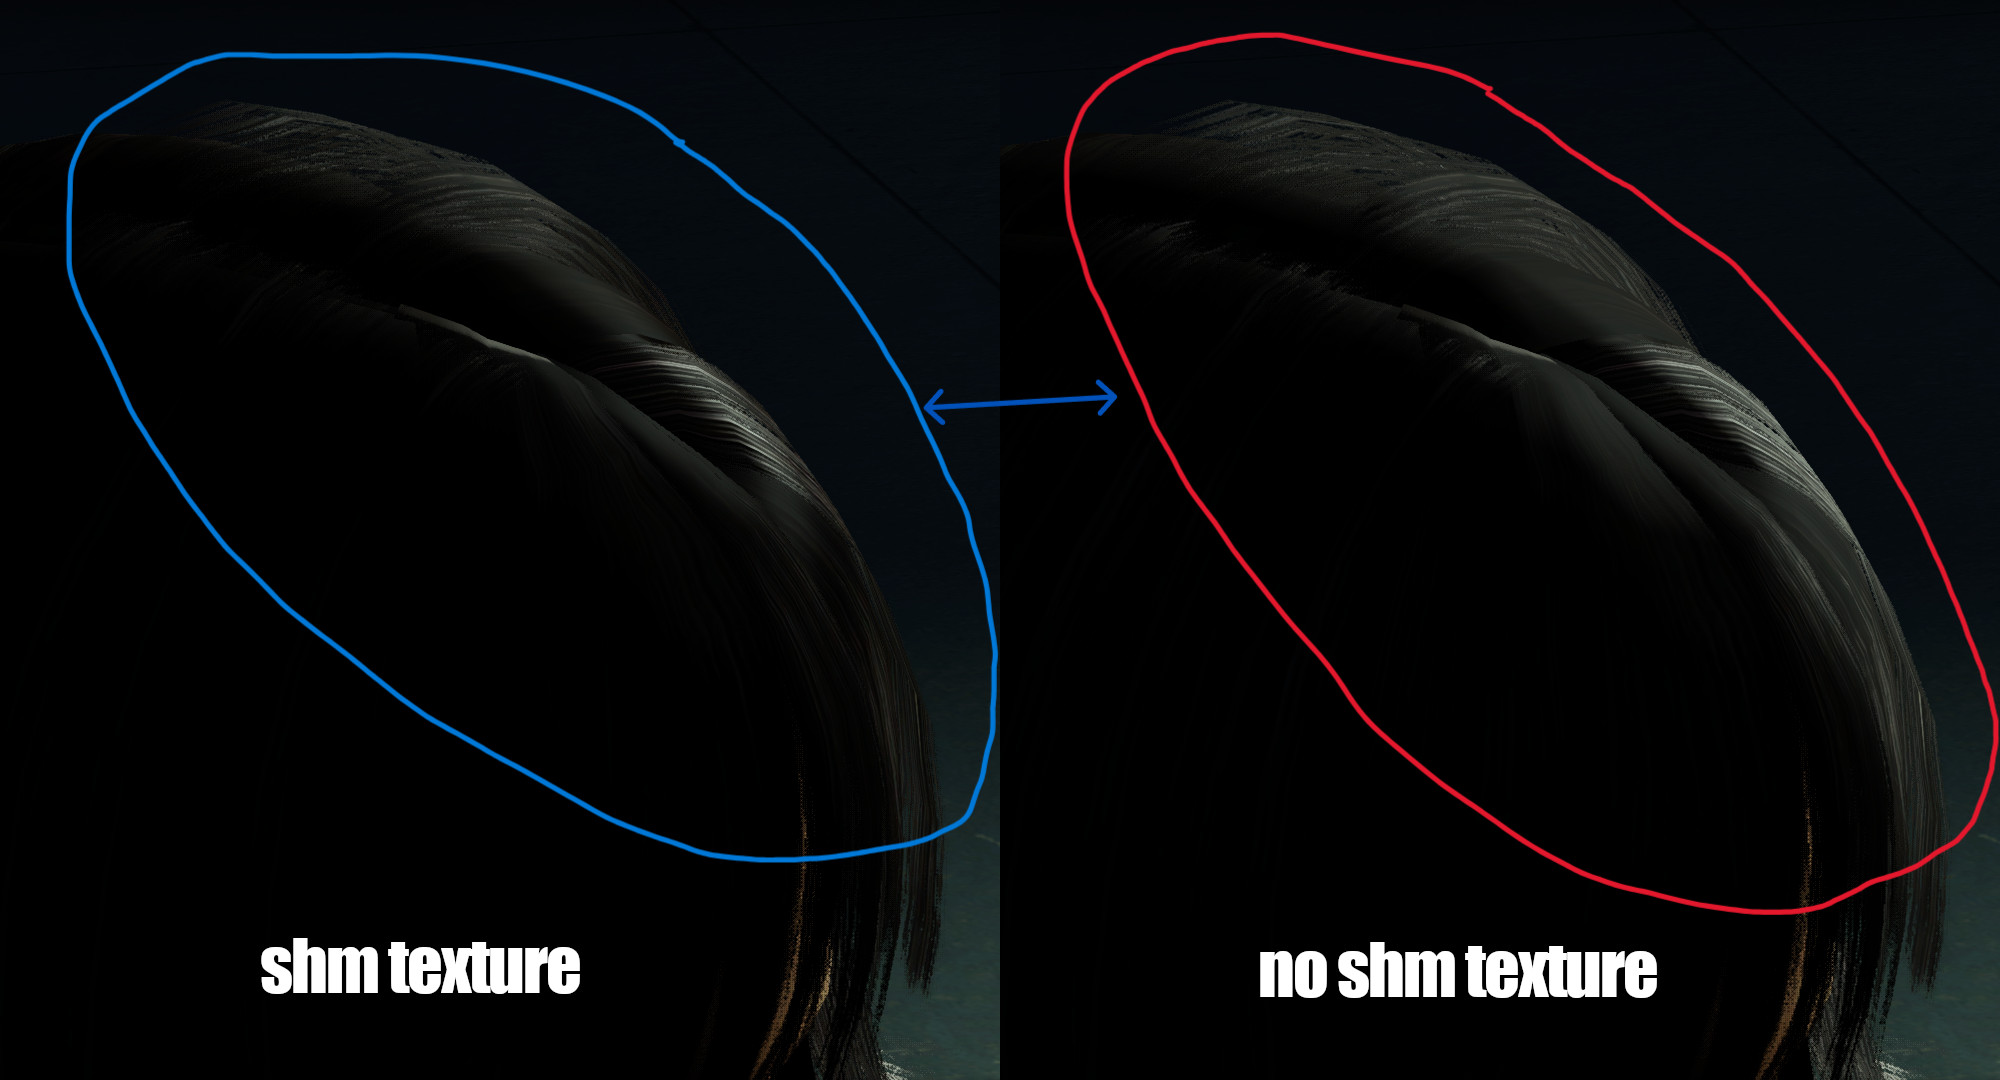
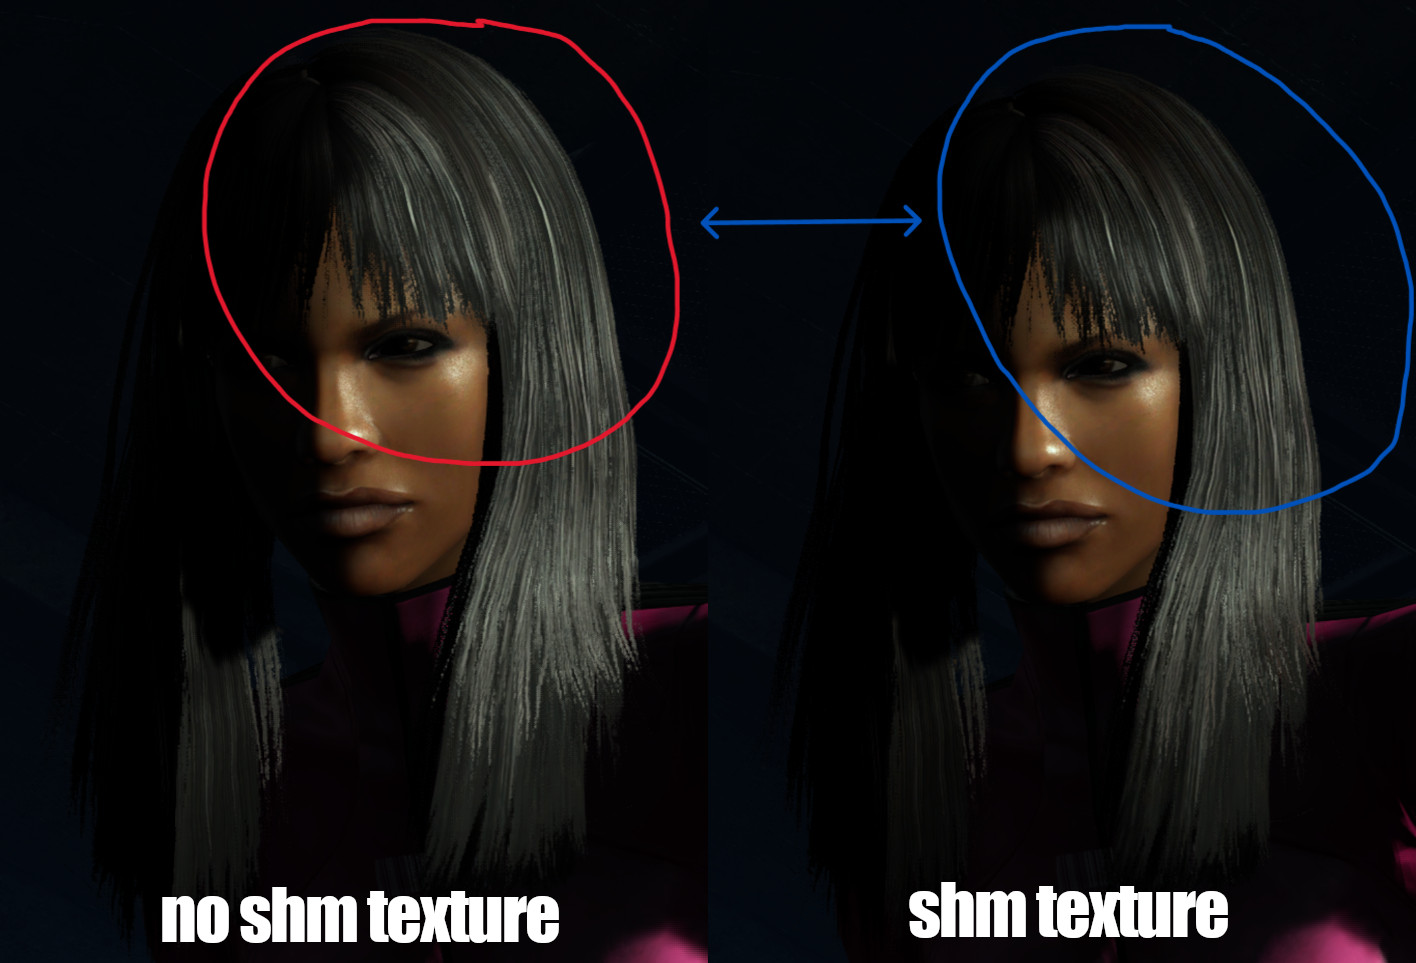
Shift_Tex_LIN (shm)
The shm is responsible for the anisotropic diffusion. This gives the hair a bright reflection. Real life hair has a shiny reflection to it. People with longer hair, ponytails for example will really give off the anisotropic effect. The same is true with weed in weed fields, giving the same effects. The important part of this texture is it can practically highlight individual strands giving it a better in depth look, highlighting strands and deflecting light with more contrast and sharpness. Good example is the small grey hairs you might see when you are getting older they will pop-out and shine more than the darker one’s with much more reflection to them.
Shaders
The Fox Engine uses the FoxShaders/fox3DDF_Hair shader most of the time. Quiet’s hair shader is designed for her abilities to disappear, but for the most part FoxShaders/fox3DDF_Hair is the preferred one to use.
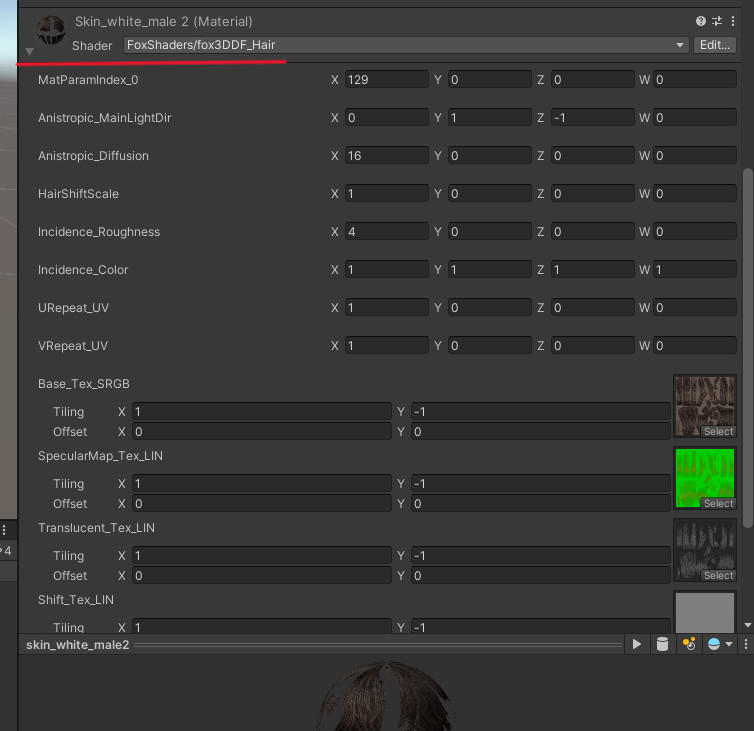
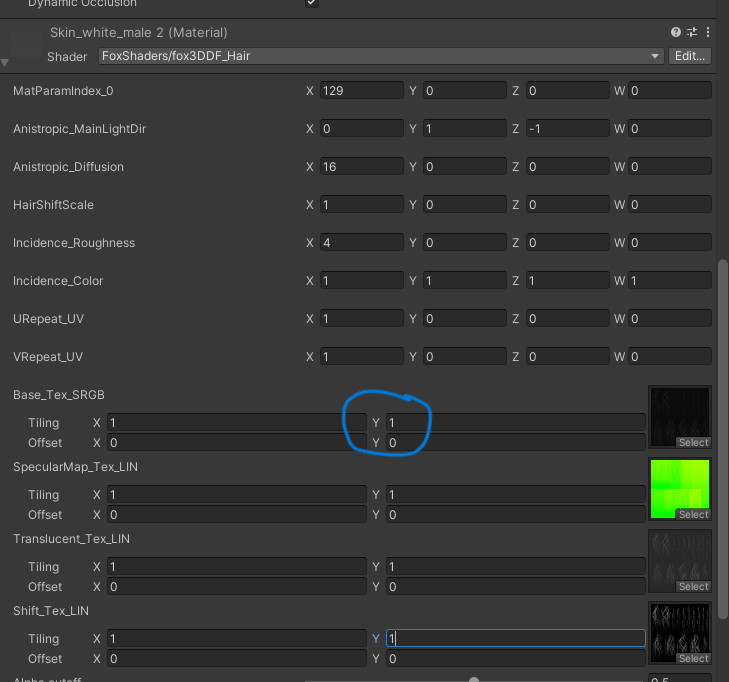
Material settings
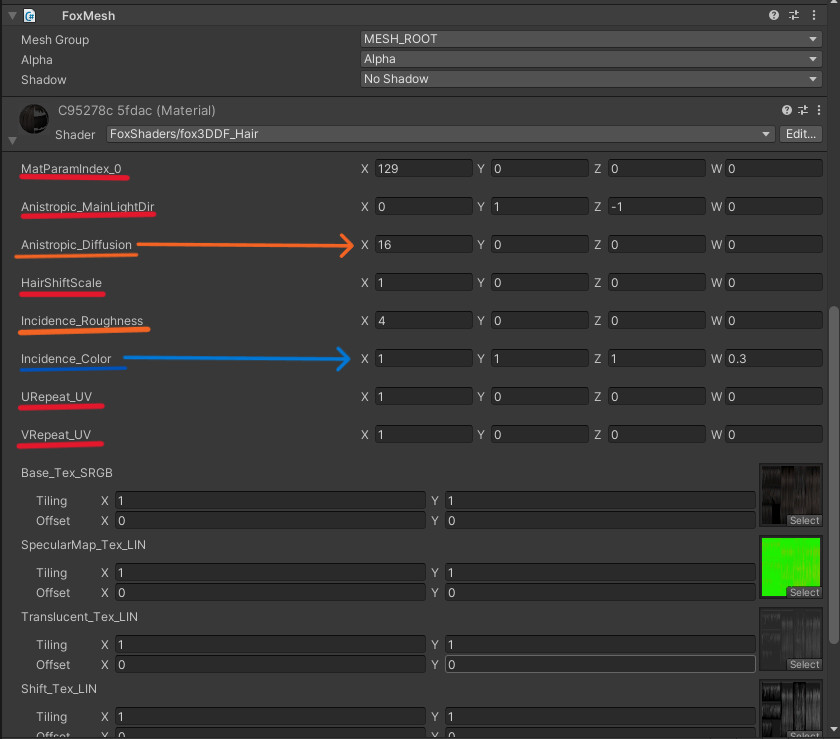
The constant values that never change for hair shaders are underlined in red. The ones underlined with orange are settings you might need to change but it’s depending on what final effect you are looking for! The ones underlined in blue are the ones that might need absolute adjustments but yet again it depends on what you are looking for, which I will explain next.
The settings that’s important to us for the final output that might need adjustments are the Anistropic_Diffusion underlined in orange and the Incidence_Colour underlined in blue.
What do these settings do?
Anistropic_Diffusion:
This determines how strong the anisotropic reflection must be for the hair. This is also affected by how bright your SHM texture is, so you might need to adjust the texture before tampering with the Anistropic_Diffusion value. For the most part, 16 is used for Quiet’s hair while Snake, Ocelot and Paz uses a value of 30, using either one of them will work fine. The higher the number the stronger the reflection effect will be.
Note: anisotropic is spelled Anistropic in game files. This is not a typo.
Incidence_Colour:
Incidence colour is basically the Subsurface Scattering colour in x, y, z values or RGB where x=R, y=G, z=B and w is the strength or Alpha strength of the Subsurface Scattering (SSS). Most hair Incidence_Colours use X, Y, Z values of 1 which will just highlight the hair as a semi white, 1 for all values would be ideal to use for hair colours like black, white and grey while brown and red hair sometimes will have adjusted values. Quiet and Mantis have their own unique Incidence colouring, while Quiets hair has a more brownish highlights to it and Mantis hair highlights has a reddish colouring when light passes through the hair. It is advised to not use a value larger than 1 otherwise the hair will light up like a candle having a balance is always preferred.
Example of the Incidence_Colouring
| Incidence_Colour | X | Y | Z | W |
|---|---|---|---|---|
| White | 1 | 1 | 1 | 0.25 |
| Brown | 0.976 | 1 | 0.996 | 0.25 |
| Light Red | 1 | 0.773 | 0.541 | 0.3 |
You can adjust the W value to be more if you wish to have a larger Subsurface Scattering (SSS) radius on the hair.
Hair naming convention
Before we dive into a practical example take note of the naming convention to use. This isn’t needed but it is good practice to keep a good naming convention when naming your textures for the game.
I like to keep a good practice of exporting the texture with the name tag of chara_hair_bsm
| Texture Map | alias | Example |
|---|---|---|
| diffuse | chara_hair_bsm | sna_hair_bsm |
| specular | chara_hair_srm | sna_hair_srm |
| Translucency | chara_hair_trm | sna_hair_trm |
| Shift text | chara_hair_shm | sna_hair_shm |
Practice
Now that we have an understanding of what we are working with, we can do a practice run.
We can start with converting the textures of our custom model to be properly utilized in Fox Engines material settings.
In the practice example that we will be doing I was using Ashley’s hair (from Resident Evil 4 Remake) over Ada Wong’s head, so I named it ada_hair0_bsm. This is just part of good organizing of texture names.
Diffuse Map (BSM)
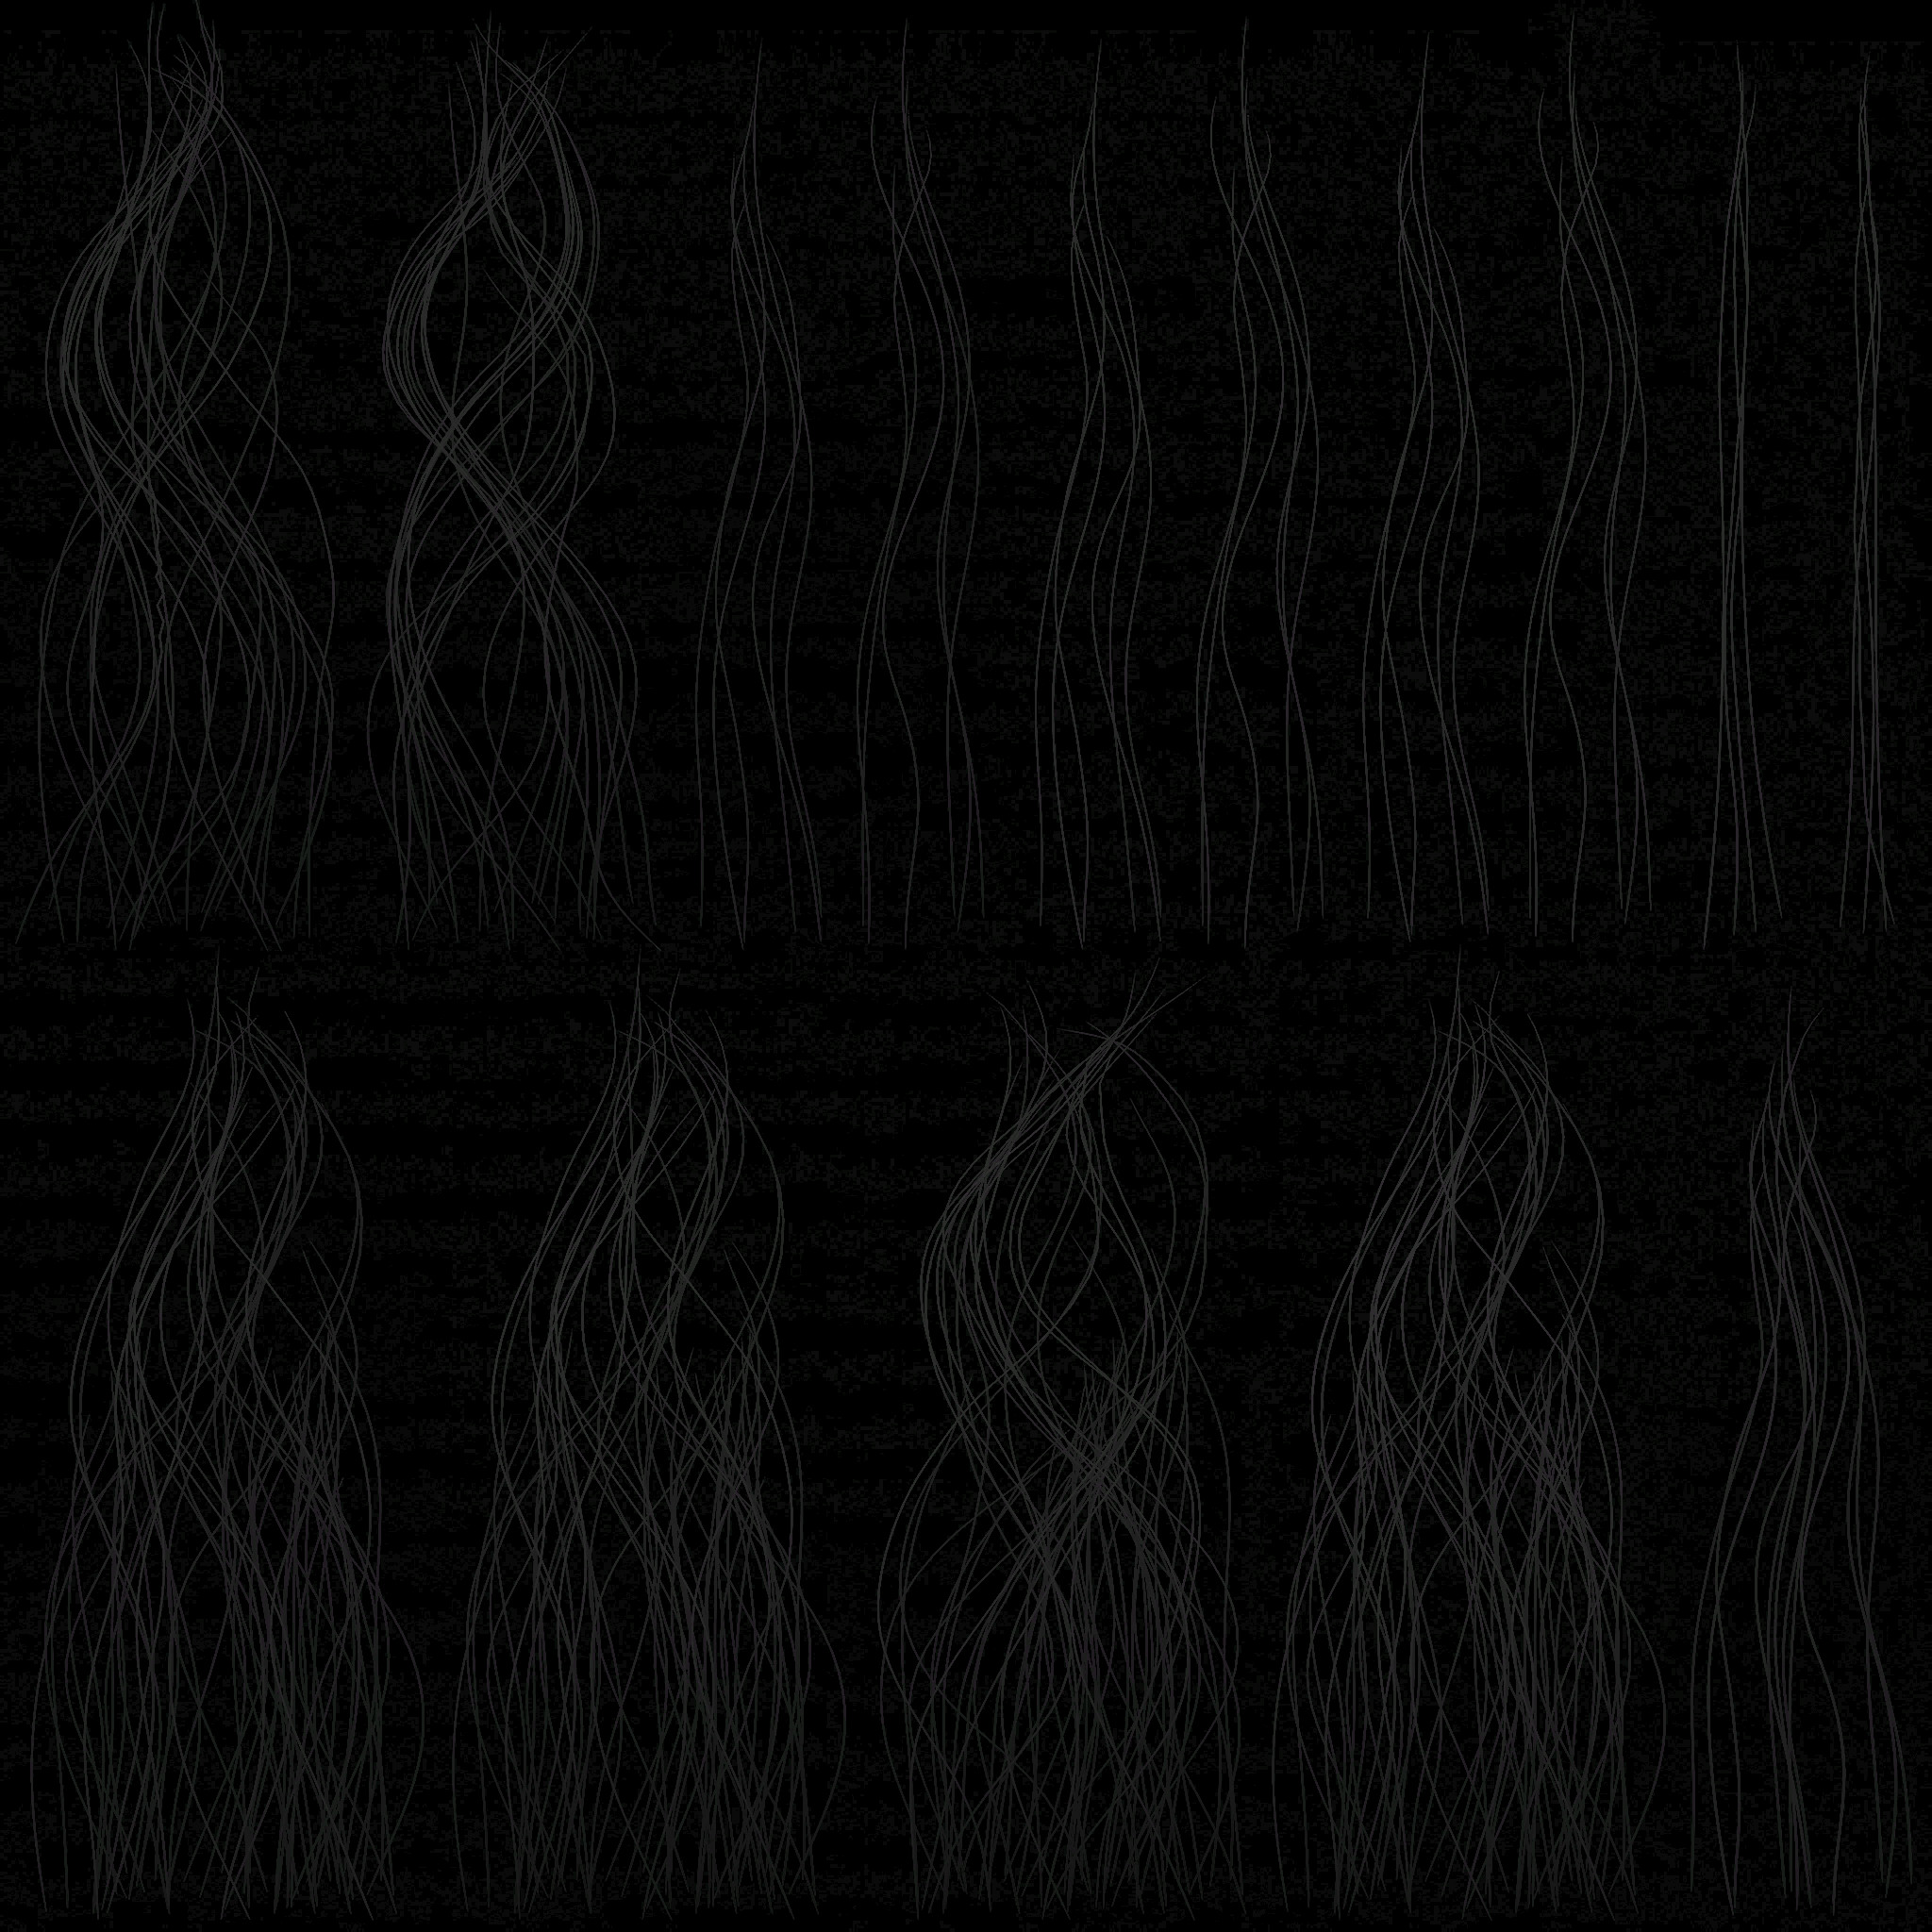
Let’s start with the diffuse map. Depending on what custom hair model you will be using we are going to import the diffuse map into a texture editing program either using GIMP, PhotoShop or Paint.Net. This is the simplest one to do, decompose the RGB values of the diffuse map then compose them as RGBA add the corresponding layers to where they were so RED -> Red channel, BLUE -> Blue Channel and GREEN-> Green Channel only extra channel now is the Alpha texture most games will have the diffuse and Alpha texture separated but some will have them combined like MGSV! The alpha texture will be added to the Alpha channel to add the transparency to the hair.
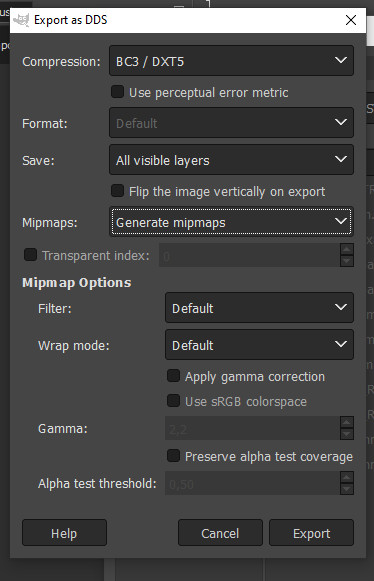
Now that we composed the layers you can export the texture take note of the export settings in the screen shot below, it’s very important!
Specular Map (SRM)
If your custom hair model has a lot of different textures, you’ll have to try and find the roughness map and specular occlusion. This can depend from texture to texture that you have. In my case, I used the base albedo for the red channel, this channel should not be very bright. The only thing in the red channel that must be a little bit bright is the hair strands themselves, so I dragged down the brightness and increased the contrast, which will make the strands brighter but not too much. For the Green channel I took the roughness texture and inverted it, but depending on how it looks some games might have it already inverted. The strands in the green channel are usually darker for the most with the surrounding background being bright white. Basically the inverse of what the red channel has. The srm output with all textures combined should have the hair strands either be a really light yellow or very light grey. For female hair I use a balance between the two for more reflection so the strands would be a light yellow, for males usually I use a specular map that highlights the strands as dark grey for less reflection.
For Example the two pictures down below.
As you can see Ashley’s hair is a bit more yellow than that of Snake’s srm which will give it a bit more reflection.
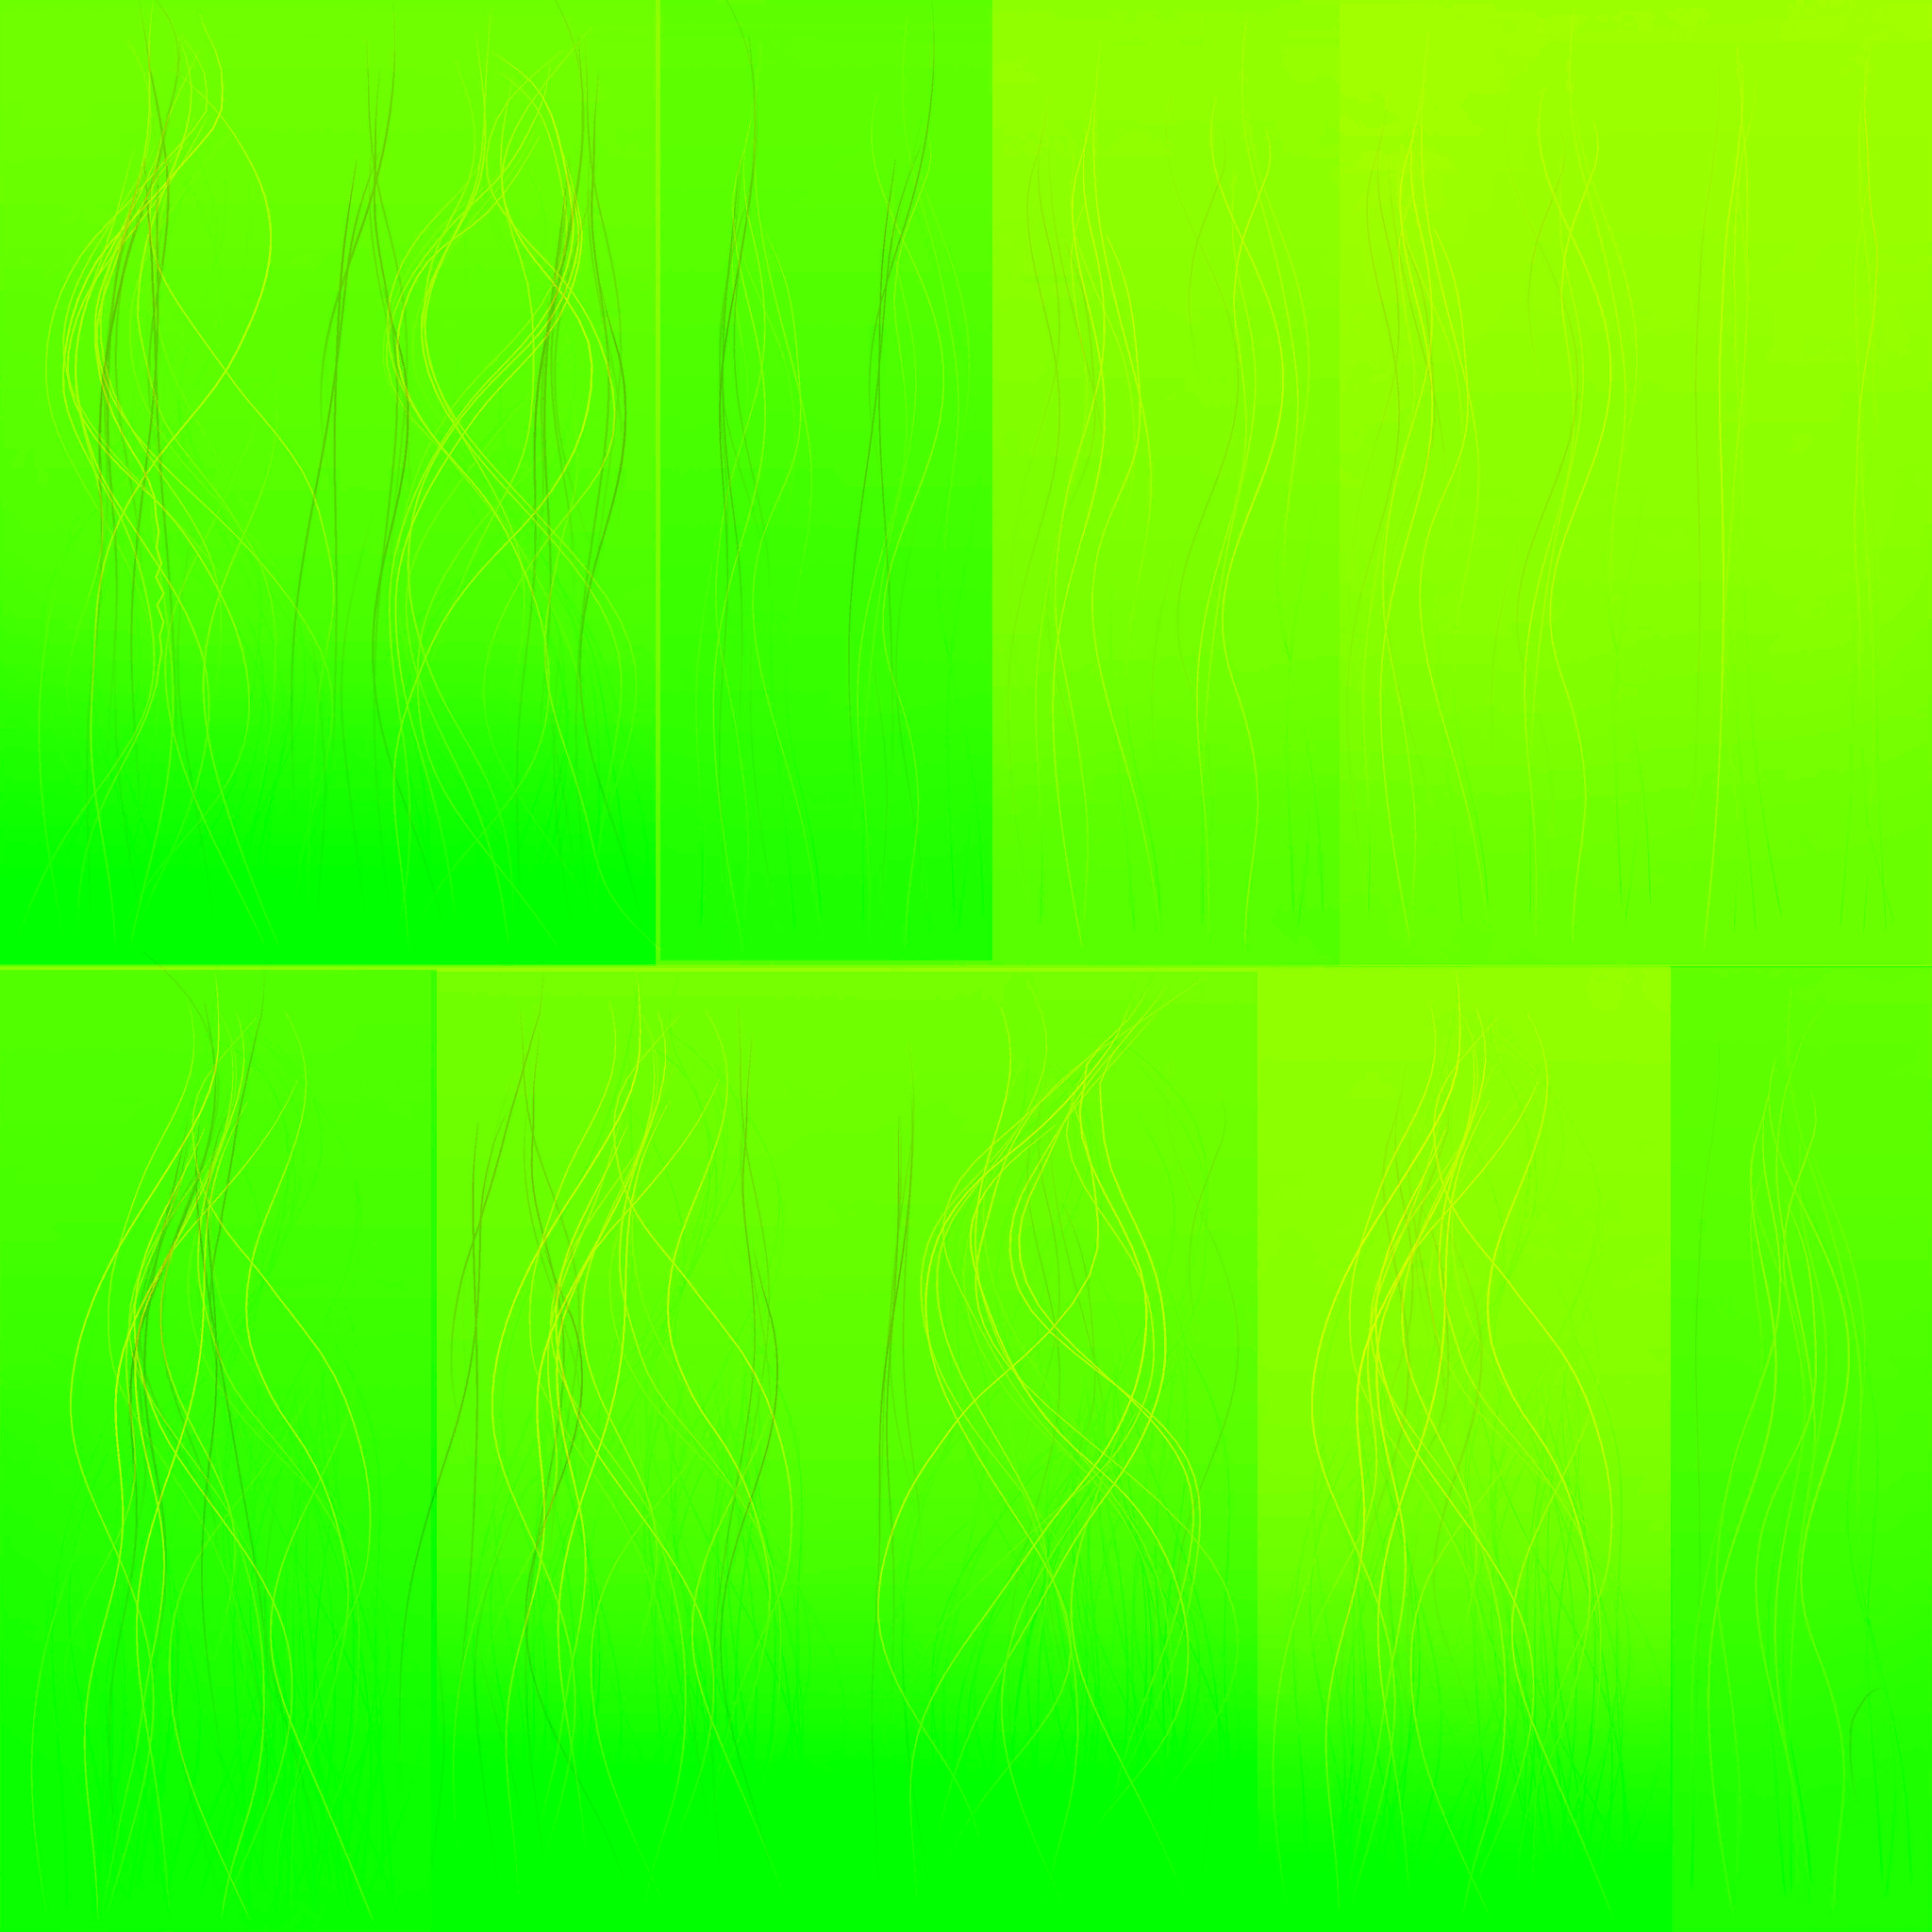
Subsurface Scattering Map (TRM)
Your trm will mostly have a dark grey background, why? The brighter the background colour of the texture the more it will be highlighted. Is this what we want? Not at all, you will see areas glow more that doesn’t have a hair strand there which will look out of place so this is why it might be better to have a way darker background to only highlight the hair strands and not the transparent areas of the hair. In my case the albedo map for Ashley’s hair had a certain amount of strands that were darker than the other which will be ideal to get more depth. I composed a texture map with the albedo as one solid colour which will look grey and added the alpha map in the alpha channel to only have the strands visible. You can create a new image texture of the same size and colour it to a dark grey. Add a new layer in the texture and paste the composed albedo with the alpha texture you made it over the background texture this way they are separated from each other which will make it easier to adjust the strand’s colouring. At first it might not be what we want but that’s ok. You can select the new layer and adjust its brightness I like to have it a bright grey but not too much. Anchor the layer down and that’s all that’s needed. You can export the texture.
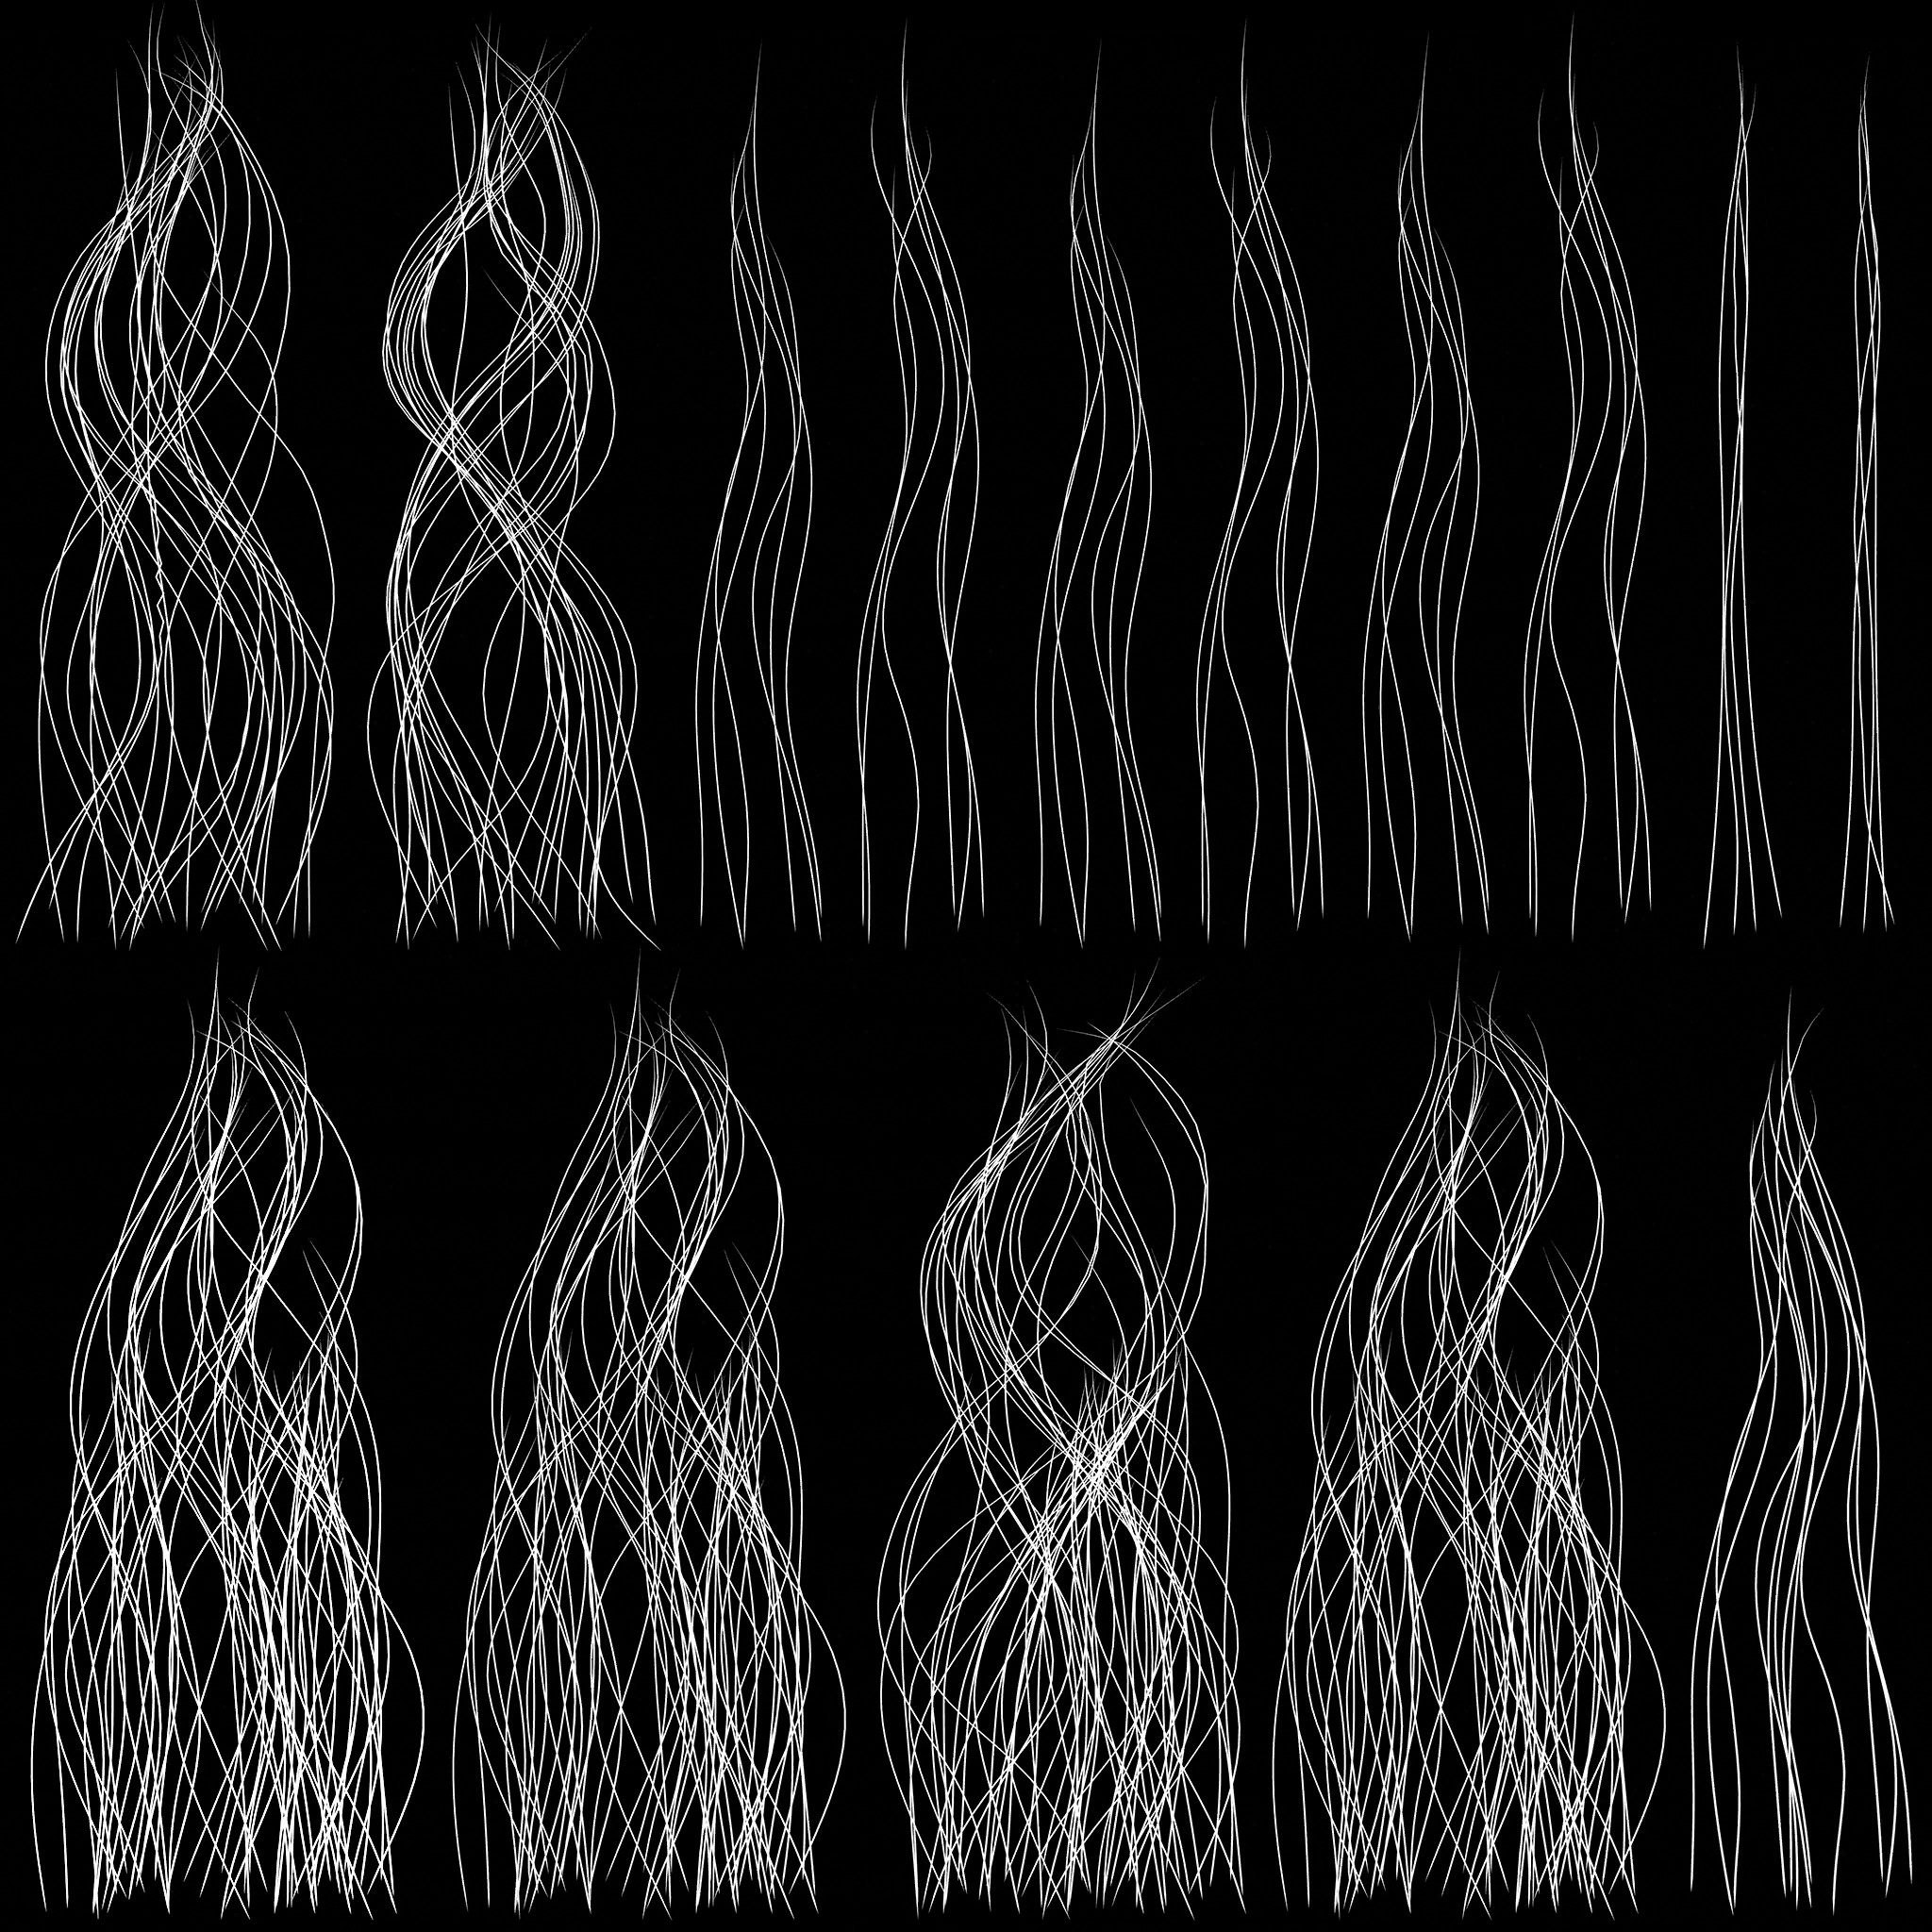
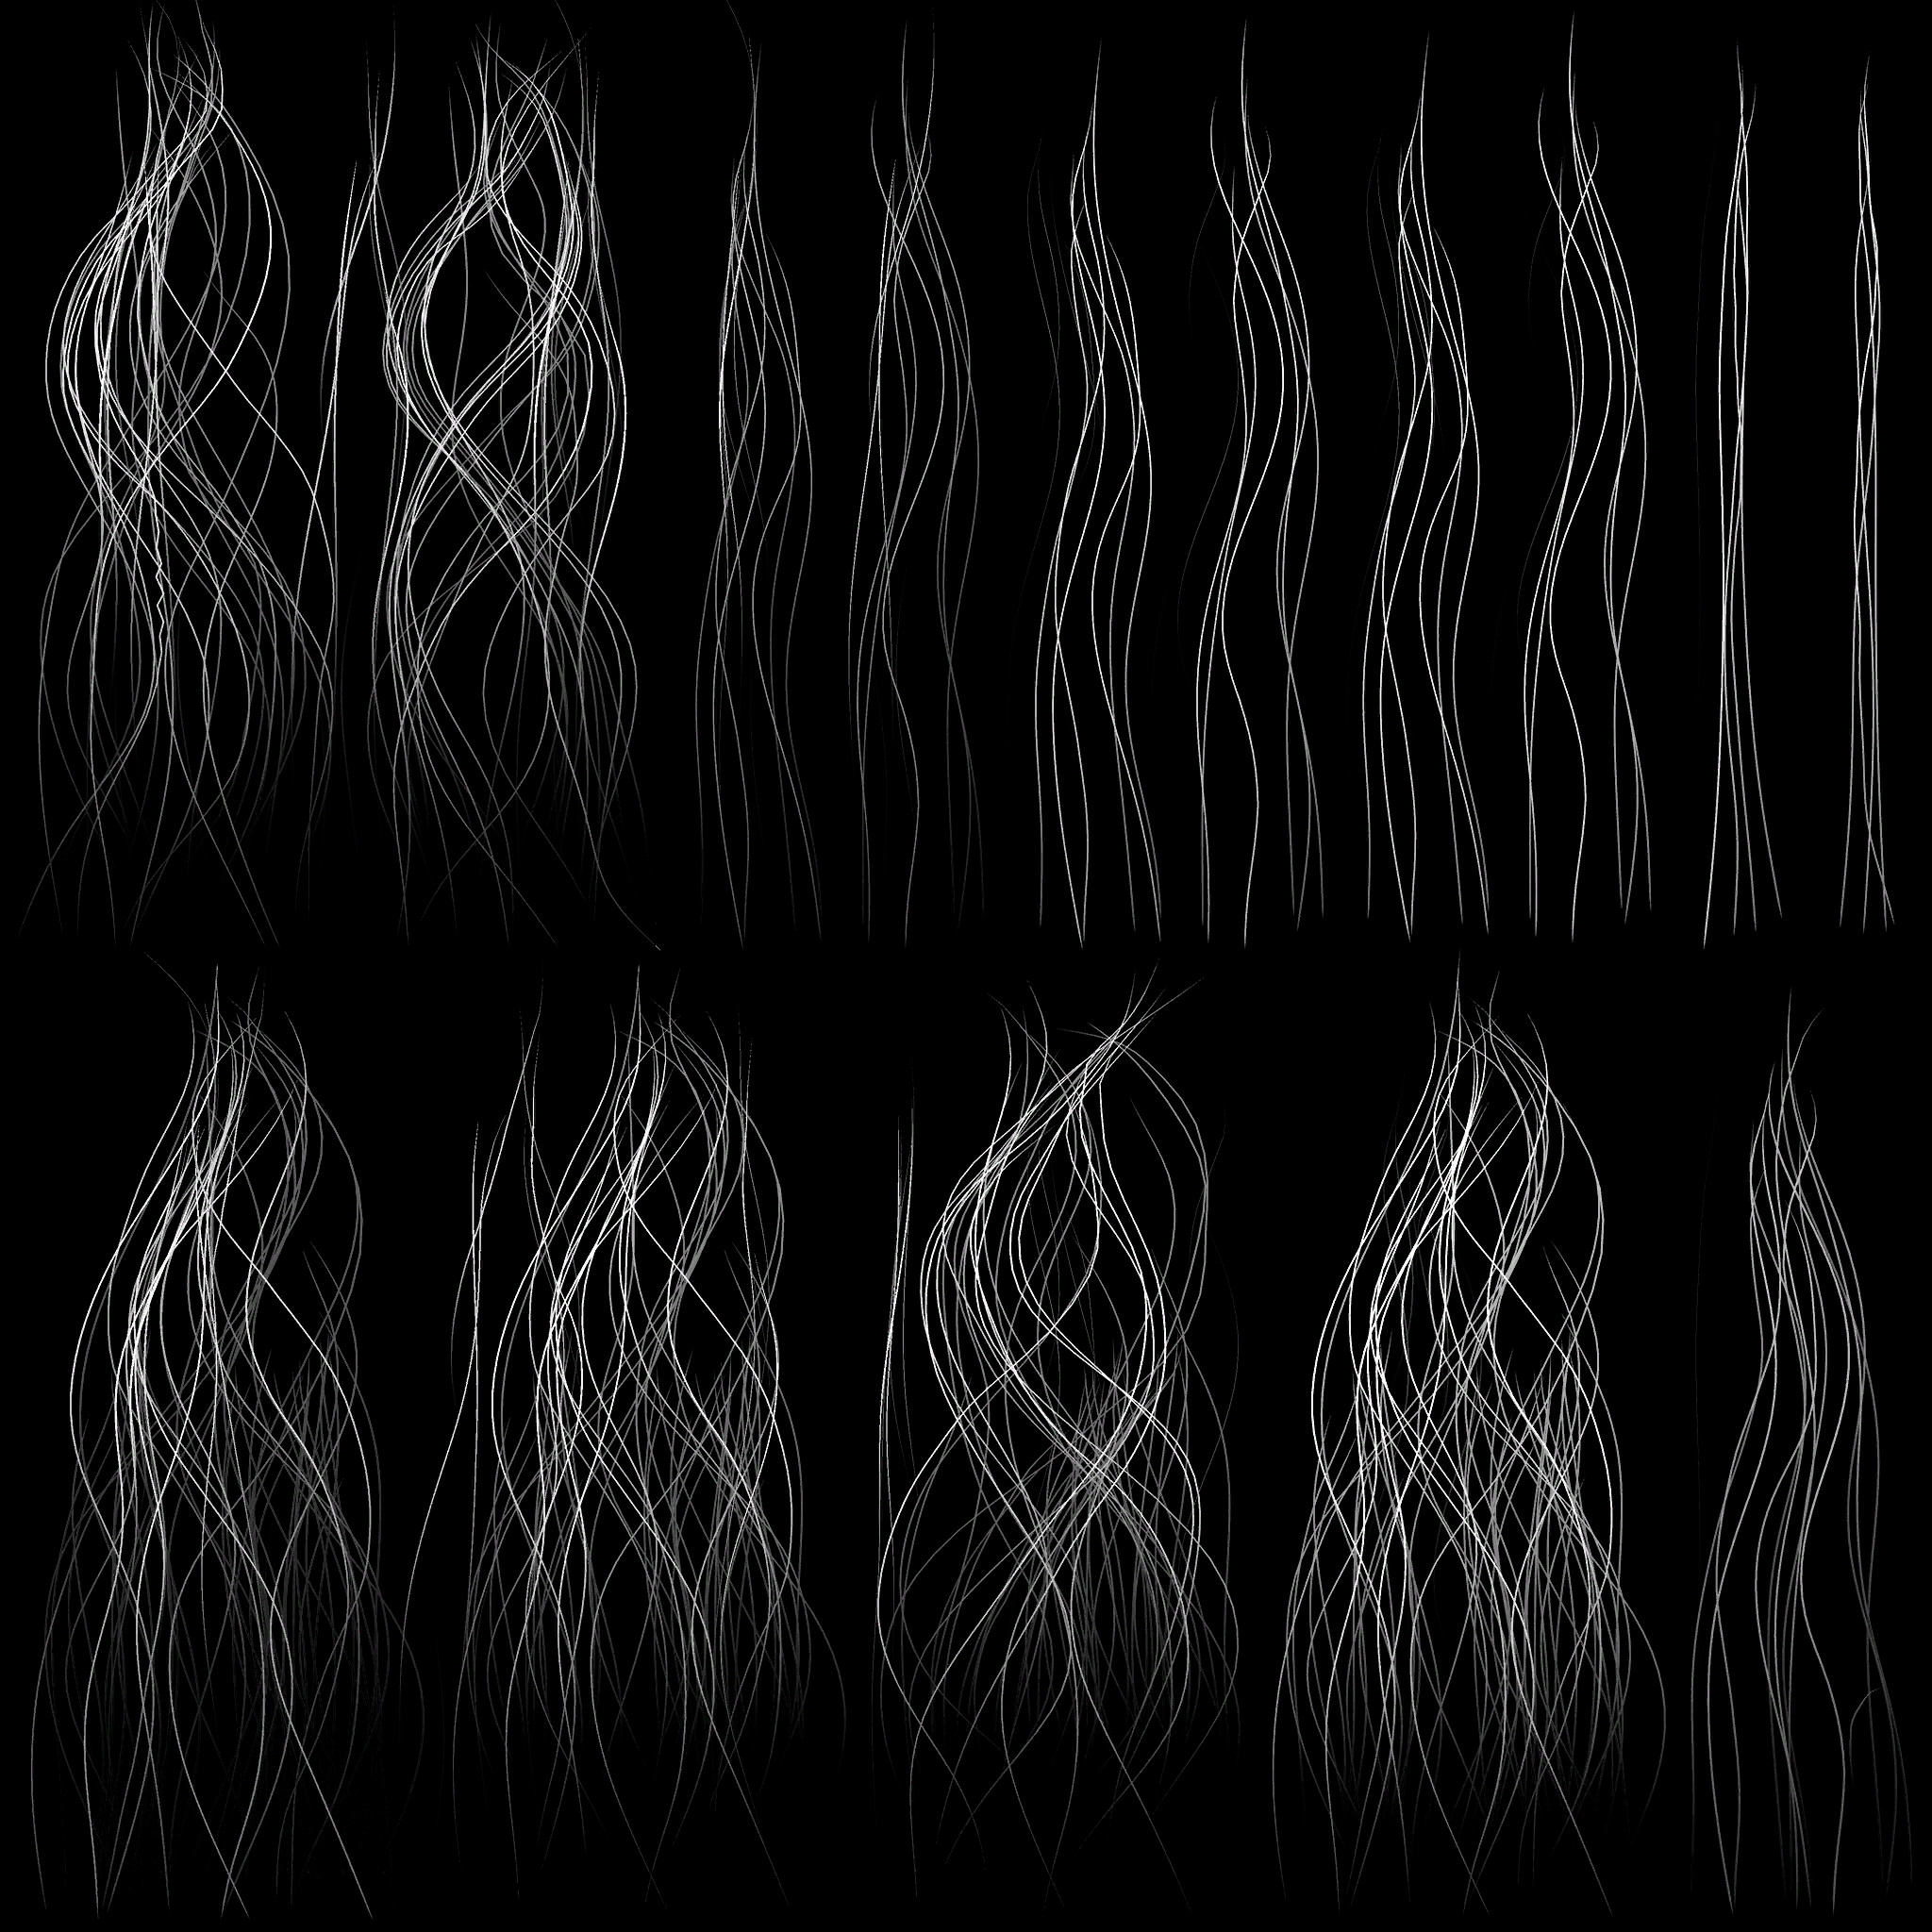
Anisotropic Texture Map (SHM)
We are almost done with the textures! The last one well also very important and is luckily easy to make. Anisotropic hair highlights move from bright to dull so at the base origin of the hair on the texture it should be duller and in the middle brighter and transition back to dull when it go’s to the hair tips. How do you make it? In my case I used the trm texture and started to adjust the colours, to get the transition of brighter highlights to lighter ones you can use a black paint brush with a low opacity and paint over it, but I use a contrast adjustment of the texture in this case, where it will be darker on the edges and brighter in the middle and it’s as simple as that, depending on how reflective you would like your hair to be, you can stick with a bright grey to a light white for super reflection or a darker grey for lighter or duller reflection.
Ay there is a tip! Most games might have a extra map for some individual hair strand pop-outs. In my case I used the roughness map of Ashley’s hair. Now of course you might not have this so it is possible that you might need to improvise. In that case you could actually use the diffuse map or even the alpha map and turn the contrast way up and adjust it’s brightness to use it as a alpha texture to paste it over your shm.
I used the roughness texture as an alpha since it already had individual strands and made the texture a brighter white with a dark background and pasted this as a layer over the SHM map I just made. It will now basically highlight a couple of random individual strands.
If you are still fairly Unsure take a look at this YouTube video. It’s a practice session of the textures I converted above: MGSV:TPP Hair Texture practice session.
Basically what I do in this video is what I explained above. Now perhaps it could be tricky to explain the steps since sometimes it might become super free hand and guesswork depending on what texture maps your custom model has.
Great Job, now we have created our textures for our custom hair model.
Adding the shaders inside of FMDL Studio!
This is the simple part!
Creating a directory to store your textures
If you already know how to add a directory for your custom textures then you can skip this part and move on to the Import of the fmdl file
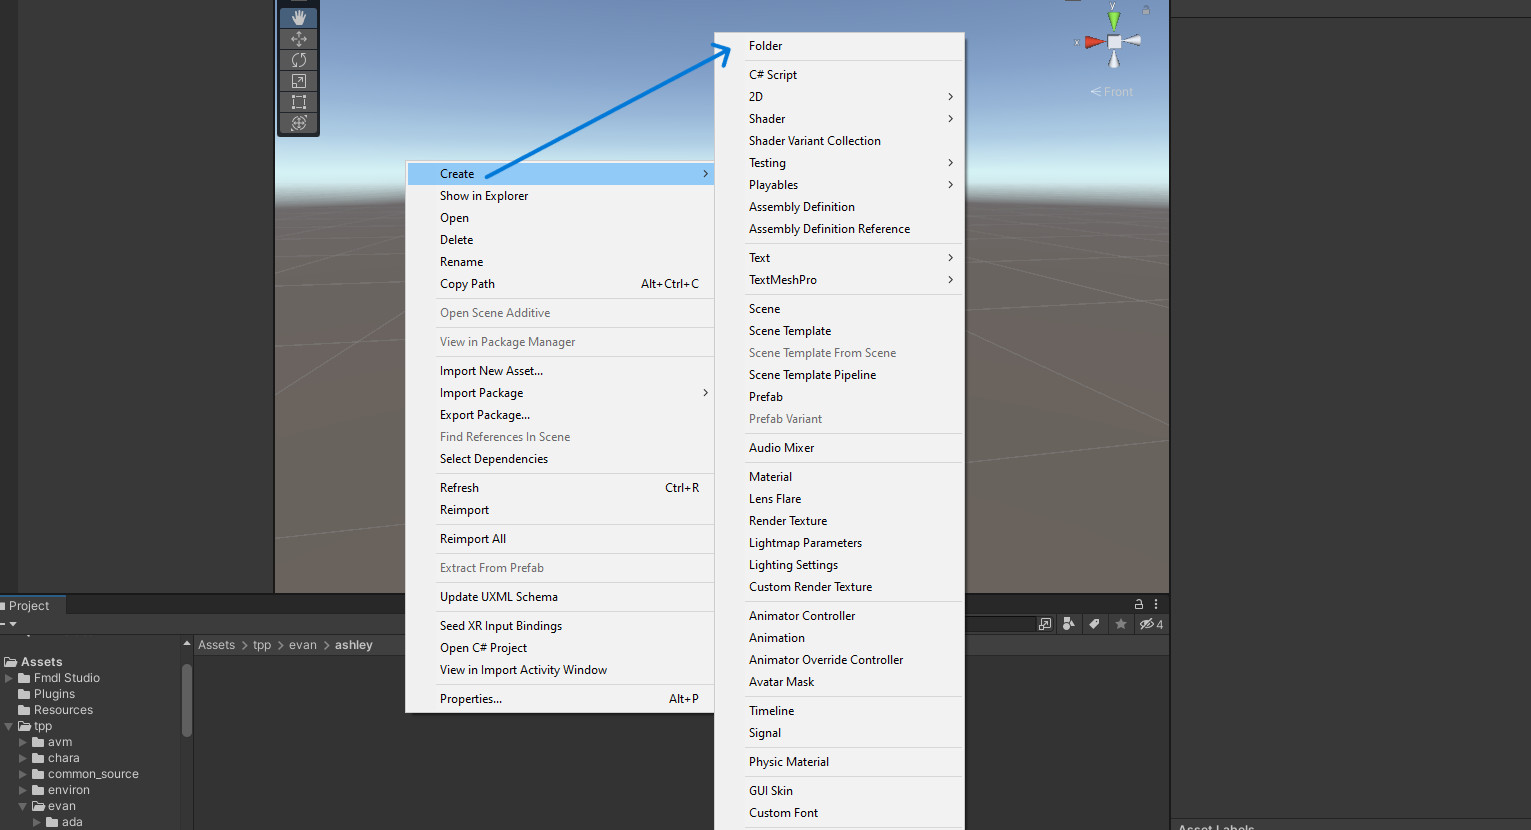
Firstly we need to add the textures we just created into FMDL Studio. We will start by creating a file directory in the Assets folder in the console at the bottom of FMDL studio, go into your Assets folder and right click and select Create -> Folder and rename the folder just created in my case I wanted to store my textures in /Assets/tpp/tutorial/Pictures so I repeated this process until the entire directory structure is created.
You can make your own directory path and store your custom hair texture in there just be sure to have the exact same file path to your textures in your mod.
After creating your directory navigate to where you exported your custom textures in an file explorer, select all the textures and drag and drop it into the Pictures folder (Depending on what your child directory is of your custom directory mine is Pictures).
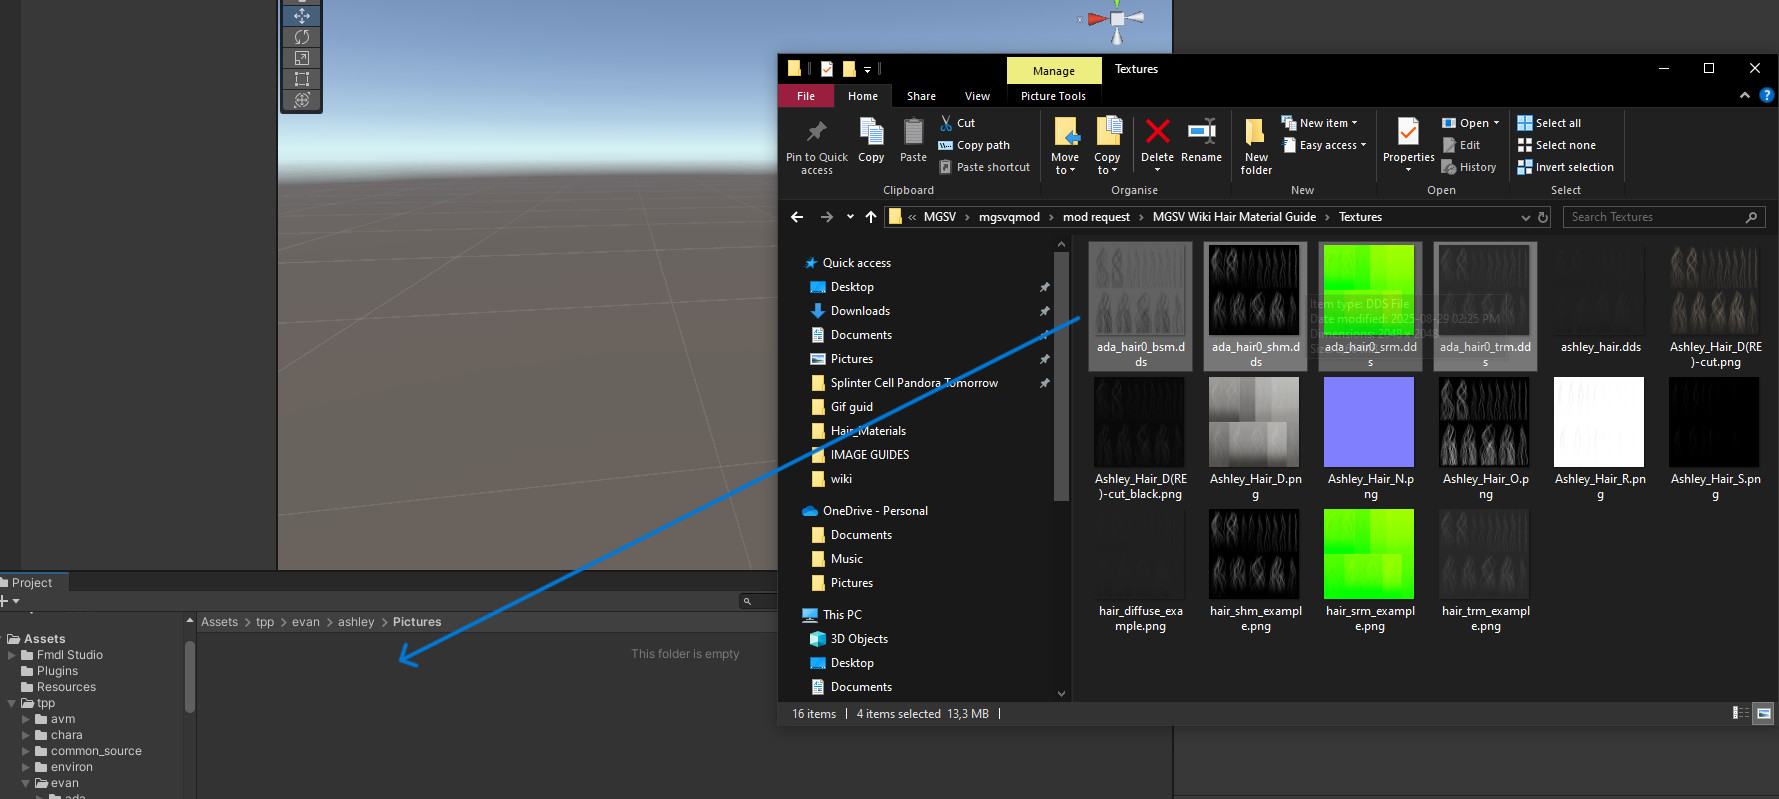
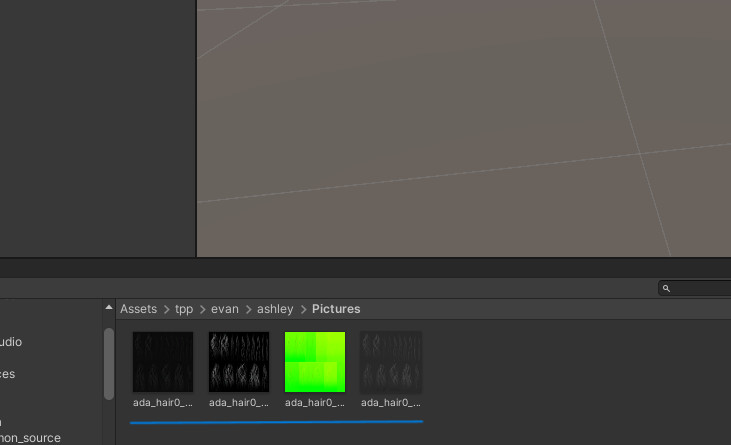
After you dragged in the textures your folder should look like this:
Importing fmdl file
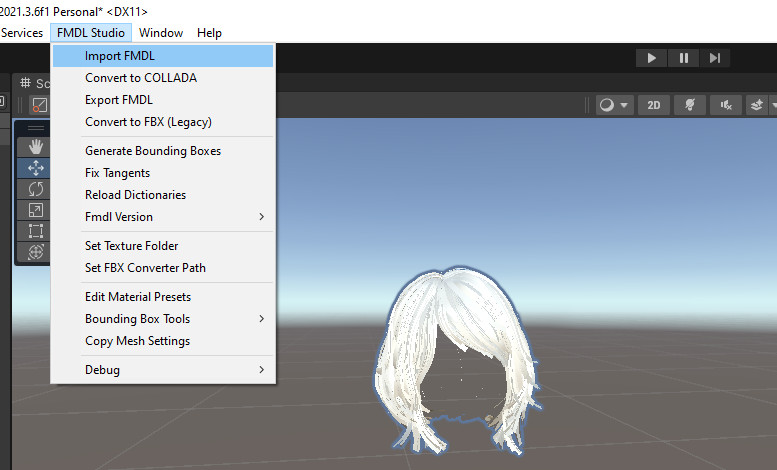
Now that we have our textures in FMDL studio we can import a vanilla model to use it’s hair materials.
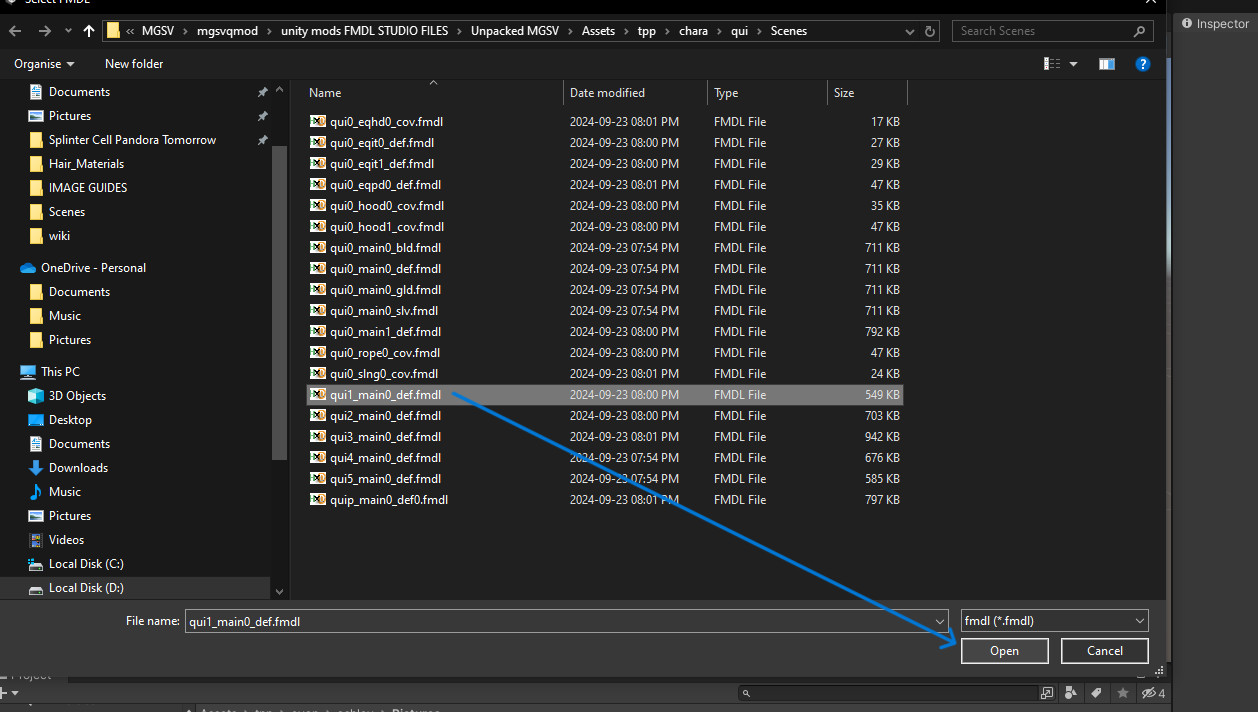
Go to FMDL studio -> Import FMDL navigate to the vanilla fmdl file you will be using in your unpacked game files.
Applying the materials onto your custom hair model
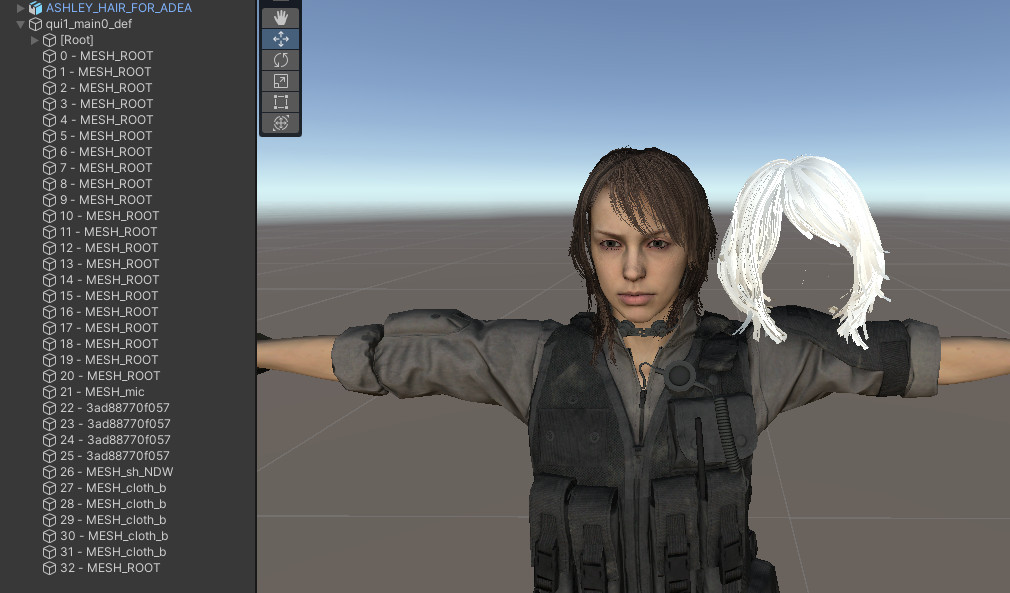
Selecting the vanilla model hair mesh, navigate to the shader properties in the bottom right hand side and drag the material onto your custom hair mesh.
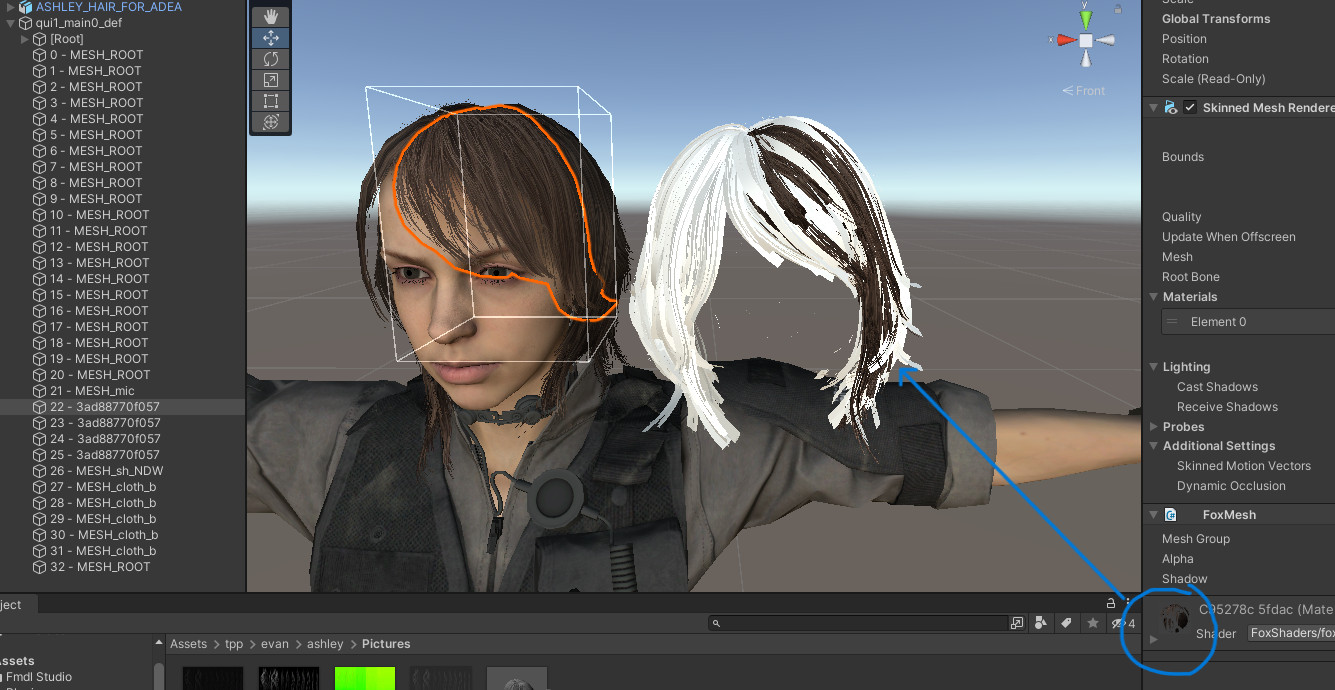
Repeat this process depending on how many parts your hair mesh has. After you are done you can delete the vanilla model it is no longer needed.
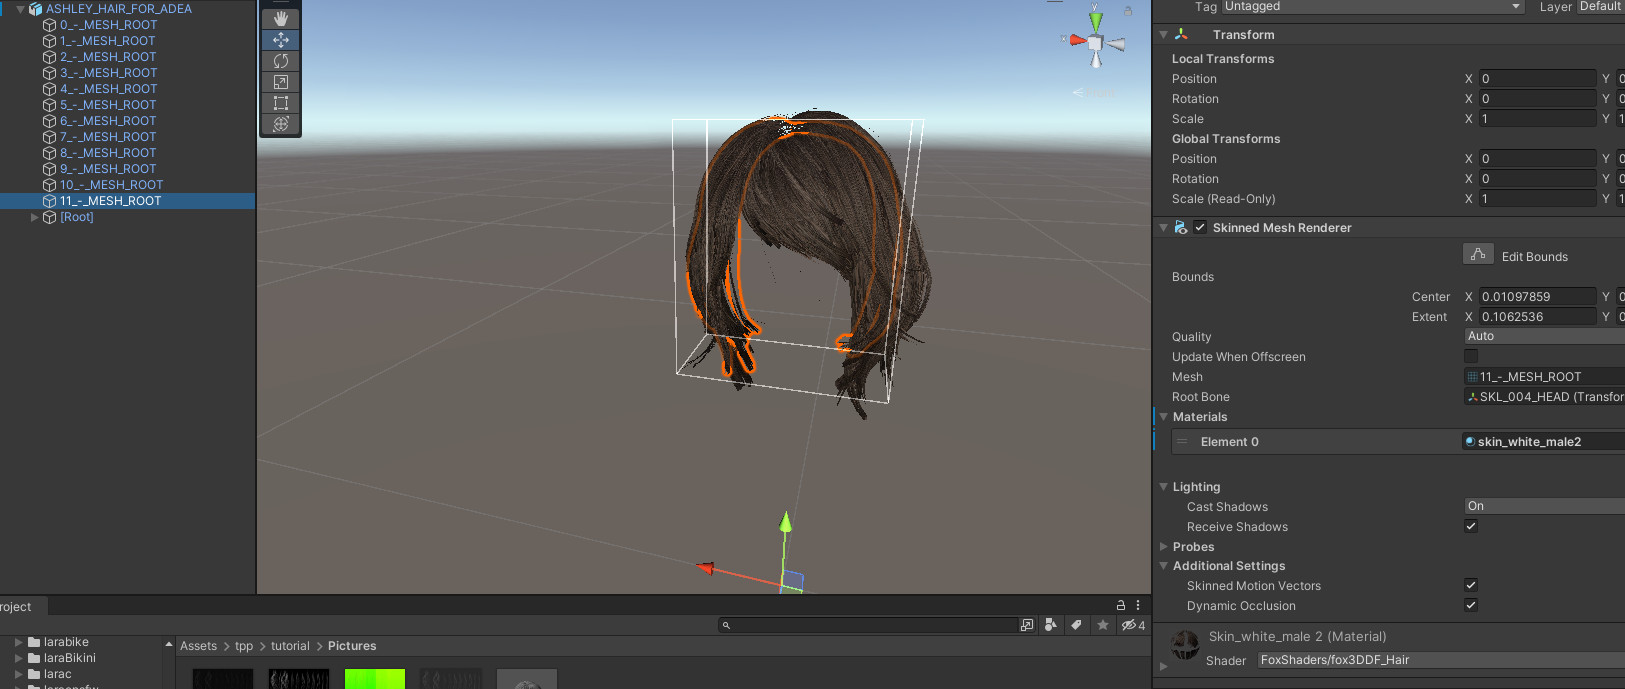
Now that we have added all the materials needed we can drop our custom hair textures into the texture slots of the material settings. Expand the material settings by clicking on the small arrow, that will expose 4 texture slots that we will drag our custom textures into.
Drag and drop your custom textures from the directory you made into the corresponding texture slots.
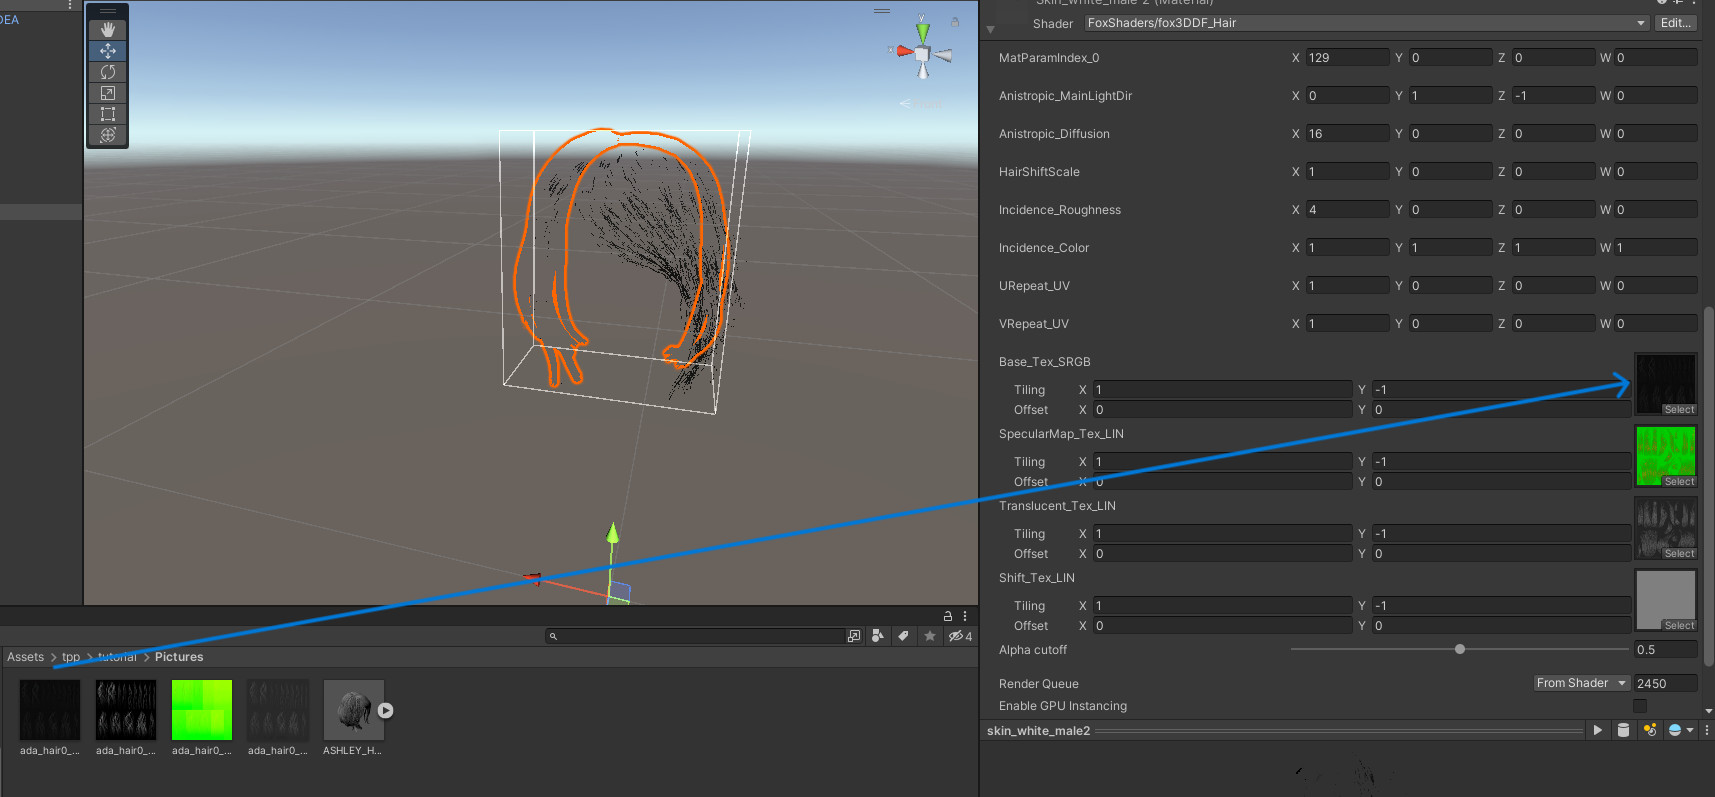
After you added your custom textures to all texture slots in the shader settings, you will have to fix the tilling right now the hair might look strange on the model. Why is that? Well Unity flips the tilling around of the texture so right now it’s mirrored.
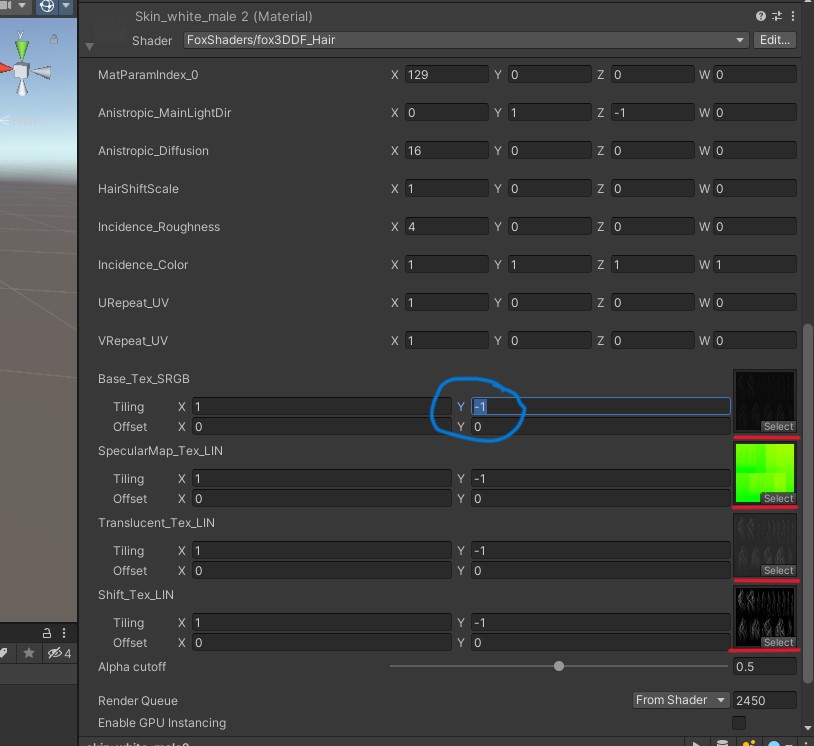
We can fix that by swapping the tilling around which will have a tilling value of 1, now you will see that the texture orientation will be correctly orientated on the mesh. Repeat that for all the textures.
Great! We have applied the textures and materials to our custom hair mesh!
Well great now it’s applied. Where do we go from here?
Depending on what your custom model is (male hair, female hair, etc), you might need to adjust some shader settings for your hair.
This will depend on what result you are looking for, in my case the only setting I changed was the Incidence_Colour values. I changed the x, y and z values to be all 1. As I mentioned previously it’s so far the preferred colour for black hair and in general most hair, unless you are looking for a specific SSS colour it must be.
Importantly well what Fox Model component settings must be used?
Hair textures and any texture that will be rendering an alpha map is recommended to have the settings to be set to Alpha, to render the transparency of the diffuse map. For a hair shader it must never cast a shadow other wise your hair will be flagging a red colour. Why is that? It appears some shaders support only a couple of Fox Model settings. It can be different depending on the shader you are using, the hair shader here can only be set to Alpha and No Shadow .The only occasion when you can set it to cast a Shadow is if you wanted to use a normal skin shader or Quiet’s hair shader for your hair it is able to render the hair with an Alpha and a Shadow although normal skin shaders might cast extremely strange shadows onto the hair when the the Fox Model component is set to cast a shadow, so keep that in mind if you do want the hair model to cast a shadow.

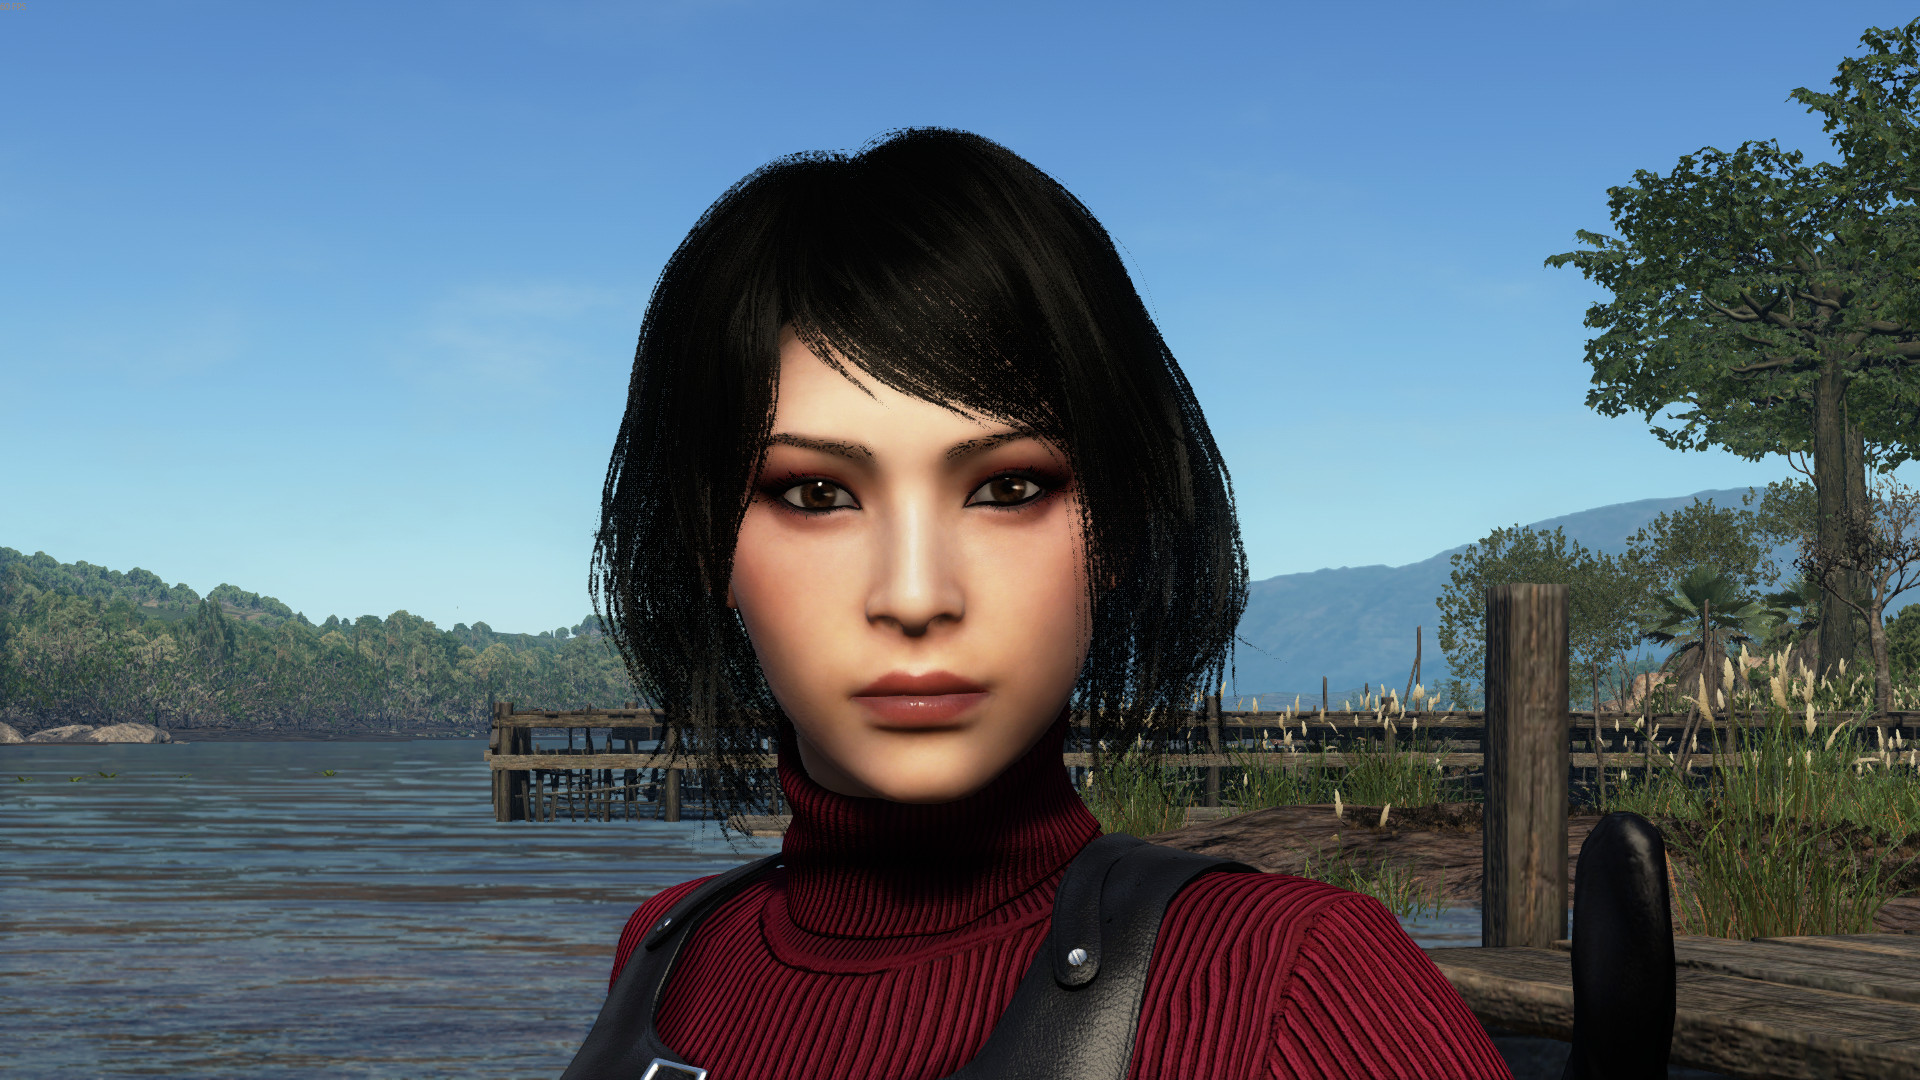
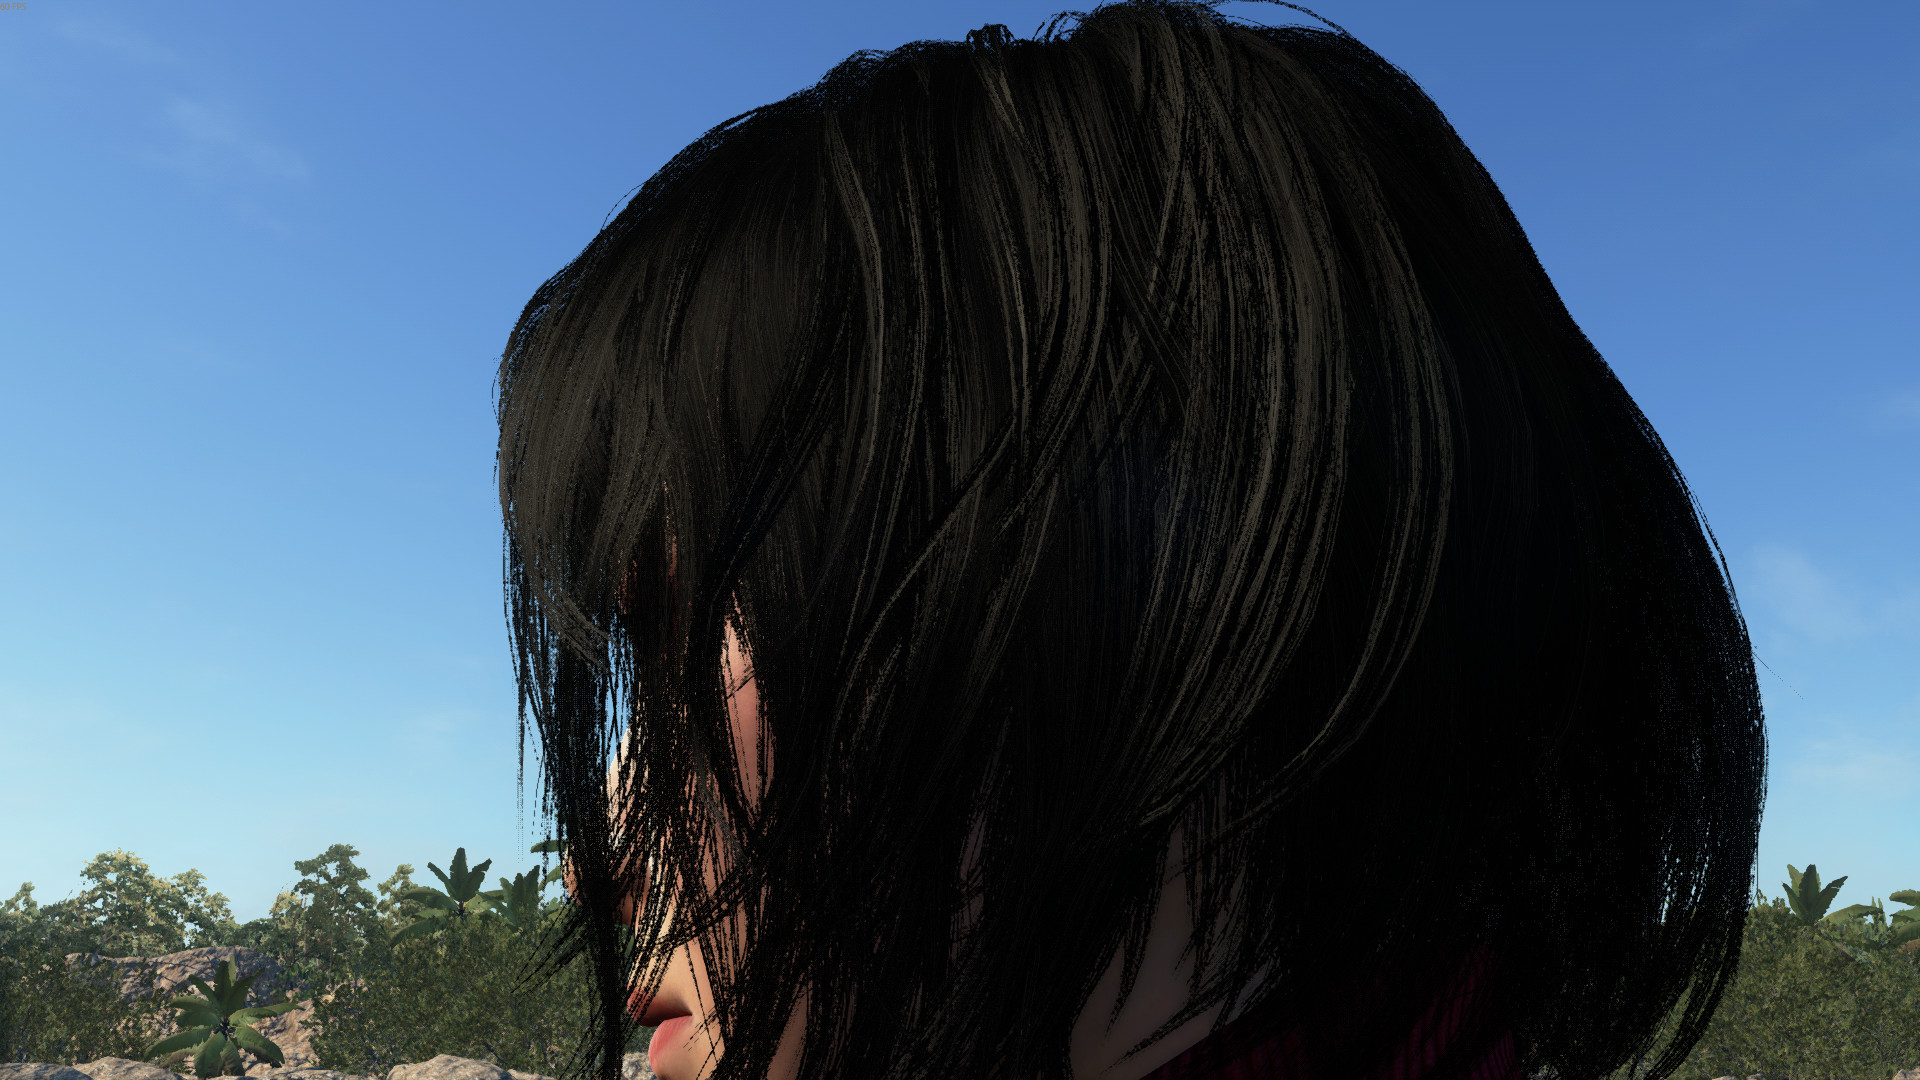
And BOOM!! Export that beauty and we are done! Check the result in game!
Final result!
Here was the final result of Ashley’s hair in the Fox Engine.
A couple of notes
This isn’t related to this guide but perhaps since we are dealing with hair well your hair will always have a different outcome than that of other hair models. Well why? Many modern hair models have become ever more realistic but at the cost of performance in my case here this model had a really large poly count that will have a large effect on the appearance from a far distance since high poly models with an alpha texture applied to them will become pixelated at a certain distance.