Using Github Desktop
Contents
Contents:Github Desktop is the official Windows/macOS application for managing things with Github.
Its main advantage over using the Github.com site is the use of Windows’ File Explorer to edit, add, move, rename and delete files like you would normally for directories in Windows, then auto detecting those changes for later submission to the original wiki.

There’s also no limit to the number of files that can be submitted at once, unlike the Github.com web interface.
As Github Desktop syncs the wiki files to a directory on your computer it consumes some drive space. At the time of writing it uses around 350MB.
Creating a fork of the wiki
Before installing Github Desktop it’s easier (imo) for new users to create a fork of the wiki via the Github website. To do so follow the Forking the wiki steps from the other guide then return back here. This only has to be done once.
Installation
Expand for more
-
First up grab the Github Desktop installer from the official site.
-
Once installed it’ll prompt with a Github.com login.
- A button will then be displayed to grant Github Desktop permissions to your account. Approve the app then continue. Some of these actions will be opened via your web browser, before returning you back to Github Desktop.
-
In the next step you’ll be asked what email to use when submitting changes online. If you have email privacy enabled in your Github settings (which it is by default) you’ll see a
noreply.github.comemail, which you can leave as the default then click continue.If you’re unsure you can check your email settings on Github.com here.
Getting started
Initially importing your fork to Windows
Pulling your fork into Windows
-
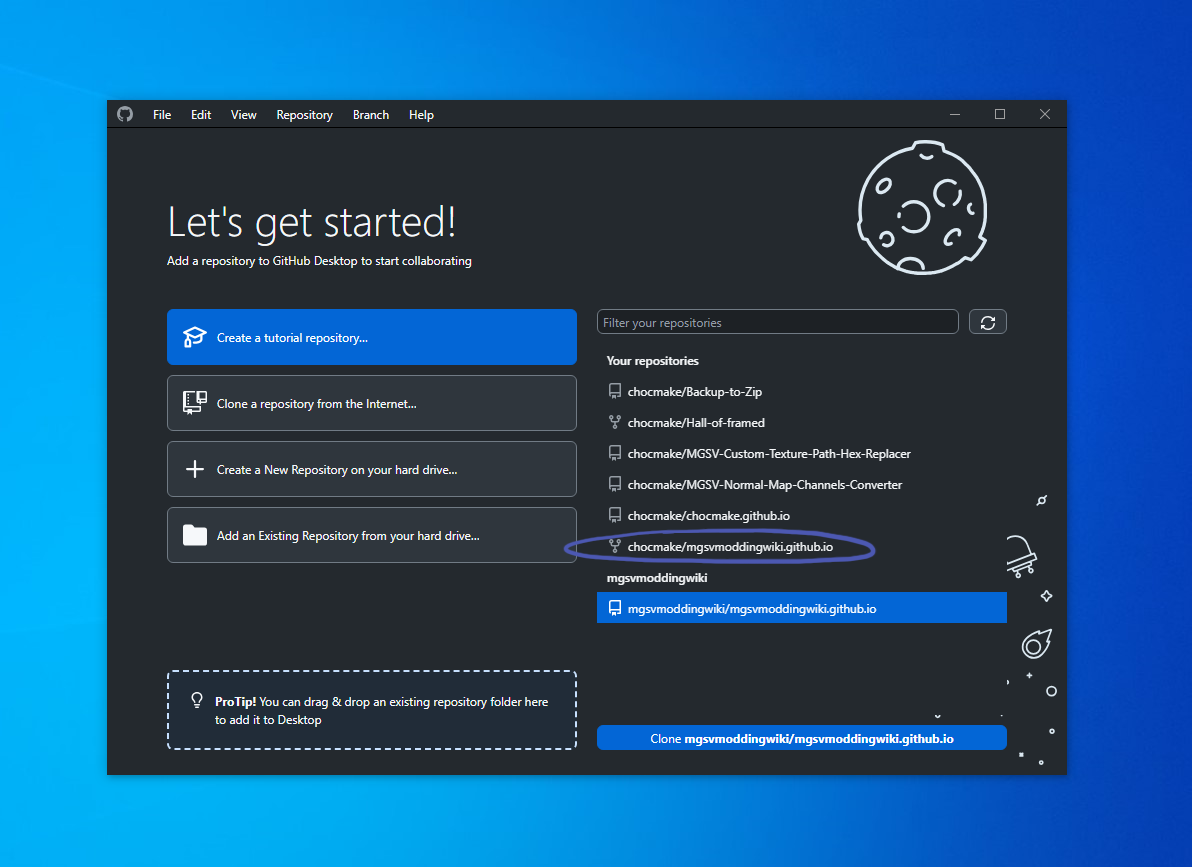
On the main screen there’s a Your respositories list. Click your fork of the wiki (it will begin with your username, mine is cicled in the above screenshot) and then click the blue Clone mgsvmoddingwiki… at the bottom-right.
-
Following the import you’ll get a screen asking how you’re planning to use the fork. Just leave it on the default (To contribute to the parent project) and press Continue.
Syncing the fork with the latest original wiki changes
Since you’ve likely just forked the wiki this probably isn’t necessary but it’s always a good idea to make sure your fork is sync’d with the original wiki to avoid having to later deal with file differences.
Expand for more
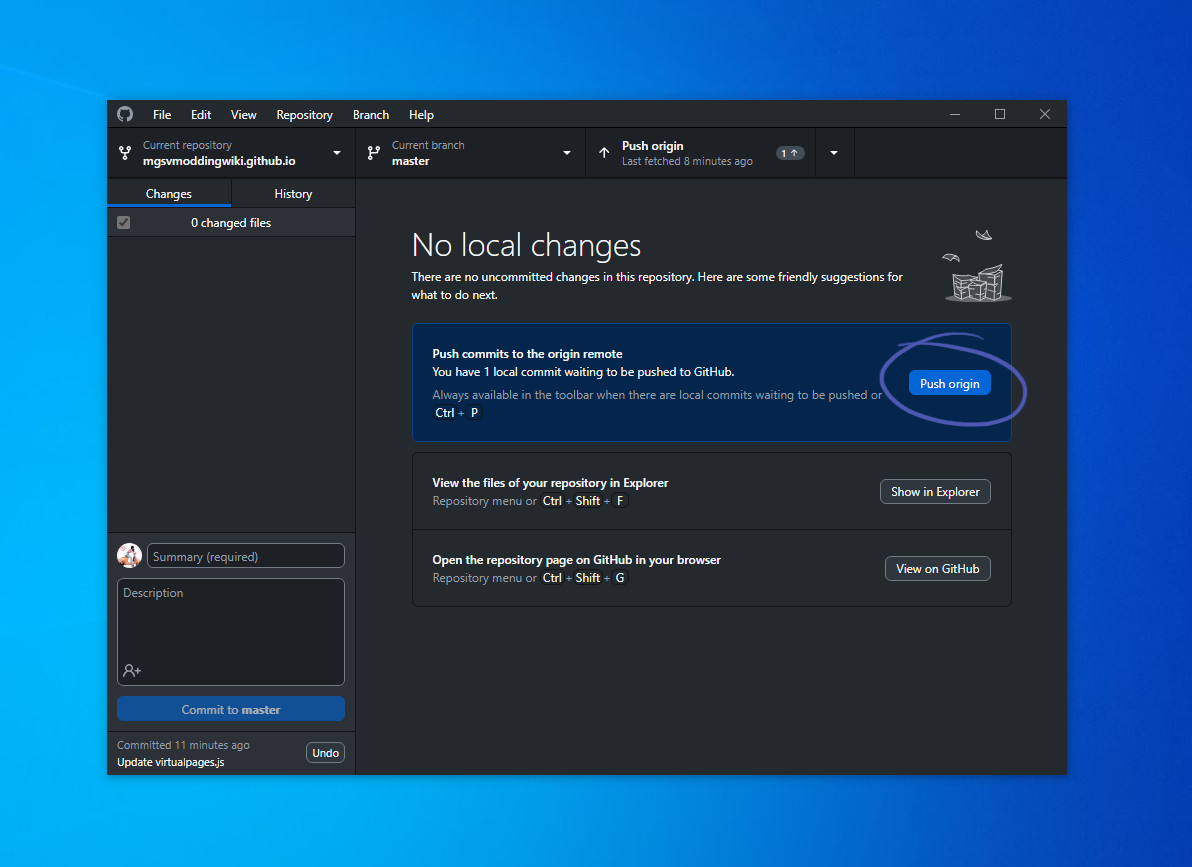
- From the main menu click the Branch menu then select Update from upstream/master. This syncs the latest files to the local Windows copy.
- Now that the local copy is updated click the Push origin button from the main screen to push the changes to the online version of your wiki fork.
Making changes locally
We can now do whatever we want with the copy of the wiki! By clicking the Show in Explorer button we can add, edit, rename, move and delete files. This will only change the files on your own computer for the time being.
Expand for more
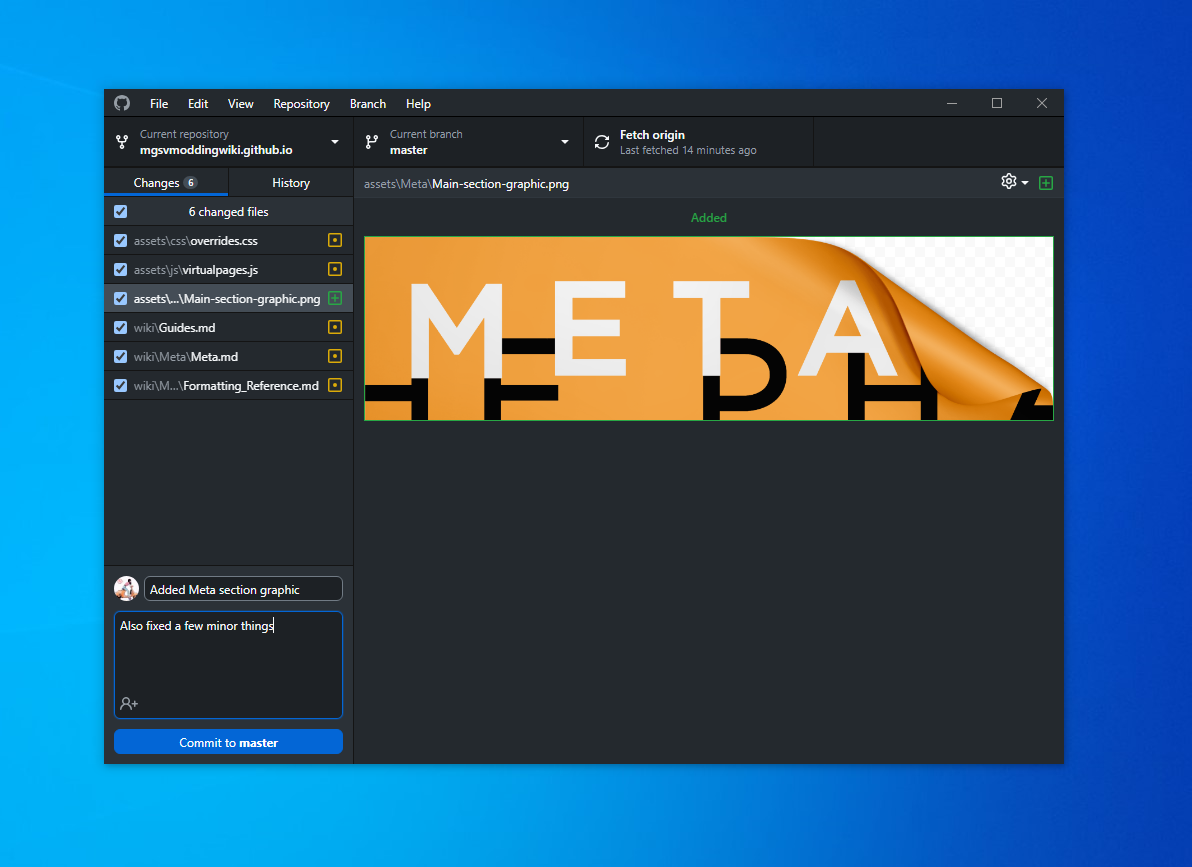
Github Desktop auto detects any changes and lists them in the Changes tab.
Overviews for creating content
- For info about writing new pages and how to organize new images see the Metadata/Organization page.
- For examples of how you can style content check out the Formatting Reference page.
As can be seen in the GIF above I already have an image directory for the Meta section that I created within
assets(where all the images/non-page files reside).
Image sub-directories should be named after their wiki page (or the root wiki page if it’s a multi-level section like Meta is). The rest of the existing images that lack their own sub-directories are just from older wiki pages (feel free to move them into their own sub-directories if adding new images to an existing wiki page).
Committing the local changes to your online fork
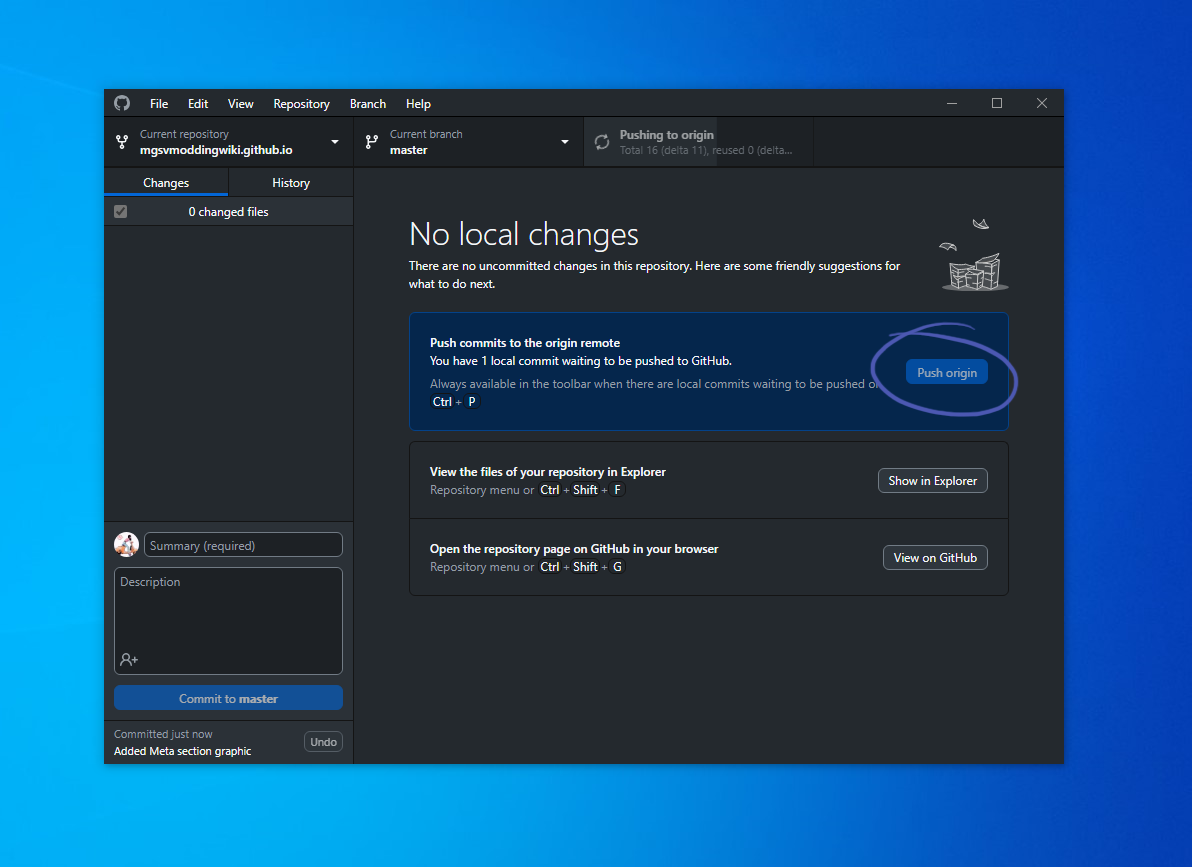
- Once you’re done with your changes write a commit summary in the Summary text box on the left side. You can optionally write a longer description in the Description box. This bundles the local changes as an item in the History tab.
- Next push the local commits back to your online fork by clicking Push origin from the main screen.
Great! Now the online version on Github.com matches the local version of the files we just changed on Windows.
Making a pull request
Since the goal is getting the changes of your fork into the original wiki we’ll request that by submitting a pull request (aka PR). This is the final step!
Expand for more
- In the Github Desktop main menu click Branch and then Preview pull request.
- A window will appear. Click the base: master button and select upstream/master from the list to compare to the original wiki’s files.
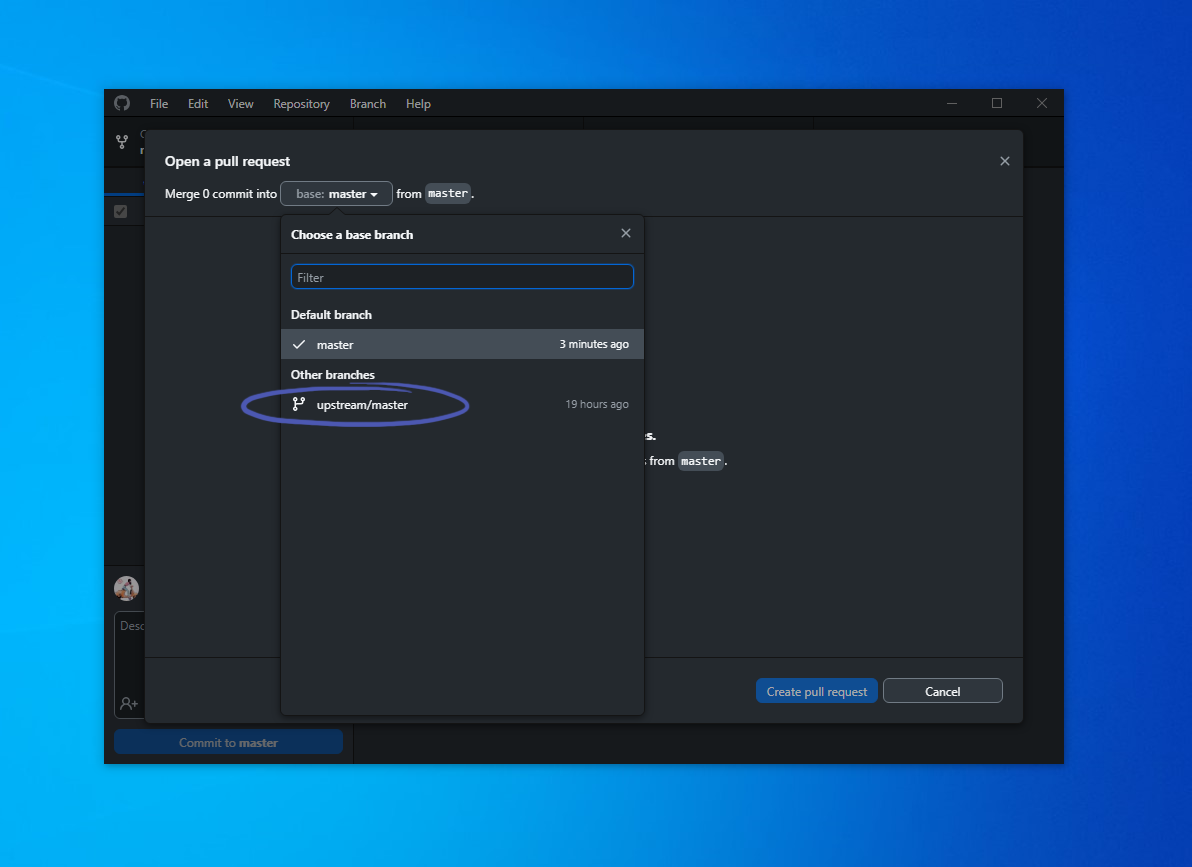
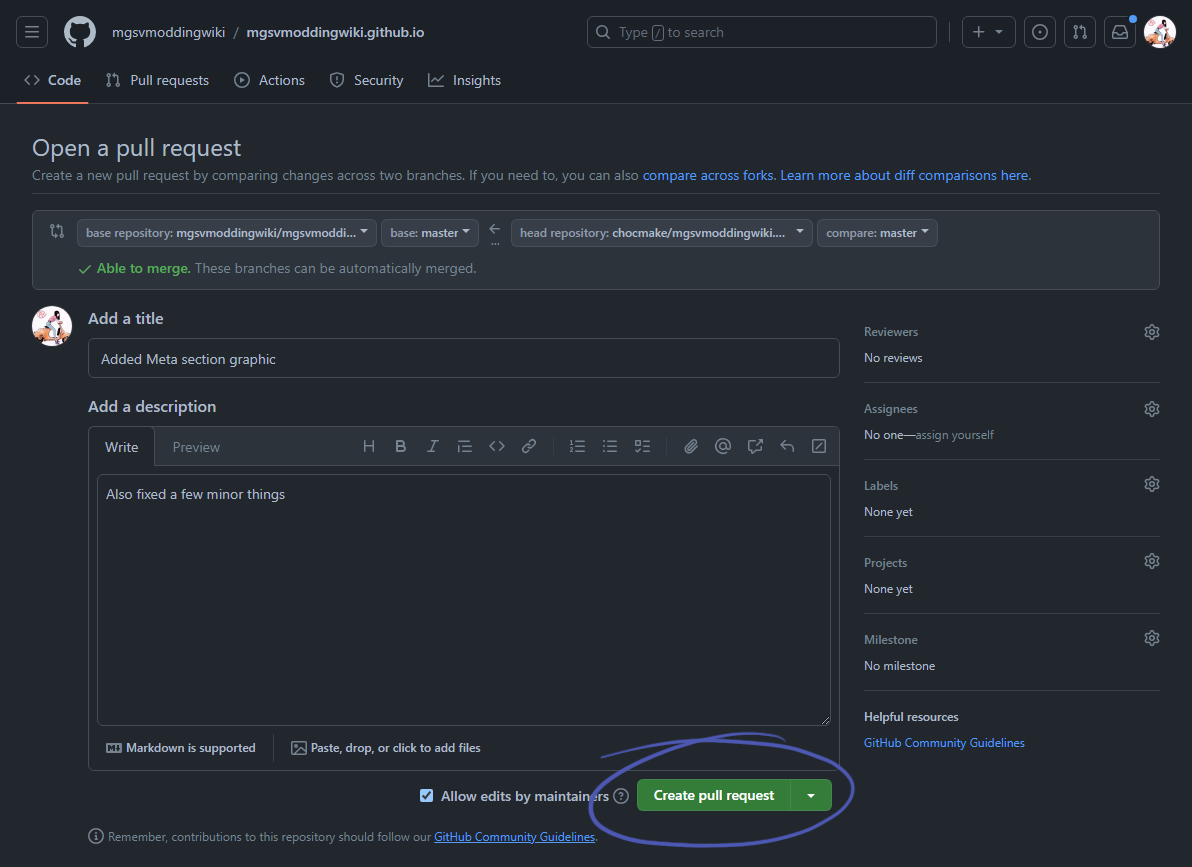
- This will open a preview of the changes and whether they’re able to be merged into the original wiki files as-is. If they are it will have a green tick and ‘Able to merge’ text on the bottom.
- If it says ‘Able to merge’ then click the blue Create pull request button.
- You’ll now be taken to Github.com via your web browser to confirm the pull request. Click the green Create pull request button.
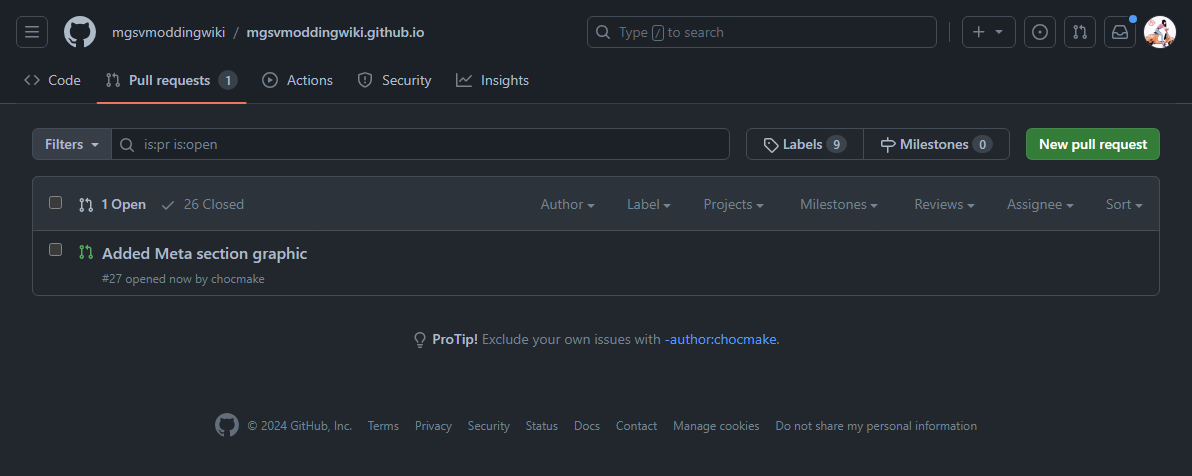
Done! Now just wait for one of the collaborators to approve the PR on this page. Once accepted the changes become part of the original wiki.
Miscellanous
Keeping the local copy updated if you change the online copy separately via Github.com
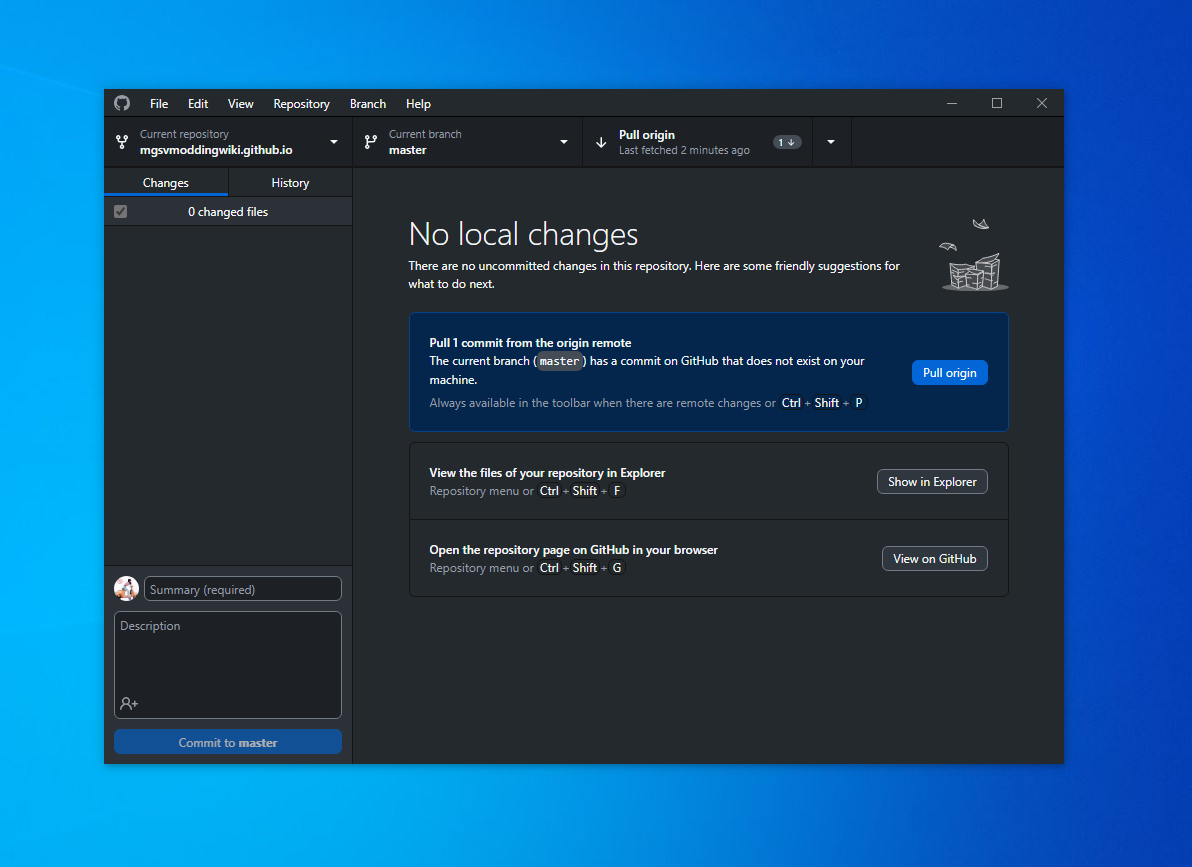
If for whatever reason you later make changes to files using the Github.com website interface, then open Github Deskop, you’ll notice a message saying files have changed on the online copy that haven’t been sync’d with your local copy.
To sync your local copy with the changes of the online copy click the Pull origin button.
Troubleshooting
Handling merge conflicts
Something you may encounter are what are called merge conflicts. This happens when some file(s) you’re syncing (in either direction) have been changed in a way that can’t be automatically resolved.
It’s analogous to mod conflicts where files have changed the same thing and you need to resolve it.
Here is an example where I used the Pull origin feature to update my local copy with my online copy and it had some file differences that I needed to address.
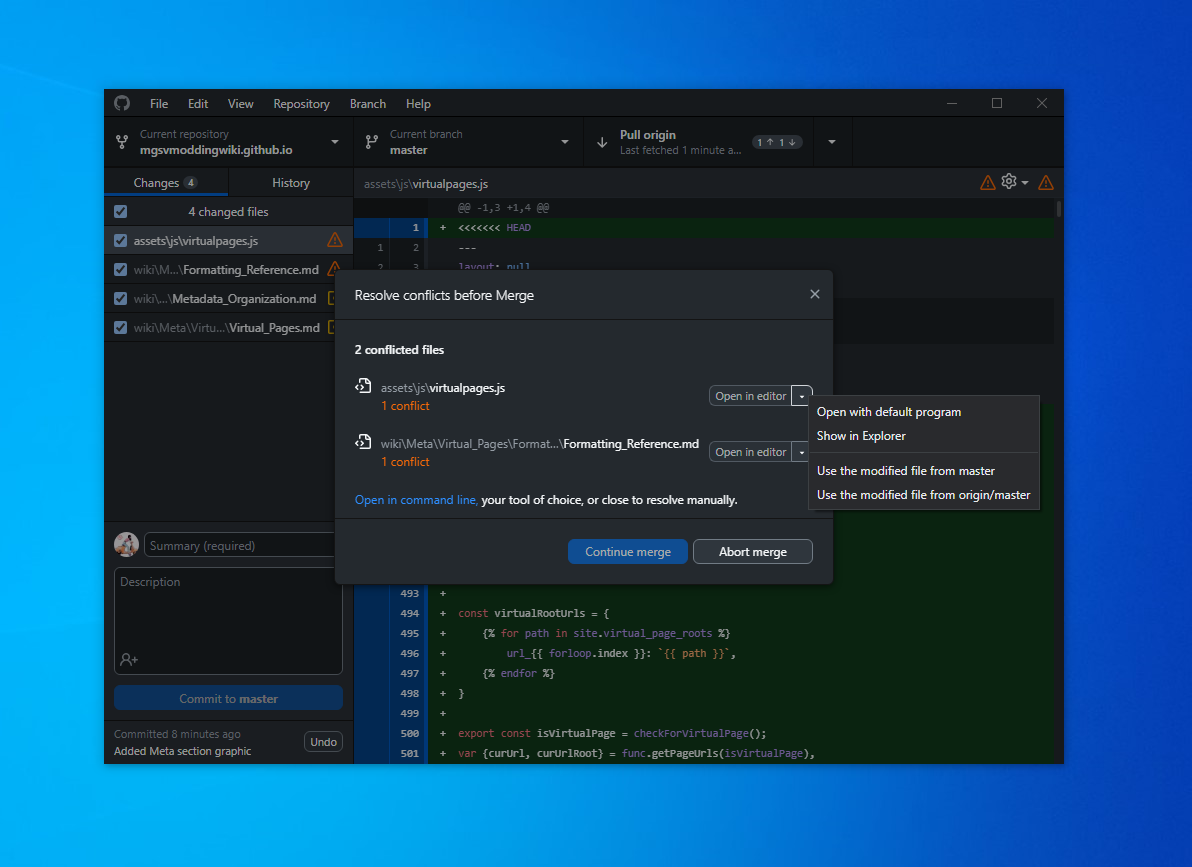
What I did in this case was choose to Use the modified file from origin/master which meant I kept the copy of the file from the online copy of my fork rather than the existing version I had of the file locally.
You can alternatively choose to keep your local copy by selecting Use the modified file from master, or open the file in a text editor to manually edit the text differences how you want.