Using Github.com
Contents
Contents:If you’d like to use the Github.com website to make contributions this guide explains how. The Github site has a few advantages over the simpler Prose.io site, including the ability to add new images and make changes to multiple pages/files more easily.
Alternatively you can use the official Desktop app to manage files using Windows File Explorer, which you may find easier, particularly if changing many files. See its guide here.
At a simplified level, for most users, the process is forking (copying) the wiki on the site, making some changes on your own copy, then submitting the changes back to the original wiki for approval.
Tip: want to just edit an existing page? Click here to jump to the steps.
Forking the wiki
If you’re a user with Collaborator status you don’t require a fork of the wiki to make changes but can create/edit files directly by clicking the Add New Page or Edit Page non-colored buttons at the top of any wiki page, or by visiting the Github repository and making changes there.
Though even with Collaborator status it’s still useful to have a fork when making larger changes since you can play around with things before submitting to the real wiki.
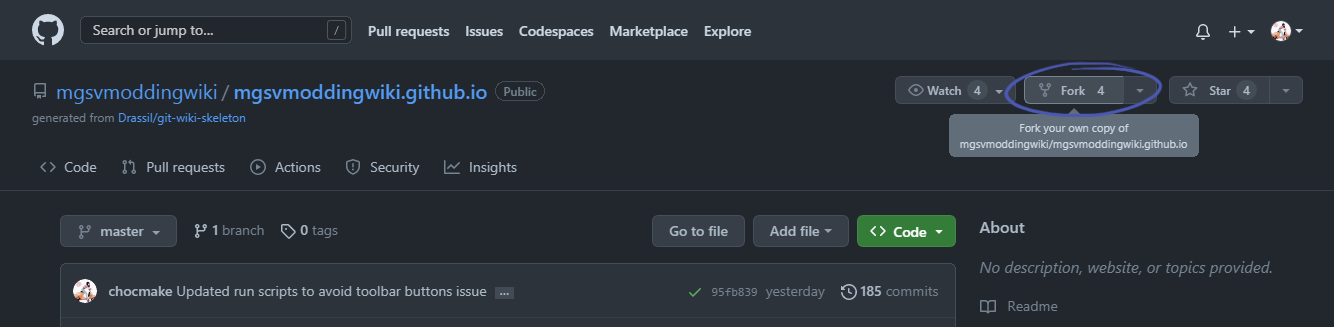
Forking is essentially creating a copy of something and it only has to be done once. First be logged into your Github account then go to the wiki’s Github repository (aka repo) and at the top-right of the page click the Fork button.
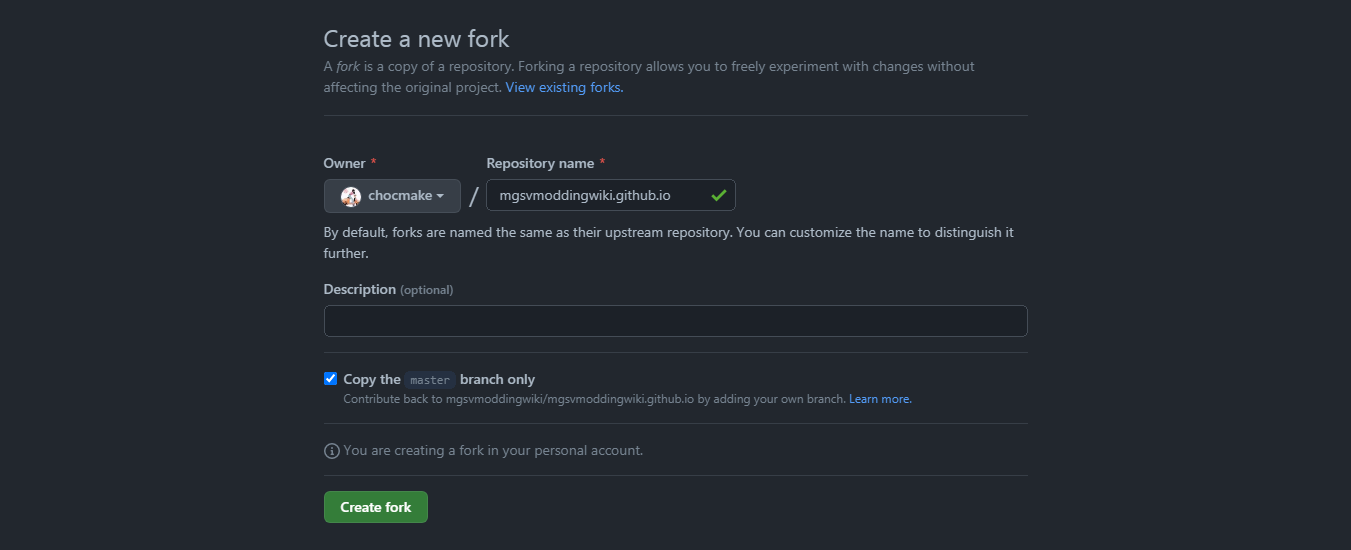
You’ll be prompted to confirm some details. Just leave them at the defaults and click Create fork.
You’ll now have a copy of the repository in your own account, identified by being under your account name instead of the original mgsvmoddingwiki account.

Creating a new page and image
For this example I’ll be creating a ‘Meta: Wiki Tips’ page and including a new screenshot image to be displayed.
Overview of expected file locations
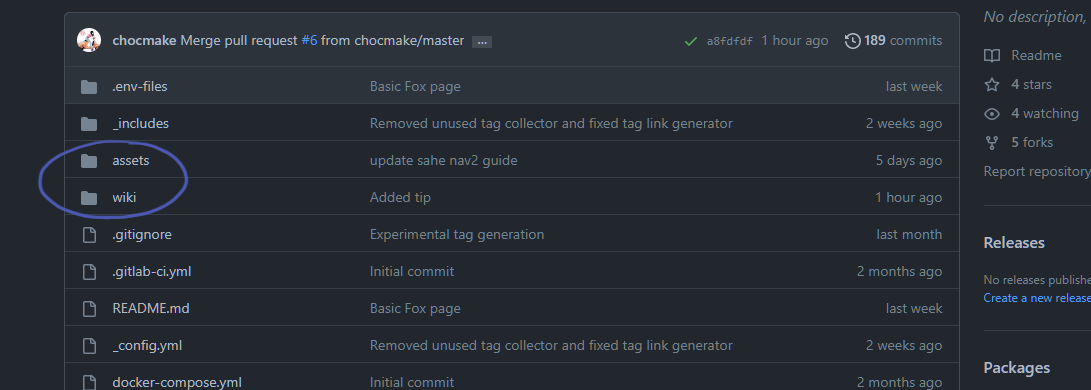
For reference, the wiki expects any wiki pages to eventually go into the wiki sub-directory of the repo and images go into the assets sub-directory.
Managing the image
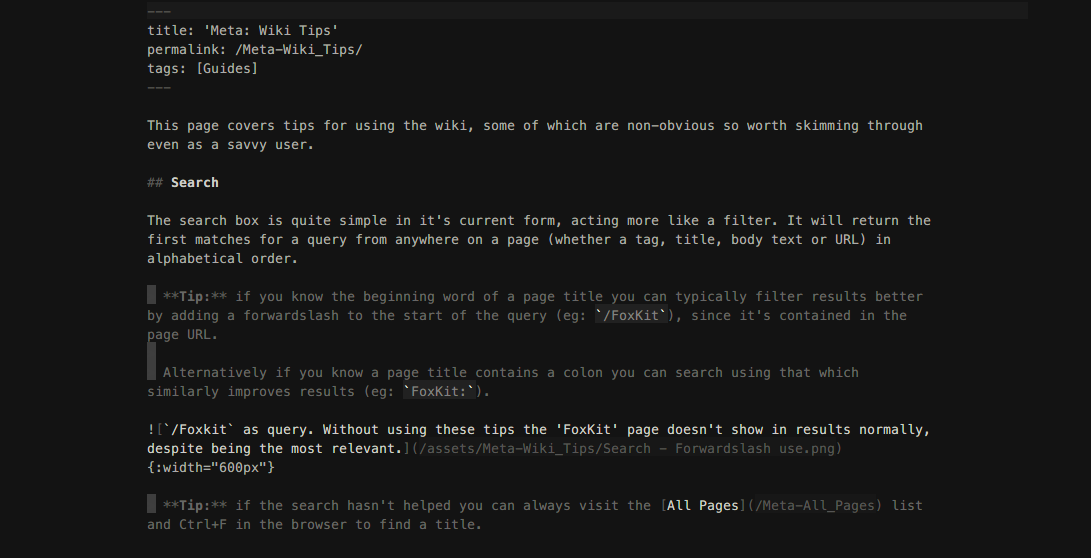
Since I wanted an image for my guide I took a screenshot that I named:
Search - Forwardslash use.png.
For new images to the wiki the advice is to place it in a sub-directory named after the page it’s from. So for this guide it will end up in the following directory structure:
/assets/Meta-Wiki_Tips/Search - Forwardslash use.png
- To do this I firstly created a directory on Windows called
assets. - Inside
assetsI created a sub-directory named after the page title. In my case the title will be ‘Meta: Wiki Tips’, so I’ll name the sub-directoryMeta-Wiki_Tips, substituting various filename characters as explained here. - Lastly I moved the image into that new sub-directory.
Creating the wiki page file
I’ll be using a text editor to create the wiki page offline before later uploading it to Github. In it I’ll be referencing the screenshot image.
Tip: you can alternatively use Github’s site to directly create pages but since I’ll also be uploading an image it’ll need to be in a new sub-directory which Github’s website UI doesn’t provide a way to add on its own.
- Firstly create a directory on Windows called
wiki. - Inside the
wikidirectory create a new text file, then change its extension from.txtto.md. - Next rename the text file to match the page title you want. In my case the title will be ‘Meta: Wiki Tips’, so I’ll name the filename
Meta-Wiki_Tips.md, substituting various filename characters as explained here. - Open the text file in a text editor and add a metadata section at the very start of the file. Check this guide for how metadata should be formatted.
So for my page I’ll be using the following metadata:
---
title: 'Meta: Wiki Tips'
permalink: /Meta-Wiki_Tips/
tags: [Guides]
---
- Now below the metadata section you can add the desired body content/text. Since I want my image to display on the wiki page I included it using the following code:

Tip: to understand how text/content will appear on the wiki refer to the Formatting Reference guide, which displays all the possible styling for text, lists, images, video, tables, etc.
Tip: you can also check out the source of existing wiki pages for inspiration by clicking the circular Page Source button in the toolbar at the top of every wiki page.
For clarity: this guide was written when the Wiki Tips page was had its original path so ignore such differences in naming to the current site.
Uploading the files to Github
Making sure your fork is in sync
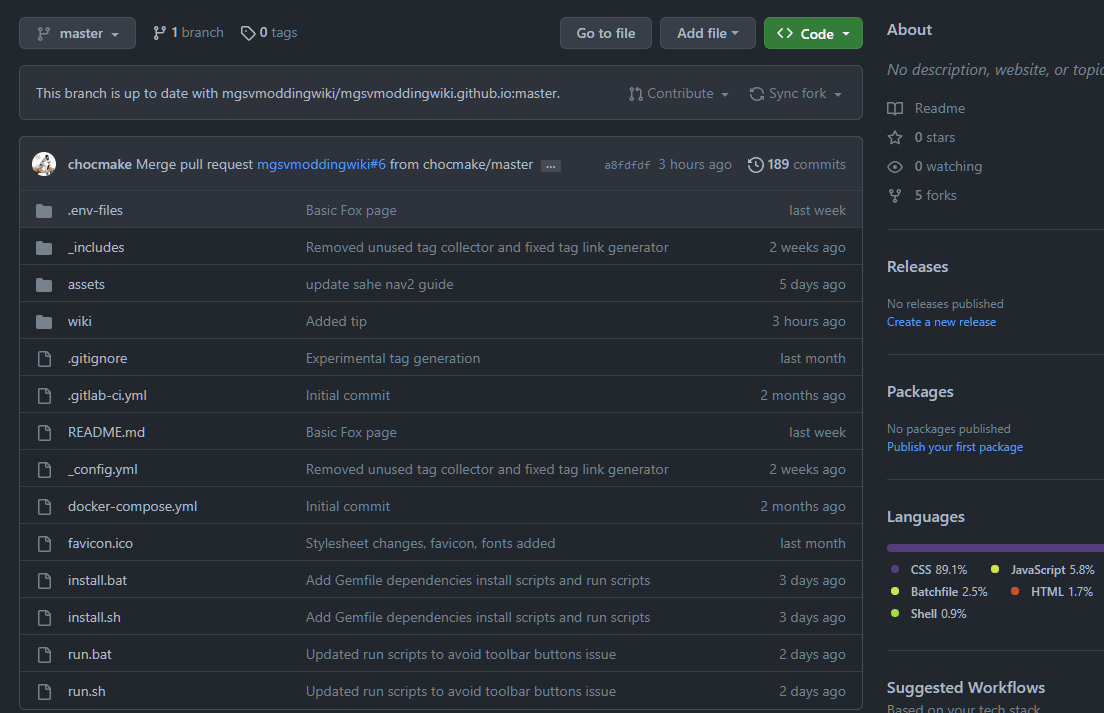
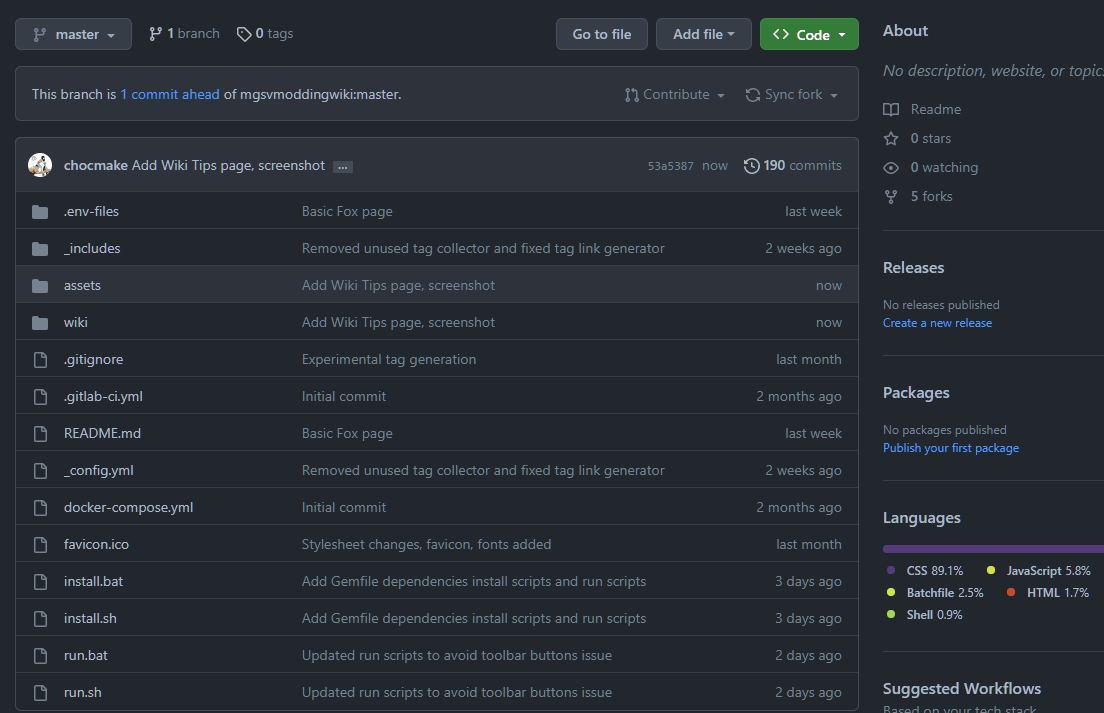
Before uploading anything to your Github repo it’s always a good idea to check your fork is up-to-date with the original wiki. If it’s already up-to-date you’ll see a line saying This branch is up to date with mgsvmoddingwiki….
For the below screenshot though we can see my fork is out of sync since it says This branch is 1 commit behind mgsvmoddingwiki… (meaning my fork doesn’t have one of the newer changes the original wiki has currently).
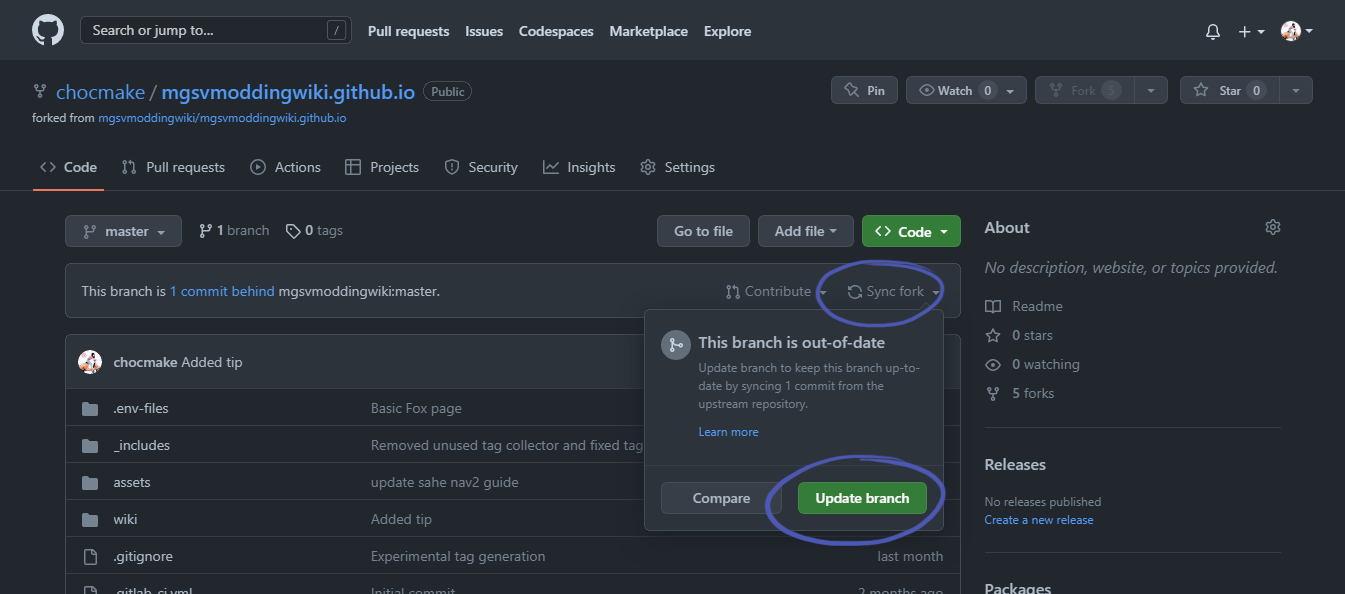
To get it sync’d click the Sync fork button as highlighted in the screenshot, then the Update branch button. After this you should get a message at the top of Github saying it was successful.
Uploading the files
On my Windows system I have the following files for uploading, which in the earlier steps were placed in the appropriate sub-directories:
/assets/Meta-Wiki_Tips/Search - Forwardslash use.png
/wiki/Meta-Wiki_Tips.md
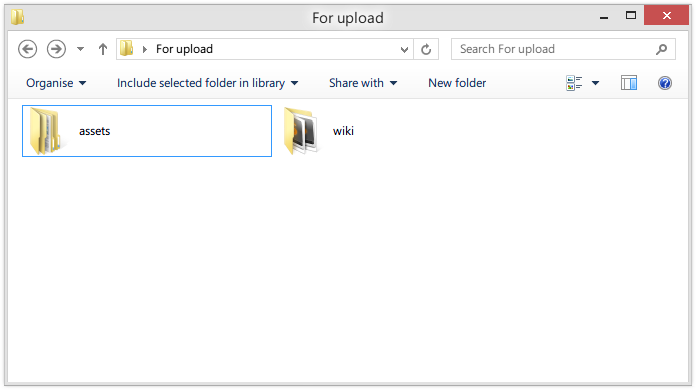
With the files in the correct structure we’ll upload them to the Github site. The GIF below shows all these steps.
-
From your main forked repo on Github click the Add file button then select Upload files. It’s important that you’re on the main page of your fork, not within any sub-directory for this step.
-
Then drag your files contained in the appropriate directories into the marked area on the Github site.
-
Add some descriptive commit message under the Commit changes heading.
-
Finally click the Commit changes button to upload the files.
Separate tip about creating instant pull requests from the upload files screen
Under the Commit changes section of the upload files page you can alternatively select the Create a new branch for this commit and start a new pull request radio option, which after clicking the Commit changes button will create a separate repo branch and immediately create a pull request.
However for this guide I wanted to also edit an existing file of the repo which required another change before creating a pull request.
Editing a page
If you have Collaborator status you can alternatively edit any wiki page directly from the original wiki repository, rather than your fork of it.
With my fork of the wiki I wanted to edit the existing Guides.md page in the repo, to link to the new wiki page I created within the organized list of guides.
- For this I navigated to
wiki\Guides.mdin my fork of the repo. - Clicked the Edit this file button above the file.
- Edited the text.
- Click the green Commit changes button to open the popup.
- Added a description of my changes to the description text box.
- Then clicking the Commit changes button within the popup.
Note: more recently Github changed the position of the Commit changes button when editing a file to the top of the page instead of the bottom, with the description text box now within a popup. The GIF above was made prior to this change but the text steps reflect the latest design.
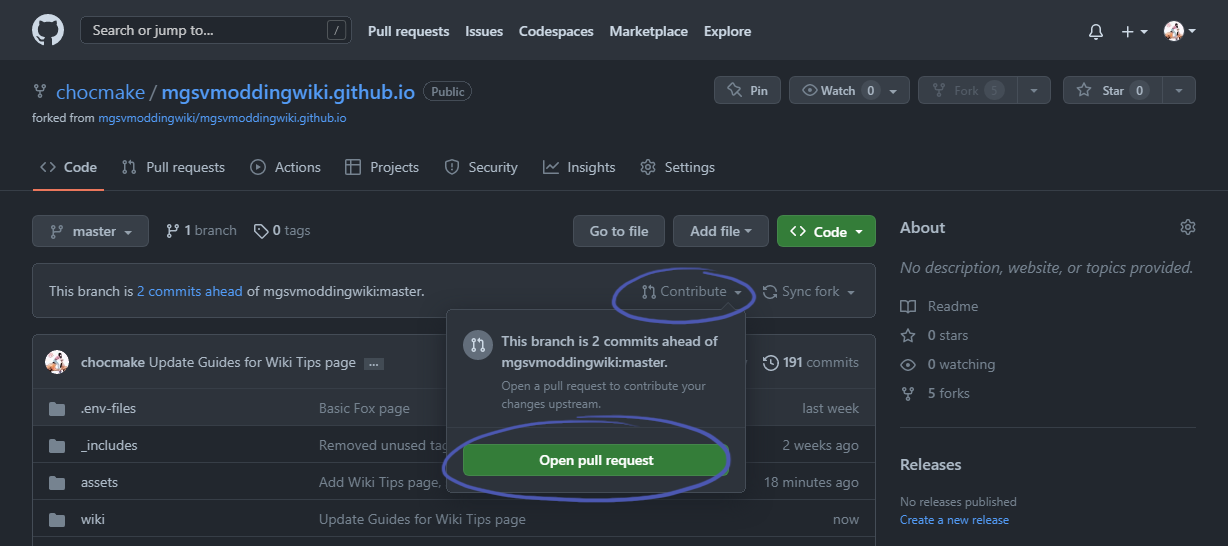
Creating a pull request
Now all my changes have been made I can submit the changes to the original wiki (aka a pull request).
- Go to the main page of the forked repo and click Contribute then Open pull request.
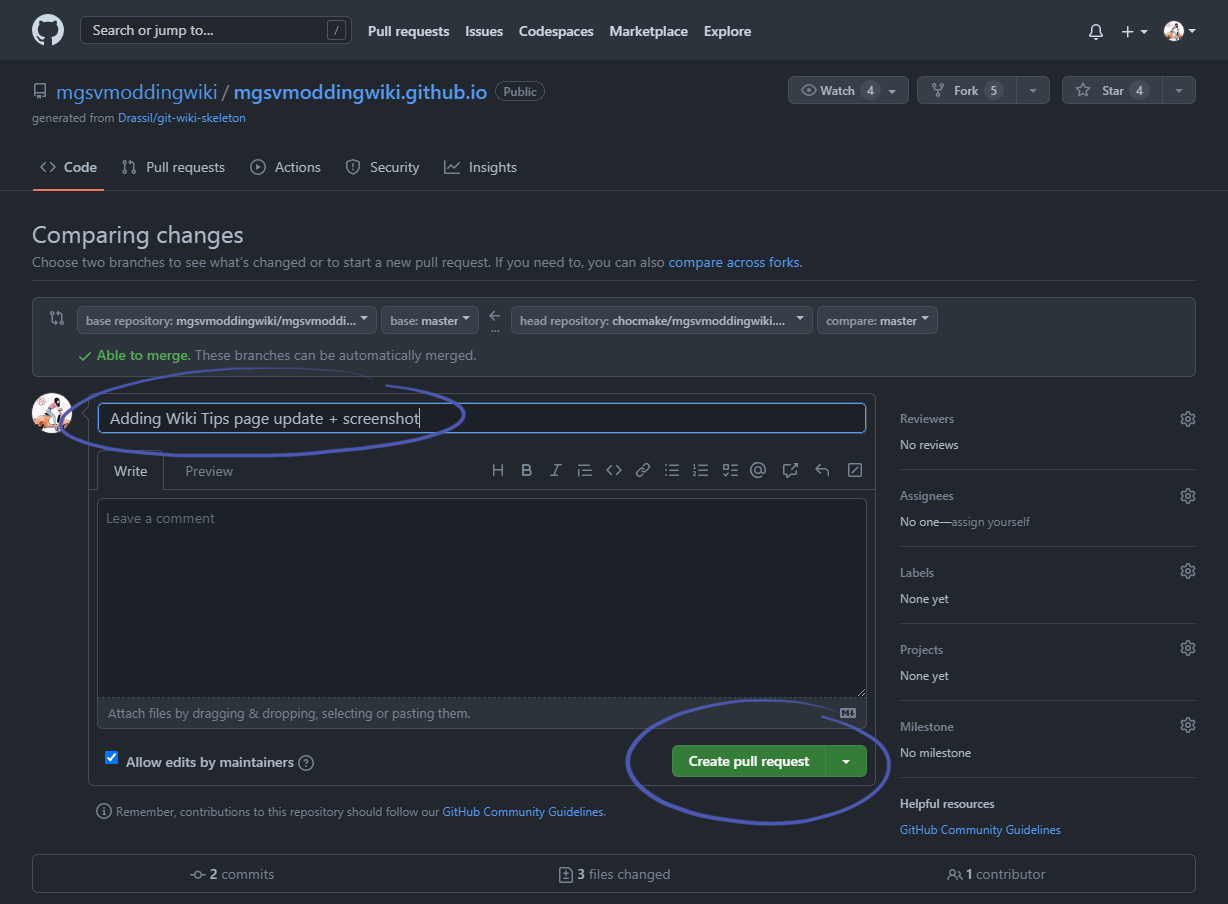
- On the next page you’ll get to add a title (and optional description) describing the changes. This is so the wiki contributors can quickly tell what the changes are. Once complete click the Create pull request button.
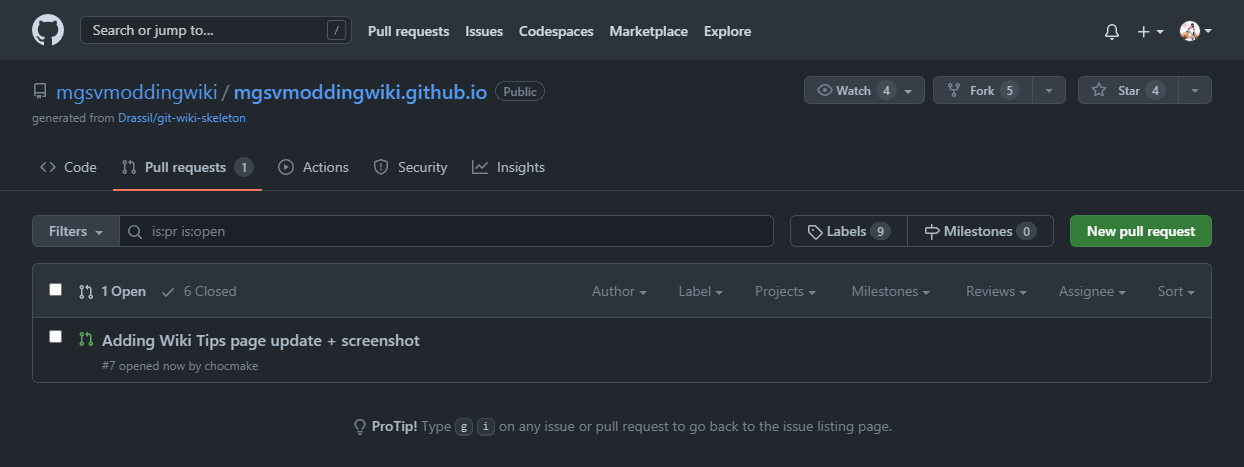
- Now it’s been submitted you’ll have to wait for approval of the changes by the wiki contributors. You can view the status of PRs on this page.
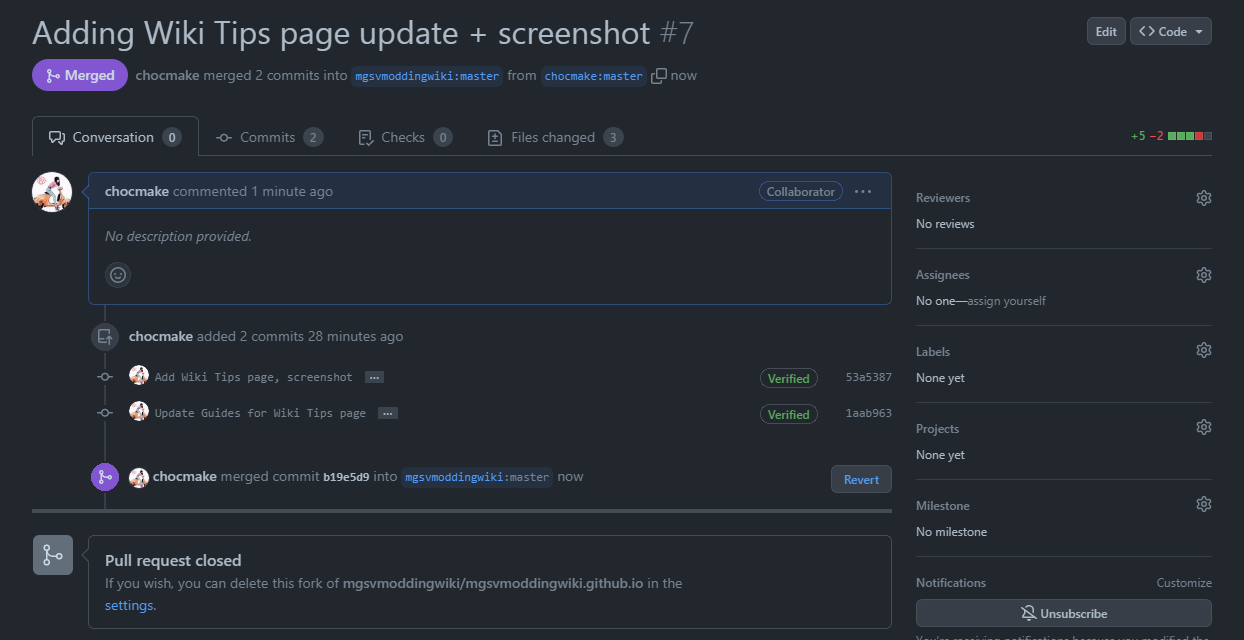
- If the pull request is approved it will become marked as ‘Merged’ and the pull request will be closed.
That’s it. Hopefully this guide provides a decent understanding of the process.