Using Prose.io
Contents
Contents:For various users the Prose.io toolbar buttons at the top of every page will likely be the easiest method for creating new text-only pages, or simple edits to existing pages.

You’ll need a Github account and to authorize Prose once for it but after that Prose.io handles submitting changes for you.
If you’re a user with Collaborator status and you can alternatively click the non-colored Add New Page or Edit Page buttons to directly make changes to the wiki, via the Github.com website (see this guide for more).
Tip: want to just edit an existing page? Click here to jump to the steps.
Note: a downside to this method is new images can’t be added and you’re limited to changing one file at a time. If you need that check out the Using Github Desktop or Using Github.com guide.
Authorizing Prose.io for your account
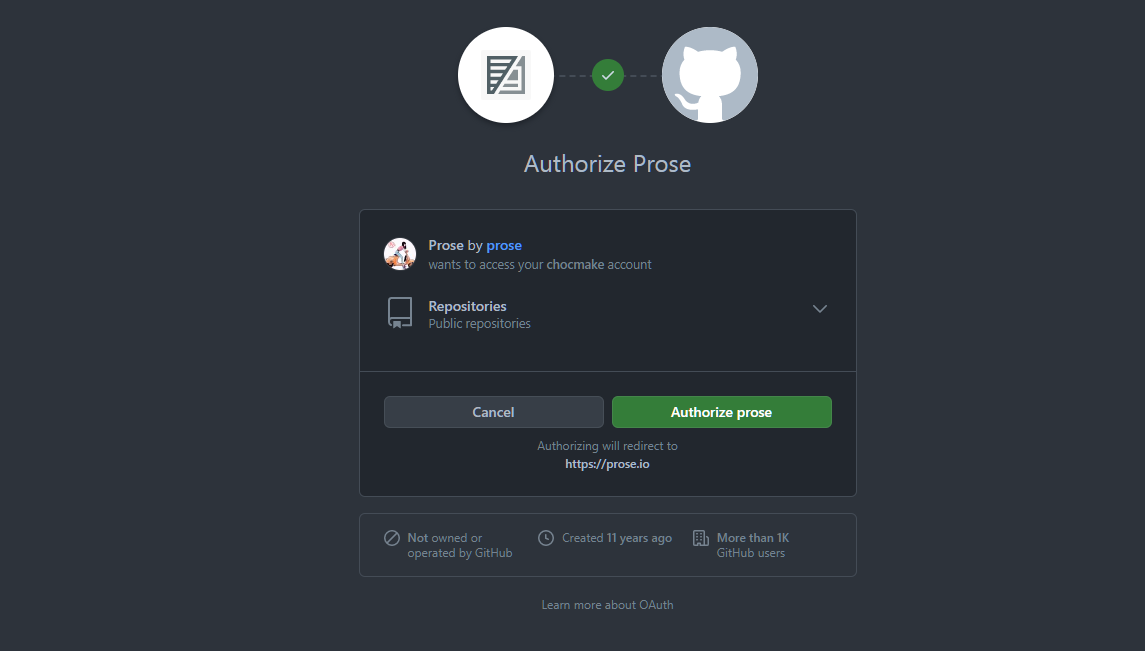
The first thing we’ll need to do is authorize Prose.io to handle making changes on your behalf by clicking the green Authorize on Github button in the bottom-right of the Prose.io window.
Tip: if you’re not comfortable authorizing Prose.io for this you can alternatively follow the Using Github.com guide.

Tip: you can always revoke authorization to Prose.io later if you’d like by visiting this Github setting page.
Creating a new page
Once you’ve authorized Prose.io like the above steps then click the colored Prose.io - Add New Page button in the toolbar at the top of the wiki. This will open open a new, generic template for creating a wiki page:
The next thing we’ll want to do is give the page a filename. As highlighted in the screenshot below click the default filename text box and edit it.
For the purpose of this guide I’ll be adding a new ‘Meta: Wiki Tips’ page, so I’ll name it similarly to the title and include wiki/ before it:
wiki/Meta-Wiki_Tips.md
For more info about filenaming see this page’s advice.
For clarity: this guide was written when the Wiki Tips page was named as such so ignore such differences in naming to the current site.
Adding the metadata
Next step is adding the metadata section of a page. Delete the default template text and replace it with a metadata section.

This takes the following form and should be the first thing at the top of any page:
---
title: 'Meta: Wiki Tips'
permalink: /Meta-Wiki_Tips/
tags: [Guides]
---
For more info about how metadata should be added and what each part means see this page’s section.
Adding the page text
Now we can finally add some text for the actual page, below the metadata section.
Tip: to understand how text/content will appear on the wiki refer to the Formatting Reference guide, which displays all the possible styling for text, lists, images, video, tables, etc.
Tip: also check out the source of existing wiki pages for inspiration by clicking the circular Page Source button in the toolbar at the top of every wiki page.
Submitting the changes
Once happy with it you can click the save icon as seen highlighted in the screenshot above, to begin the process of submitting the changes to the wiki.
Note: there’s also a Preview button there but it doesn’t accurately reflect how the page will look since the wiki uses a special kind of Markdown and also various custom styling.
After this it will ask for a message summarizing the additions/changes. This can be left blank (which will use a default message), or you can be more descriptive of the changes as I’ve done in the screenshot.
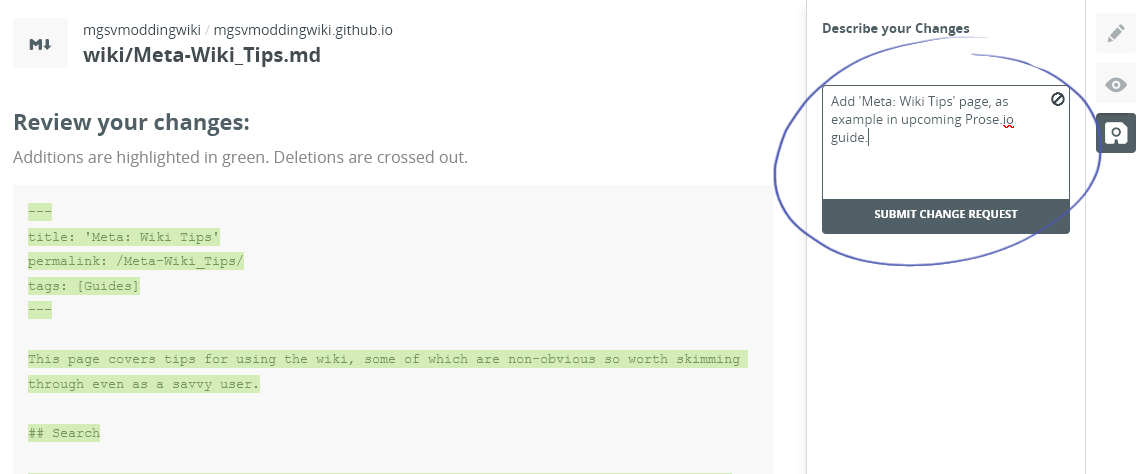
Once done click the Submit Change Request button below the text box.
Note: if you get an error saying
Error while loading data from Github. This might be a temporary issue. Please try again later.this means you haven’t authenticated Prose.io with Github yet. To do so click the green Authorize on Github button in the bottom-right of the Prose.io window, as explained in the this section above.
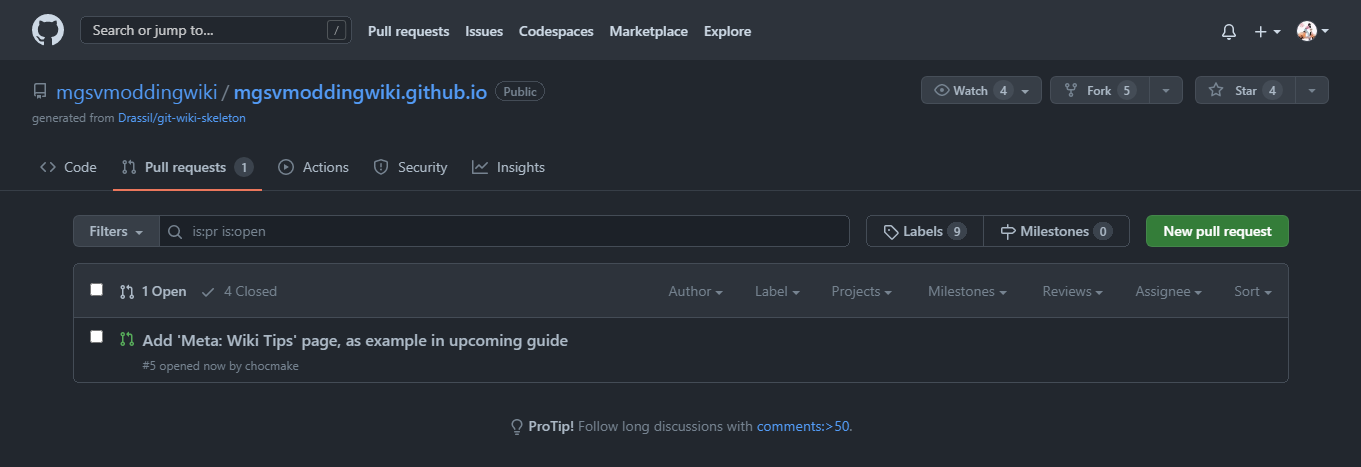
Reviewing the pending change
After this the change will become pending until an wiki contributor reviews and (hopefully) approves it. You can view the page containing pending wiki changes here.
Editing an existing page
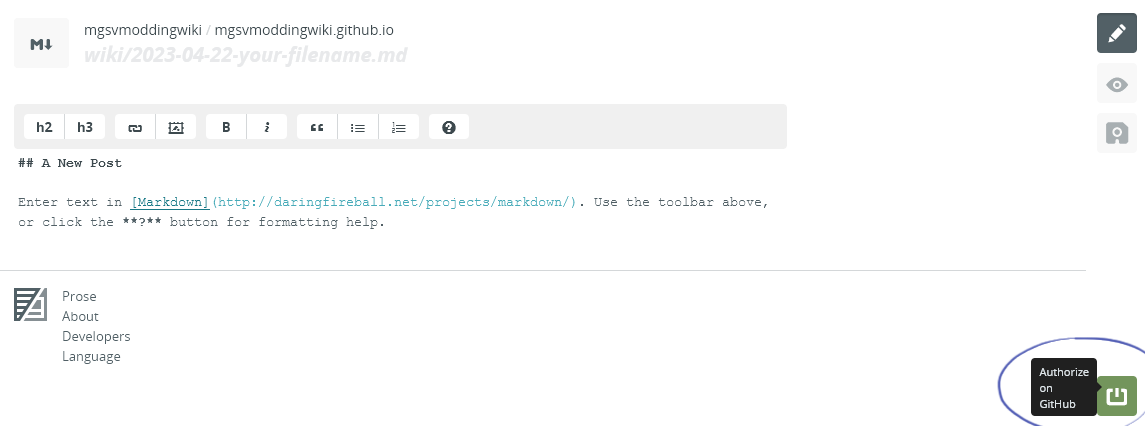
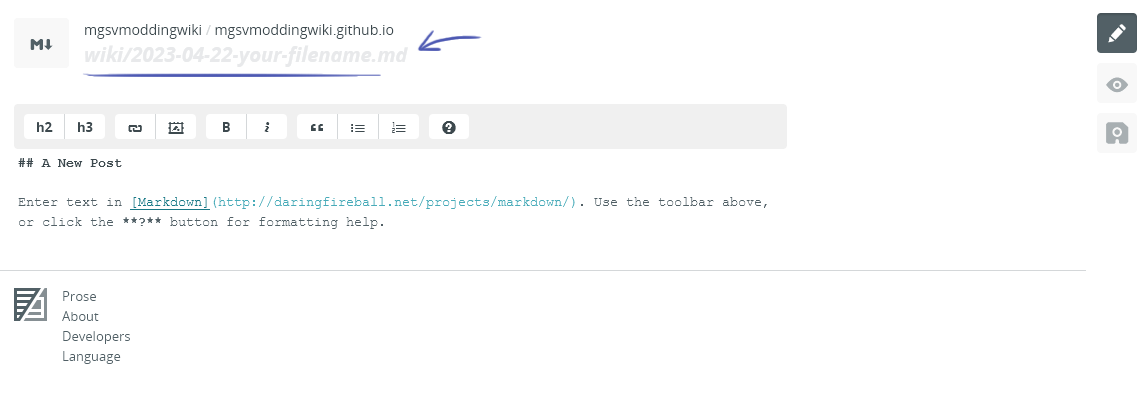
To edit an existing page first click the colored Prose.io - Edit page button in the top toolbar of the wiki. You’ll then see the Prose.io text editor.
Note: This section assumes you’ve already authorized Prose.io for your Github account. If you haven’t yet follow these steps first.
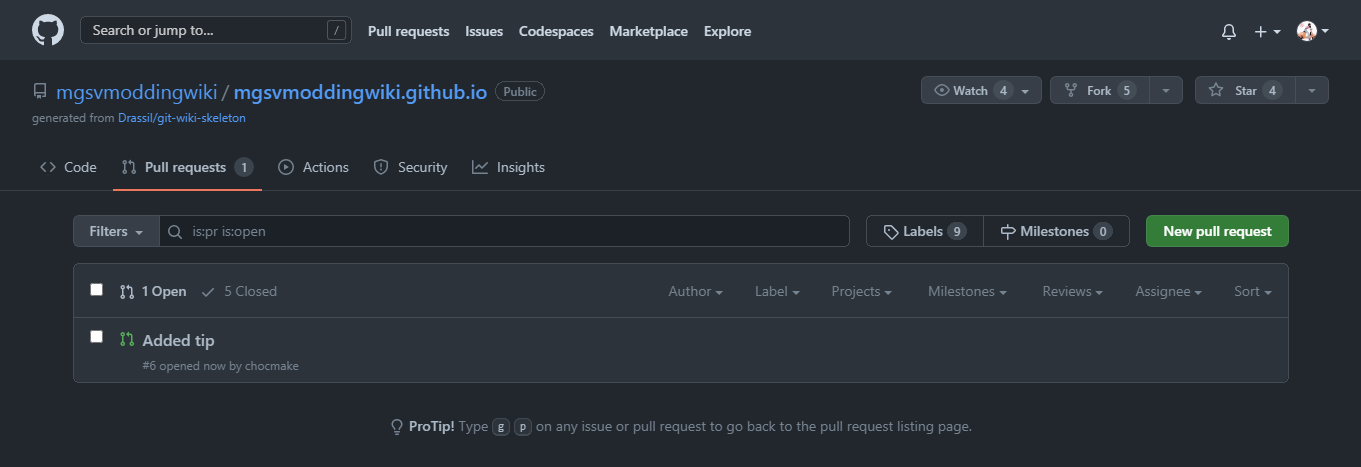
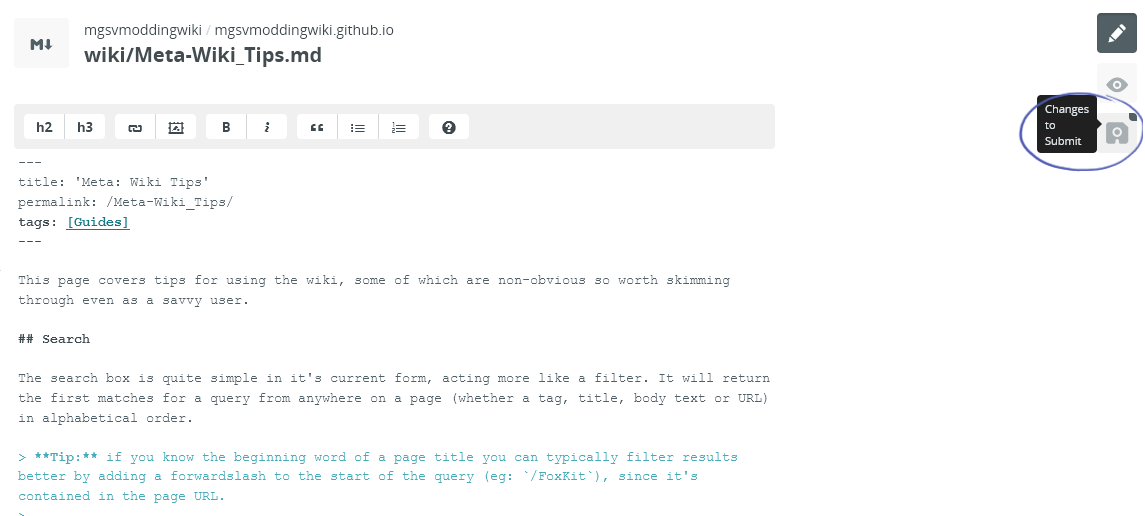
Here I’ll add a tip in the text that I think would be helpful.

Submitting the changes
Once happy with the changes click the Changes to Submit save icon button on the right side toolbar and either leave the commit message as the default or add some text describing the changes.
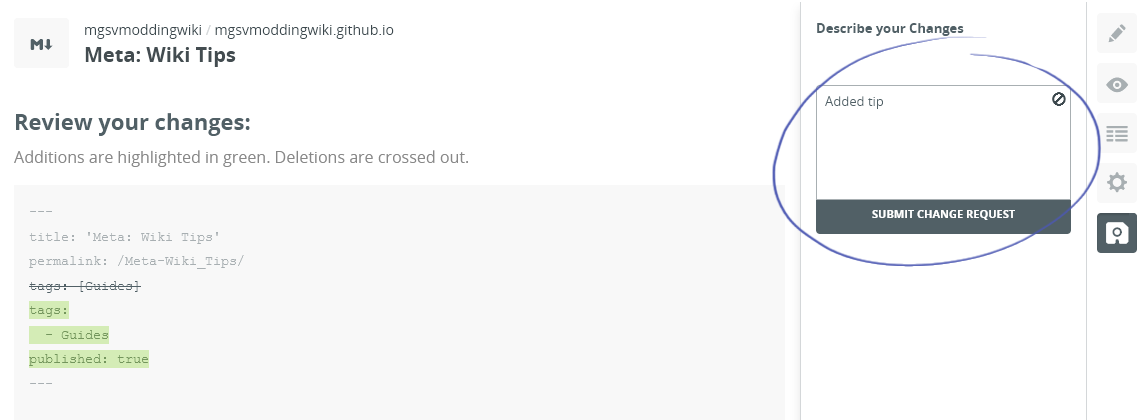
Then click the Submit Change Request button to complete.
Reviewing the pending change
After this the change will become pending until an wiki contributor reviews and (hopefully) approves it. You can view the page containing pending wiki changes here.