Retexturing the Bionic Arm (PFTXS Only)
Contents
Contents:
Tip: there are multiple versions of this guide, covering different approaches. See the side bar for others.
In this guide we’ll be retexturing Snake’s bionic arm in Metal Gear Solid V: The Phantom Pain from its original red/black to all dark, to suit various black outfit retextures (such as this).
There are a few different ways to retexture game files in MGSV and this guide covers an approach that replaces the texture files from the game’s PFTXS texture archive. Similar steps can also be used for modding other textures.
Pros and cons of this approach
Benefits:
- Only have to mod a single game archive.
- Models that have the texture file metata and smallest mipmap included in an associated PFTXS will render faster when the model is loaded. See this page for more.
Downsides:
- Currently the way PFTXS archives are typically repacked as a final step they’ll also contain unmodded texture files. This can lead to conflicts if more than one mod is installed that mods texture files from the same PFTXS.
- Whereas other approaches like FMDL model editing (see sidebar for sibling guides) will only pack the files directly modded, which reduces the likelihood of such conflicts.
While it’s possible to alternatively package only the modded texture files in a modded vanilla PFTXS what happens if doing so is all other vanilla textures that ordinarily are included are prevented from rendering as quickly.
- Whereas other approaches like FMDL model editing (see sidebar for sibling guides) will only pack the files directly modded, which reduces the likelihood of such conflicts.
- Can sometimes be larger filesize because of the above reason. For this texture swap specifically the FMDL guide versions are 60% smaller filesize than the PFTXS guide version.
- There can be multiple PFTXS archives that need modded if wanting to cover every instance they are used in-game.
- In this guide alone there are 3 PFTXS files that reference the same texture files, however for simplicity only the main relevant PFTXS will be modded.
Let’s get started!
Things needed
- AutoPfxsTool
- For simpler PFTXS packing.
- File Monolith
- For unpacking the game files. Note: latest version requires .NET v8 Desktop Runtime installed; while the last version without this dependency is version 0.4.
- FtexTool
- Game texture converter.
- SnakeBite Mod Manager
- For packaging and installing the mod. Note: the download requires a Nexus Mods account.
- An image editor and plugin or tool to import/export DDS textures
- See this page for suggestions.
Tip: for those unfamiliar with downloading programs from Github just download the topmost file in the linked pages, with the package/cube icon.
Initial tools setup
Show steps
-
Unzip/install the other required tools each to their own directory. Most of the the tools are portable so can be placed anywhere on the drive. SnakeBite is the only tool that comes with an installer.
In my case I’ve chosen to place them all inC:\Modding\MGSV\Tools. -
Next up, note where the game is installed and if you haven’t already, set up SnakeBite mod manager.
Viewing file extensions in Windows
It’s also recommended to show all file extensions in Windows, so different filetypes can be distinguished easily.
Unpacking the game files
To get to the necessary files we first have to unpack the game’s data files.
Check out the steps here then return back.
Finding the texture files
With the files unpacked we can now identify which we’ll need for modding the bionic arm.
Brief explainer about how the game uses PFTXS archives
The parent section explains this but to recap: the game uses PFTXS archives to store texture metadata files (.ftex) and the lowest resolution versions of textures (.1.ftexs files).
This is so when the model first loads on screen only the fastest textures are loaded immediately (the lowest resolution mipmaps) to avoid texture flickering/delays. Then the game will search outside the PFTXS for ‘loose’ (standalone) textures (the higher resolution variants, like .2.ftex and .3.ftexs).
There can sometimes be multiple PFTXS archives the game uses to store copies of these metadata/low-res texture files. With Snake’s bionic arm there are actually 3 PFTXS files, however we’ll only be modding the main one for simplicity.
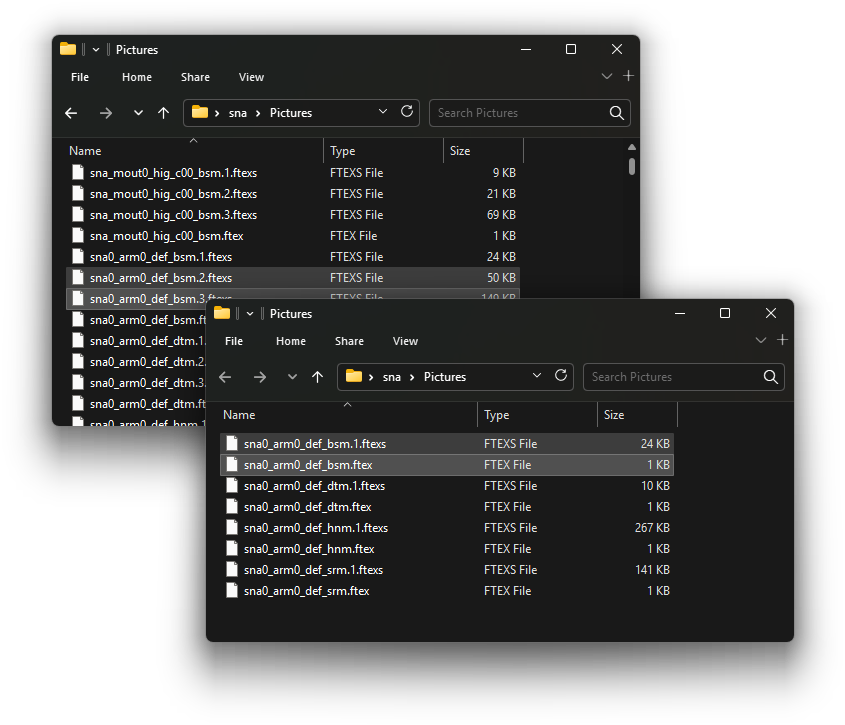
Original file locations
These are the locations of the original texture files we’ll be dealing with, within the unpacked game directory:
Assets\tpp\pack\player\fova\plfova_sna0_arm0_v00_pftxs\Assets\tpp\chara\sna\Pictures\sna0_arm0_def_bsm.ftex
Assets\tpp\pack\player\fova\plfova_sna0_arm0_v00_pftxs\Assets\tpp\chara\sna\Pictures\sna0_arm0_def_bsm.1.ftexs
Assets\tpp\chara\sna\Pictures\sna0_arm0_def_bsm.2.ftexs
Assets\tpp\chara\sna\Pictures\sna0_arm0_def_bsm.3.ftexs
As you can see the first two listed are within a PFTXS that Archive Unpacker auto unpacked earlier (when unpacked a
.pftxsfile becomes a_pftxsdirectory). While the last two are the higher resolution mipmaps.
In addition to those specific texture files that we’ll be making copies of to mod we also will need the entire plfova_sna0_arm0_v00_pftxs parent directory listed above for packing our modded PFTXS later, just to keep in mind.
Setting up the mod directories
Our final mod will have two directory structures within the same parent directory:
Assets\tpp\pack\player\fovaAssets\tpp\chara\sna\Pictures
The first path is where we’ll be placing our final packed .pftxs archive, while the second path is where the loose .2.ftex and .3.ftex texture files will go.
So let’s create them and also copy in the relevant directory/files. Follow either the text steps or the video below.
Show steps
Creating the directories
-
Make some new directory on your computer where you’d like your mod project to be. Eg:
C:\Users\Username\Bionic arm mod - Within it create a new sub-directory named
Modded. - Open
Moddedand select File Explorer’s path addressbar (the textbox to the left of the searchbox). - Type
cmdand press Enter. This will open a command line at the current location. -
Copy the following command then paste it in the CMD window by right-clicking in the window once:
mkdir "Assets\tpp\pack\player\fova" - Then press Enter. This creates all the sub-directories in one action.
-
Next do the same but for the following command:
mkdir "Assets\tpp\chara\sna\Pictures"
Done! Now we have both required directory paths in the Modded directory.
Copying the directory/files to them
Lastly copy in the following:
- Copy the entire
Assets\tpp\pack\player\fova\plfova_sna0_arm0_v00_pftxsdirectory from the original unpacked game files to theModded\Assets\tpp\pack\player\fovadirectory we just created.- By entire I mean the copy the
plfova_sna0_arm0_v00_pftxsdirectory itself to our newfovadirectory withinModded. - It should then look like
Modded\Assets\tpp\pack\player\fova\plfova_sna0_arm0_v00_pftxs
- By entire I mean the copy the
- Then copy the
sna0_arm0_def_bsm.2.ftexsandsna0_arm0_def_bsm.3.ftexsfrom the original game files (as listed in the paths from the prior section) toModded\Assets\tpp\chara\sna\Pictures.
Video
Important things to know about paths
-
Wherever you decide to have your
Moddeddirectory just remember to not place them too deeply in the drive, since Windows File Explorer still has a ~260 character path limit and we want to avoid exceeding that length to avoid issues.- Eg:
C:\Users\Username\Bionic arm mod\Moddedwould be a decent path length.
- Eg:
-
MGSV is case-sensitive with its directories and filenames. So
assetsis different fromAssets.
Editing the texture file
Obviously the key part of any retexture mod.
Before following the linked steps below first create a temporary directory somewhere and copy the following files from the original unpacked game files to it:
Assets\tpp\chara\sna\Pictures\sna0_arm0_def_bsm.1.ftexs
Assets\tpp\chara\sna\Pictures\sna0_arm0_def_bsm.2.ftexs
Assets\tpp\chara\sna\Pictures\sna0_arm0_def_bsm.3.ftexs
Assets\tpp\chara\sna\Pictures\sna0_arm0_def_bsm.ftex
Video
Then check out the steps here and return back.
Preparing the final files
Now that we have our modded texture file converted back to .ftex and .ftexs files we can place them in the Modded directories we created earlier.
Follow the text steps or check out the video.
Show steps
-
For the
sna0_arm0_def_bsm.ftexandsna0_arm0_def_bsm.1.ftexsfiles copy them to the following path and overwrite the versions of the files that exist there currently:Modded\Assets\tpp\pack\player\fova\plfova_sna0_arm0_v00_pftxs\Assets\tpp\chara\sna\Pictures -
While for the
sna0_arm0_def_bsm.2.ftexsandsna0_arm0_def_bsm.3.ftexsfiles copy them to the following path:Modded\Assets\tpp\chara\sna\PicturesThese are the higher resolution versions of our texture.
- Next go to the
Modded\Assets\tpp\pack\player\fovadirectory and drag the entire directory ontoAutoPftxsTool.exe.This will generate the final PFTXS packaged archive that we need. You’ll see a
.pftxsfile created beside the directory. - Finally, delete the unpacked
plfova_sna0_arm0_v00_pftxs, leaving just theplfova_sna0_arm0_v00.pftxsfile we generated using AutoPftxsTool.
Video
We’re finally ready to package everything for an installable mod!
Packaging and installing the mod
The mod is almost complete. We just need to package it into a SnakeBite archive so it can be easily installed and shared.
Check out the steps here then return back.
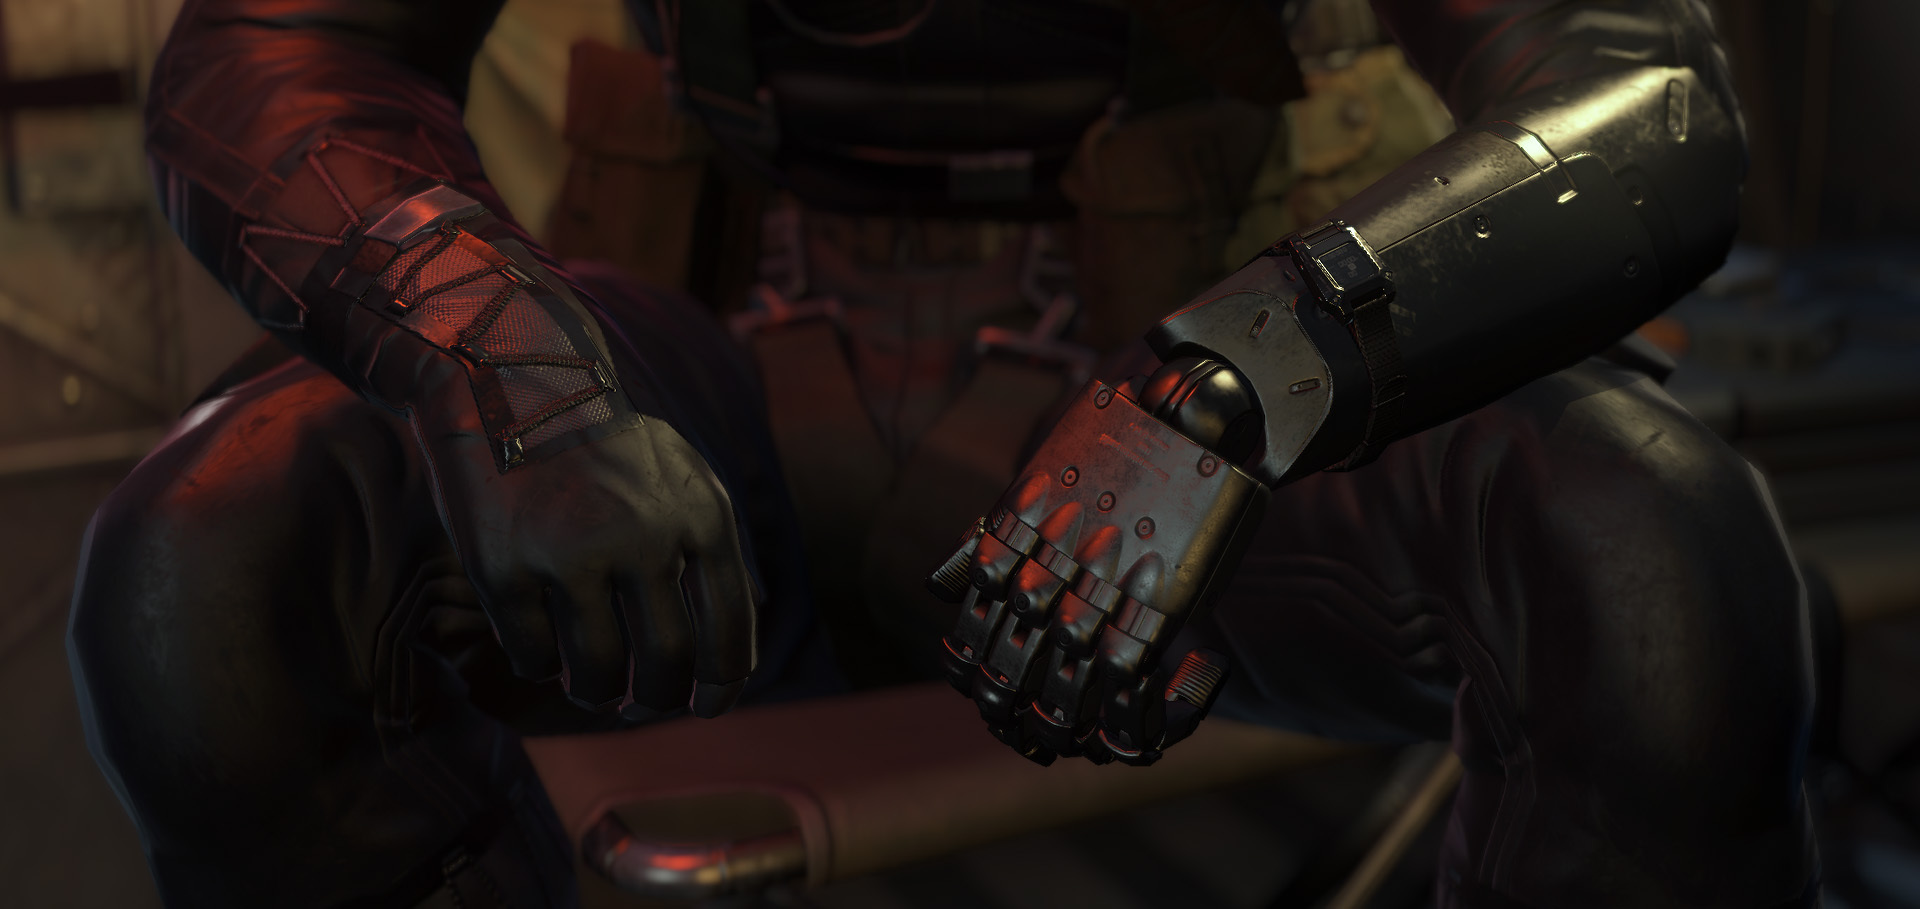
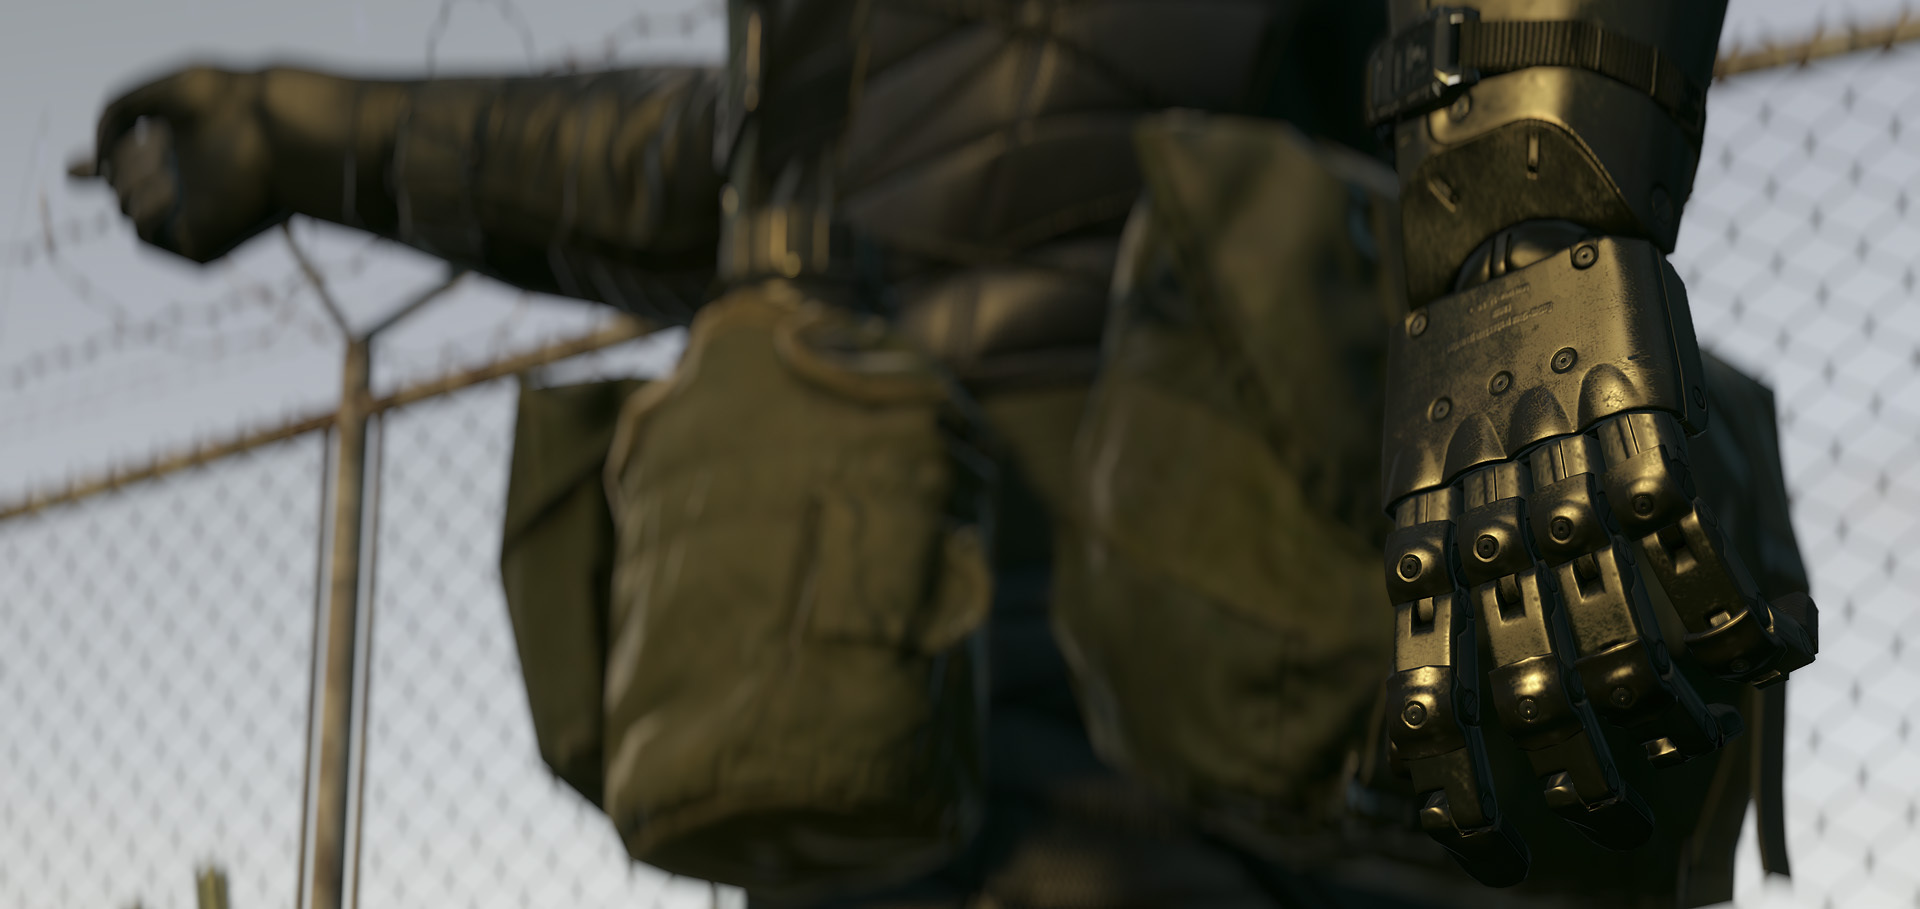
In-game screenshots
Creating new texture variations
If in the future you’d like to create some new retexture mod based on the same base texture then you can:
- First unpack the
plfova_sna0_arm0_v00.pftxsyou modded by dragging it ontoAutoPftxsTool.exe. This will create an unpacked directory beside it.- Then delete the
plfova_sna0_arm0_v00.pftxs.
- Then delete the
-
Generate a new DDS retexture file then convert it to FTEX using FtexTool.
-
Follow the steps from the above section for copying and overwriting the various
sna0_arm0_def_bsmFTEXS/FTEXS files you’ve newly modded. - Package back up using MakeBite again.
Download this mod
Below is the SnakeBite packaged mod using the steps from this version of the guide. For reference.